Portfolio
Disclaimer: If you are not interested in technical breakdowns, check out my demo reels on the home page!
Mortimer: First Launch
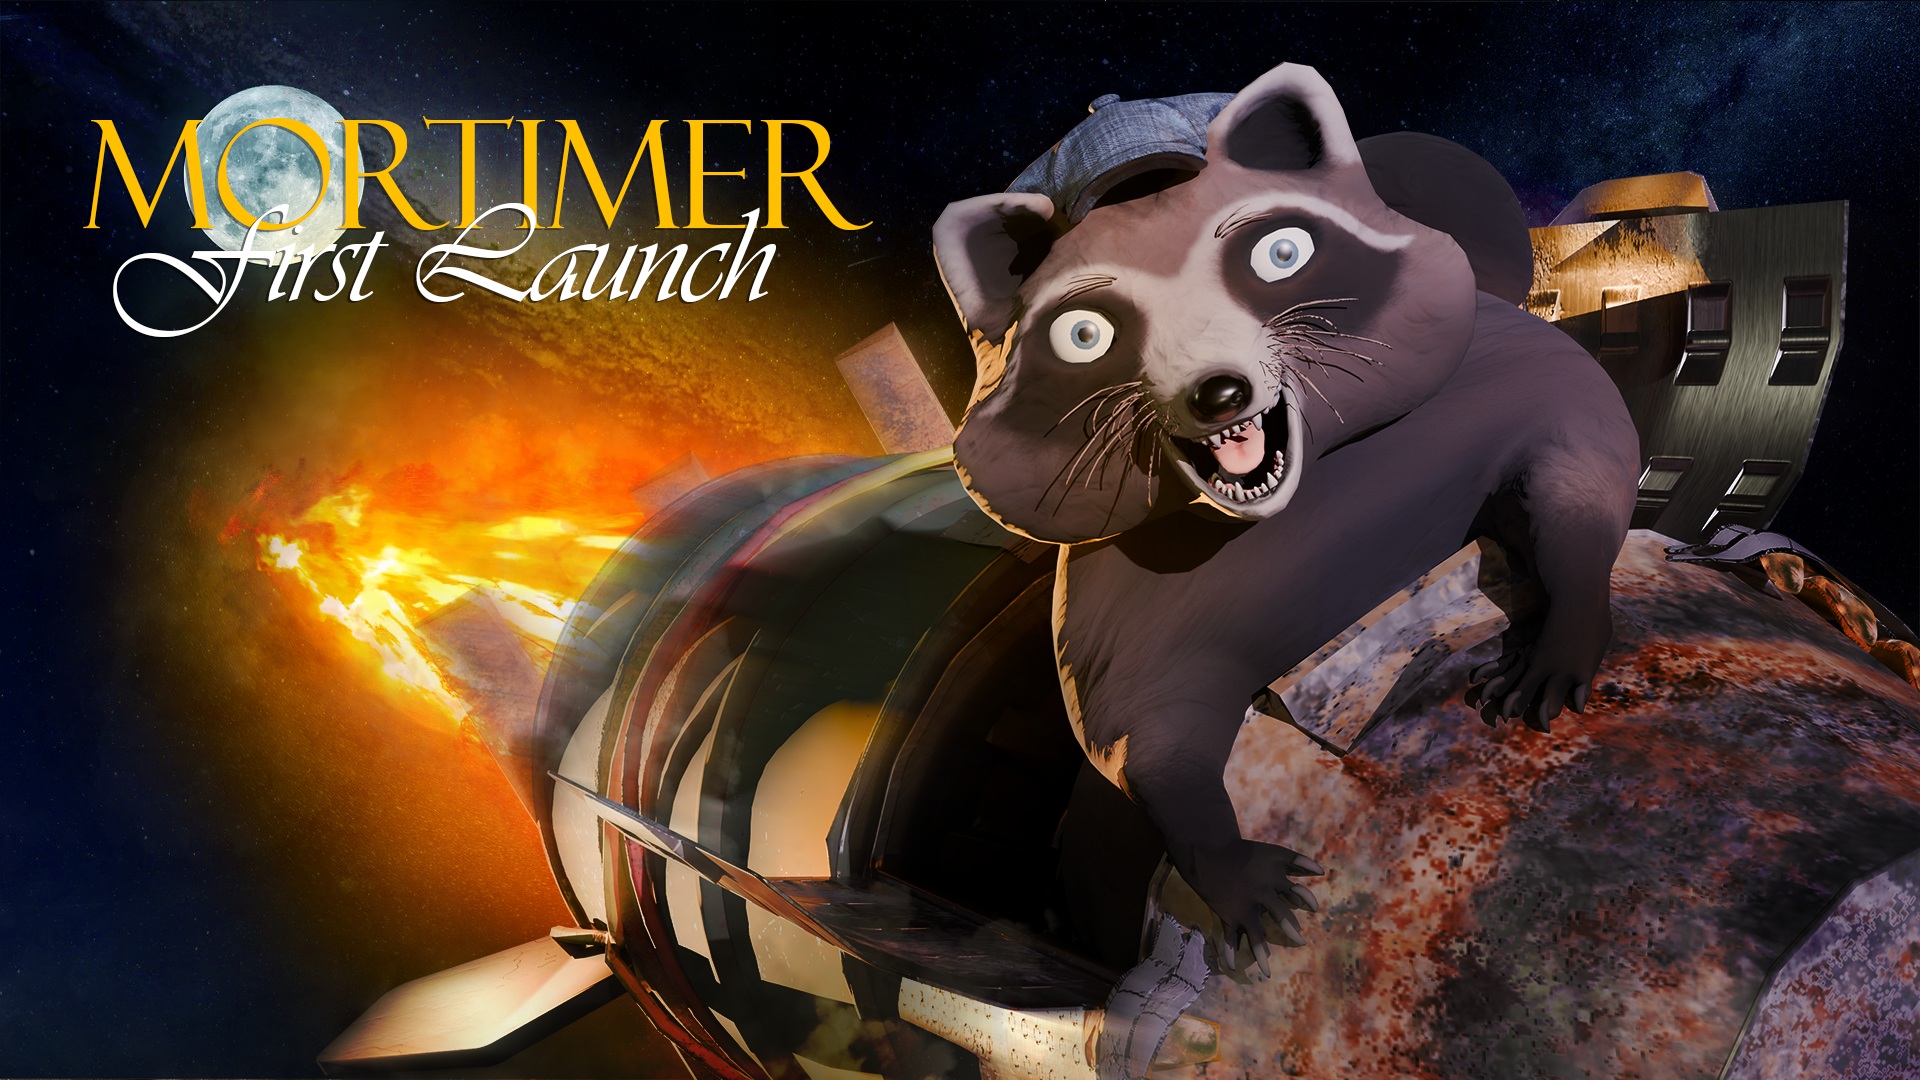
Mortimer: First Launch is a 3D adventure puzzle/stealth game created using the Unity Engine (v2022.3.43f1 LTS). In the game, users take control of the titular character, Mortimer, and guide him on his journey to build a rocket and reach the moon so that he can eat the cheese he believes it is made of. Users must navigate the environment, avoid humans, utilize stealth and solve puzzles to achieve the goals of collecting rocket parts and blasting off to the stars. The game takes place in a fictionalized version of Hatbill Park in Florida, near the Kennedy Space Center, and is presented in a third-person, over the shoulder camera perspective which makes use of toon shading for the visuals.
It was made by a team of five student developers, including myself, over the course of three months as a part of the Ticorporate Demo Lab course at Jyvaskyla University of Applied Sciences. The idea behind Ticorporate Demo Lab is that we would first come up with ideas, then pitch them in pairs with the six best projects being selected by peer voting. Once the projects had been selected, it was then up to the winning pairs to form groups of five to seven developers around which they would create a mock company for the development of the game. There were two layers to the process, the first and most obvious being the development aspect where the team would focus on the product, what it is, what it needed to be, and how they would achieve their goals. The other aspect was organizing the development team into an AGILE structure, with a Product Owner (PO), Scrum Master (SM), and Producer handling the administrative tasks as well as the scrum and sprint cycles. Additional admin roles were Business, Marketing, and Publishing.
Administration
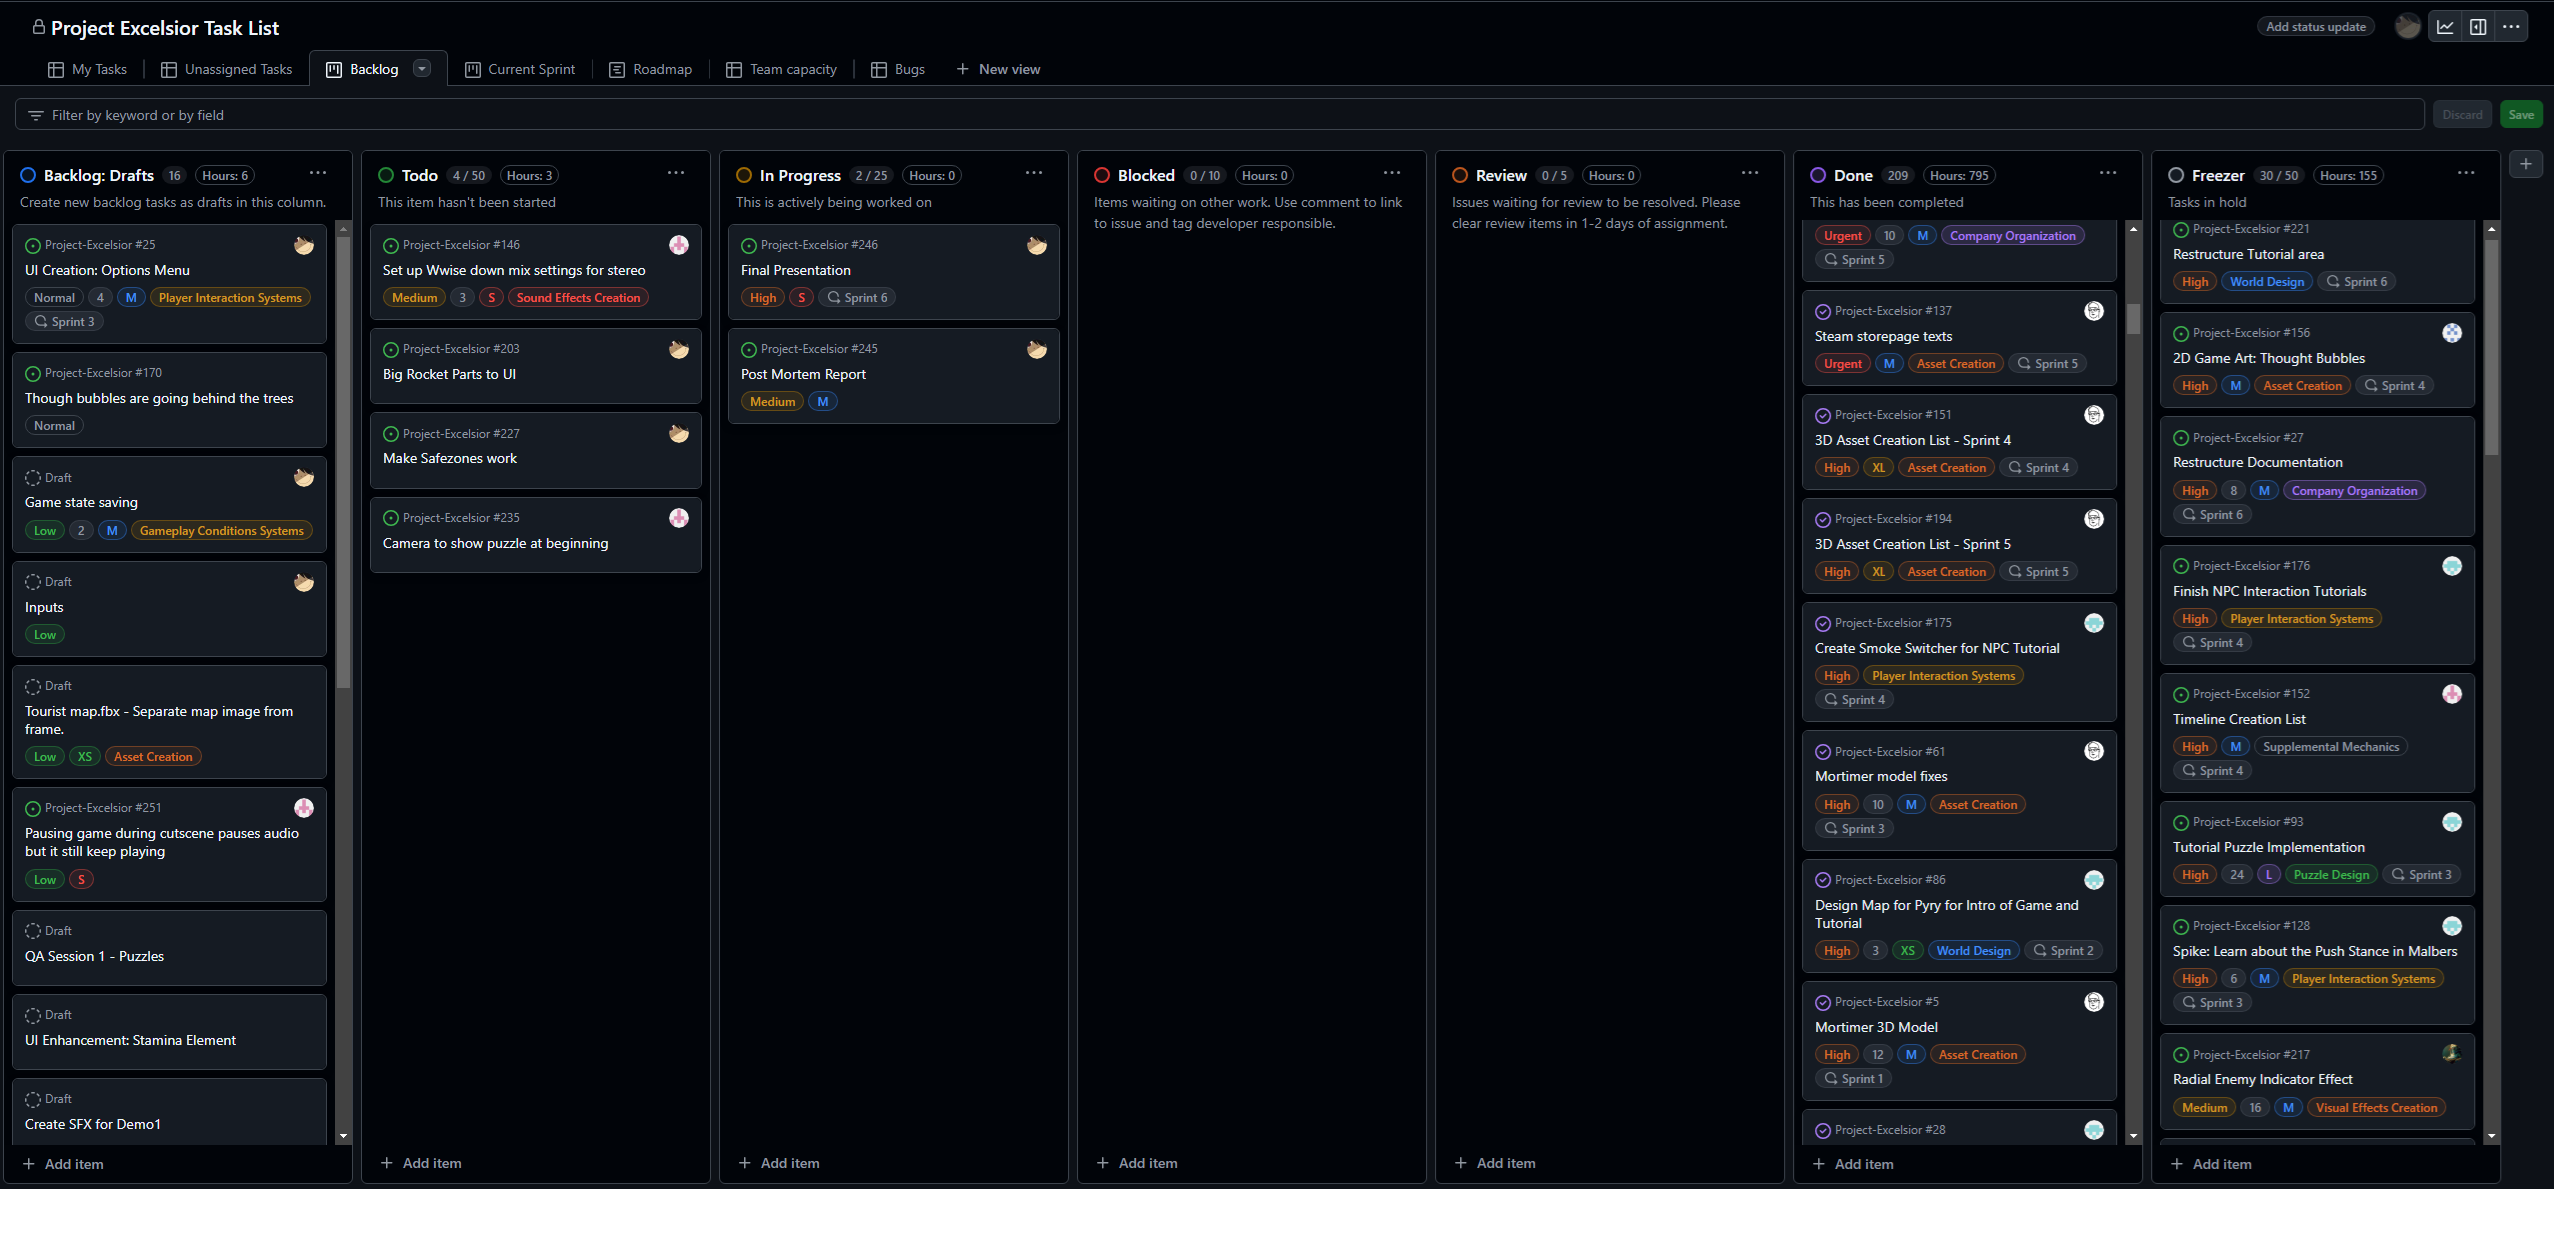
For the duration of this project, I served as Product Owner of our team as we attempted to employ AGILE processes, overseeing the project from concept to completion. I was responsible for the creation of the project's vision, the development of the project's roadmap, and the prioritization of the project's backlog. The project backlog was created and maintained using our own private company Github Organization, where we made extensive use of the Github Projects board to track the progress of the project. As mentioned before, the project was developed using AGILE methodologies, with our team's 'sprints lasting two weeks each and bookended by sprint planning and sprint review.
I created the Github Organization and set up the project board, and was responsible for maintaining the project's vision and roadmap throughout the development process. Individual developers on the team were responsible for creating and maintaining their own tasks on the project board from the backlog items, and I was responsible for ensuring that the project board was up-to-date and that the project was on track to meet its goals.
Development
During production of Mortimer: First Launch, I developed four custom shaders using Unity's Shader Graph to meet with the needs of our game. These custom shader graphs included an outline shader, a fresnel glow shader for highlighting objects, a custom shader using flipbook logic to allow for human NPCs with different clothing, and an object shine shader for highlighting interactable objects. These shader graphs were created to be lightweight and optimized for performance.
The water shader selected for use in the game is a modified version of Staggart Creations' Stylized Water 2 shader asset. This asset is highly customizable, comes with a host of built-in features and also supports third party integrations with several other popular ready made assets. (See documentation here)Using this asset as a base, I set up a material that would mimick swampy water and then worked through several iterations of art style, visuals and overall design for the look of the water. This process was aided by gathering feedback from my team members as well as getting impressions from individuals outside of the project. The water in our project was further enhanced by adding on functionality for enhanced dynamic effects - underwater rendering, normal displacement for simulating waves and ripples, and splash functionality which would respond to the character or objects dropped into the water, passing the information into the GPU buffer to be read by the shader for further normal displacement and realism.
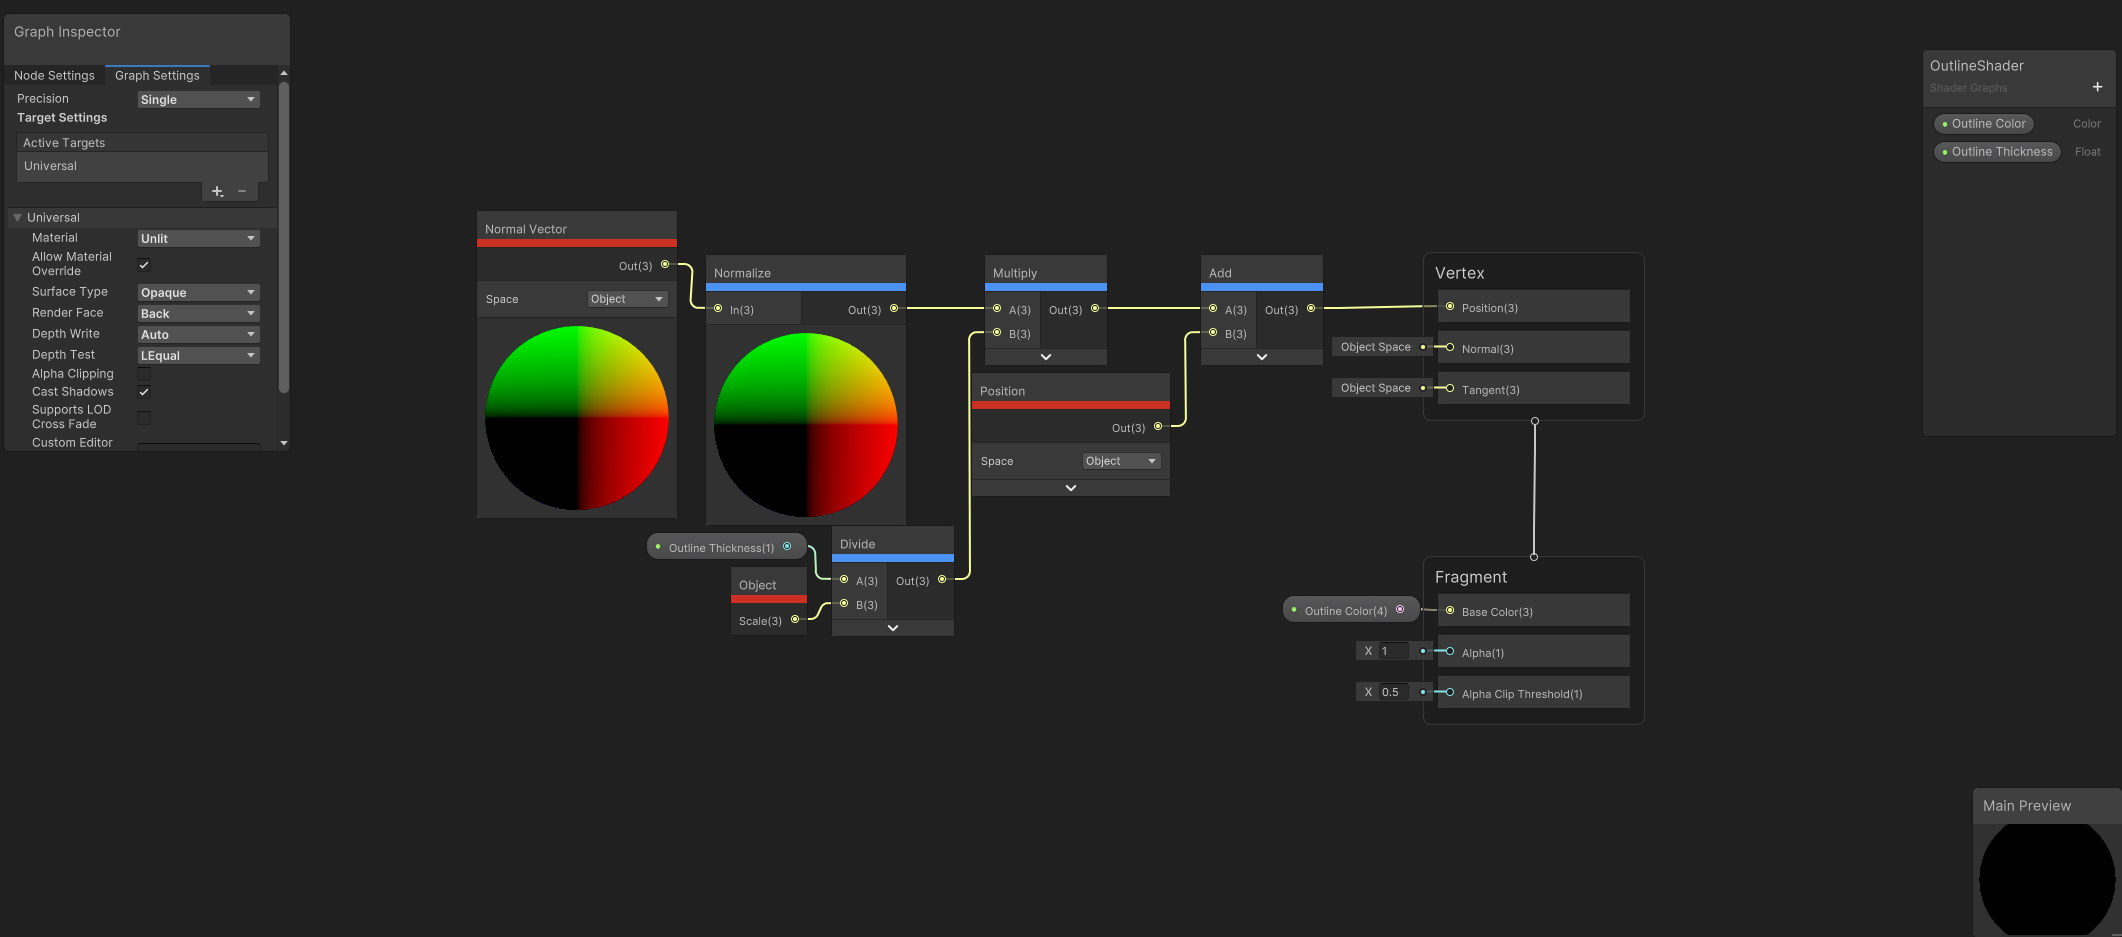
I created a simple, lightweight outline shader using Shader Graph. There was a desire for the powerlines which extend between utility poles at one of the campgrounds to have the same outlined look that trees and other objects do, but as the powerlines have movement built into them with a shader I needed to create an additional material layer to add on top of it, this shader is the result of that work. It works by using the Normal Vector in object space, normalizing it, and scaling it by a controllable Outline Thickness value. This scaled vector is added to the object's position to create the outline offset. The outline is rendered in the Fragment stage, with a customizable Outline Color and thickness using back-face culling to ensure the outline is visible around the object.
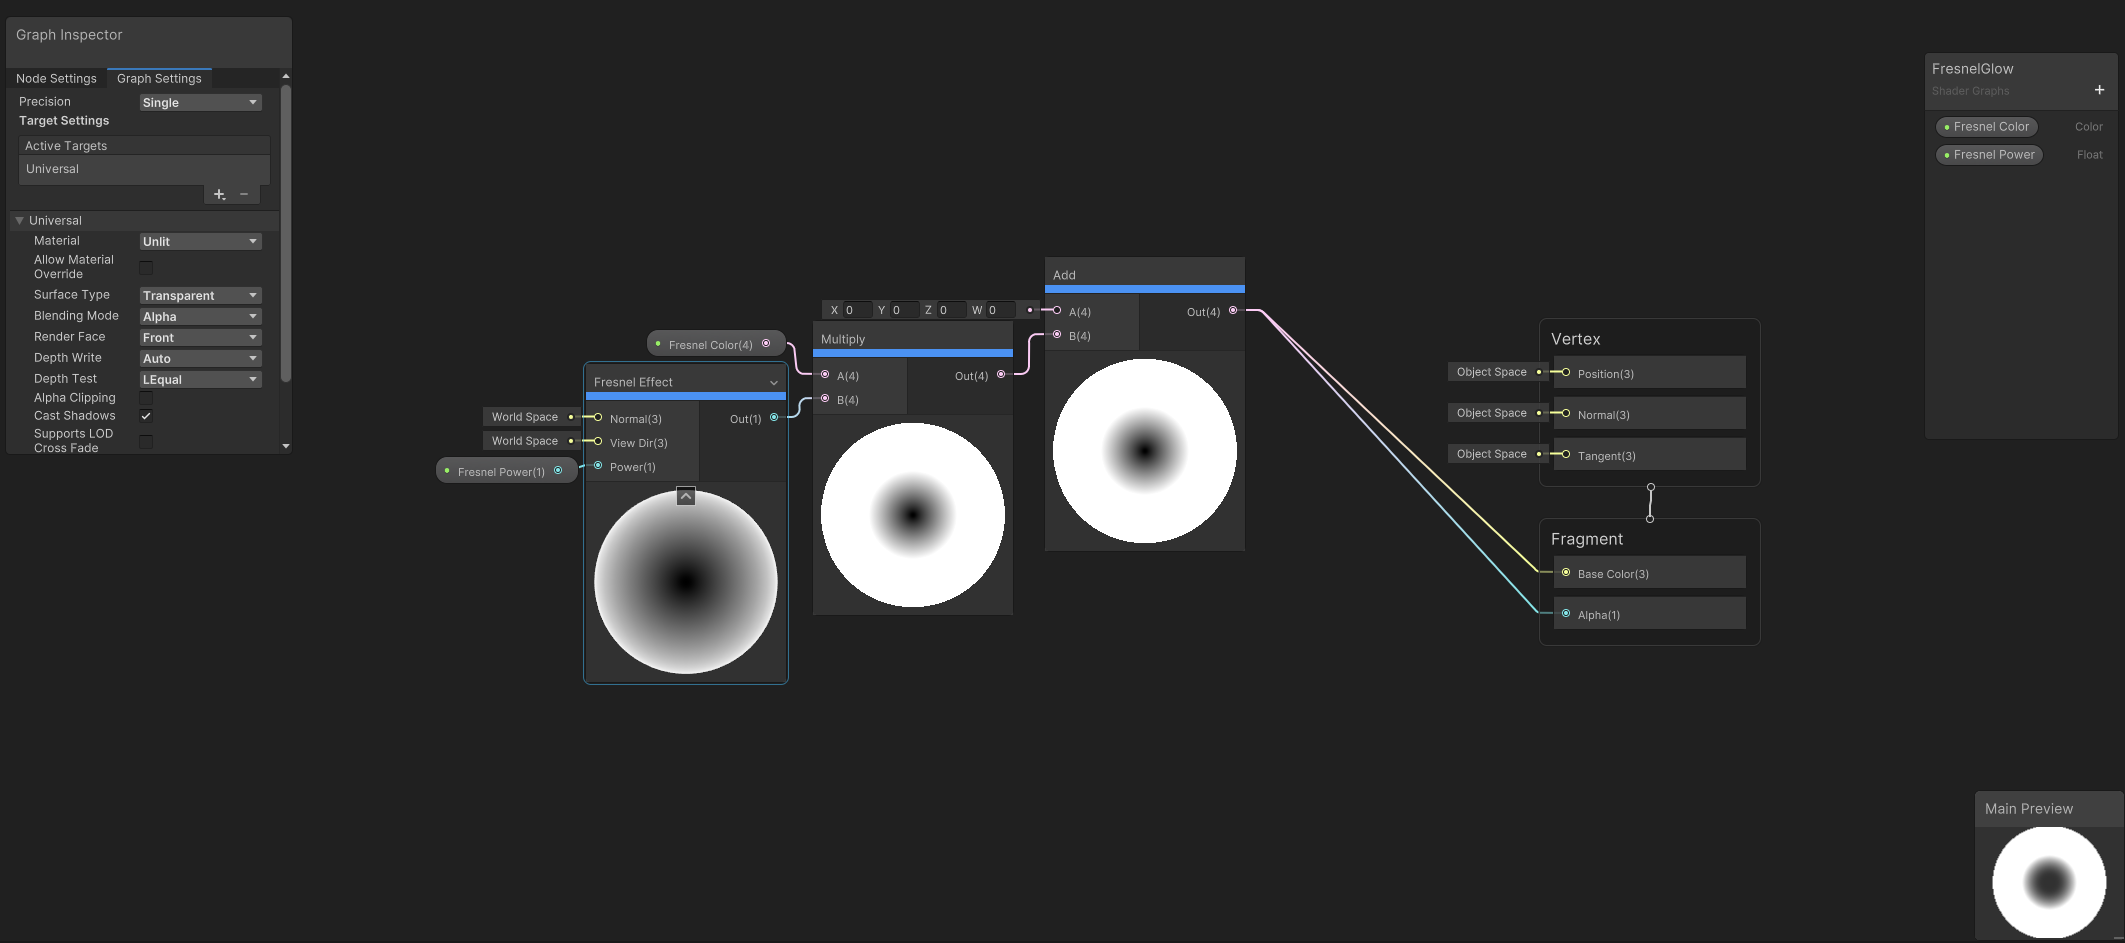
A simple fresnel effect shader I made on request to solve an issue with key items in the world not being noticeable enough. We ended up going with a different solution for that particular problem, outlined below in the Object Shine shader, but the shader was kept in the project for potential future use. The shader works by calculating the dot product of the Normal Vector and the View Direction, raising it to a Power value to control the sharpness of the effect. This result is multiplied by a selectable Fresnel Color which is added to the base color in the fragment stage. The shader outputs a glow-like appearance around the edges of the object, with control over intensity and color through the exposed properties.
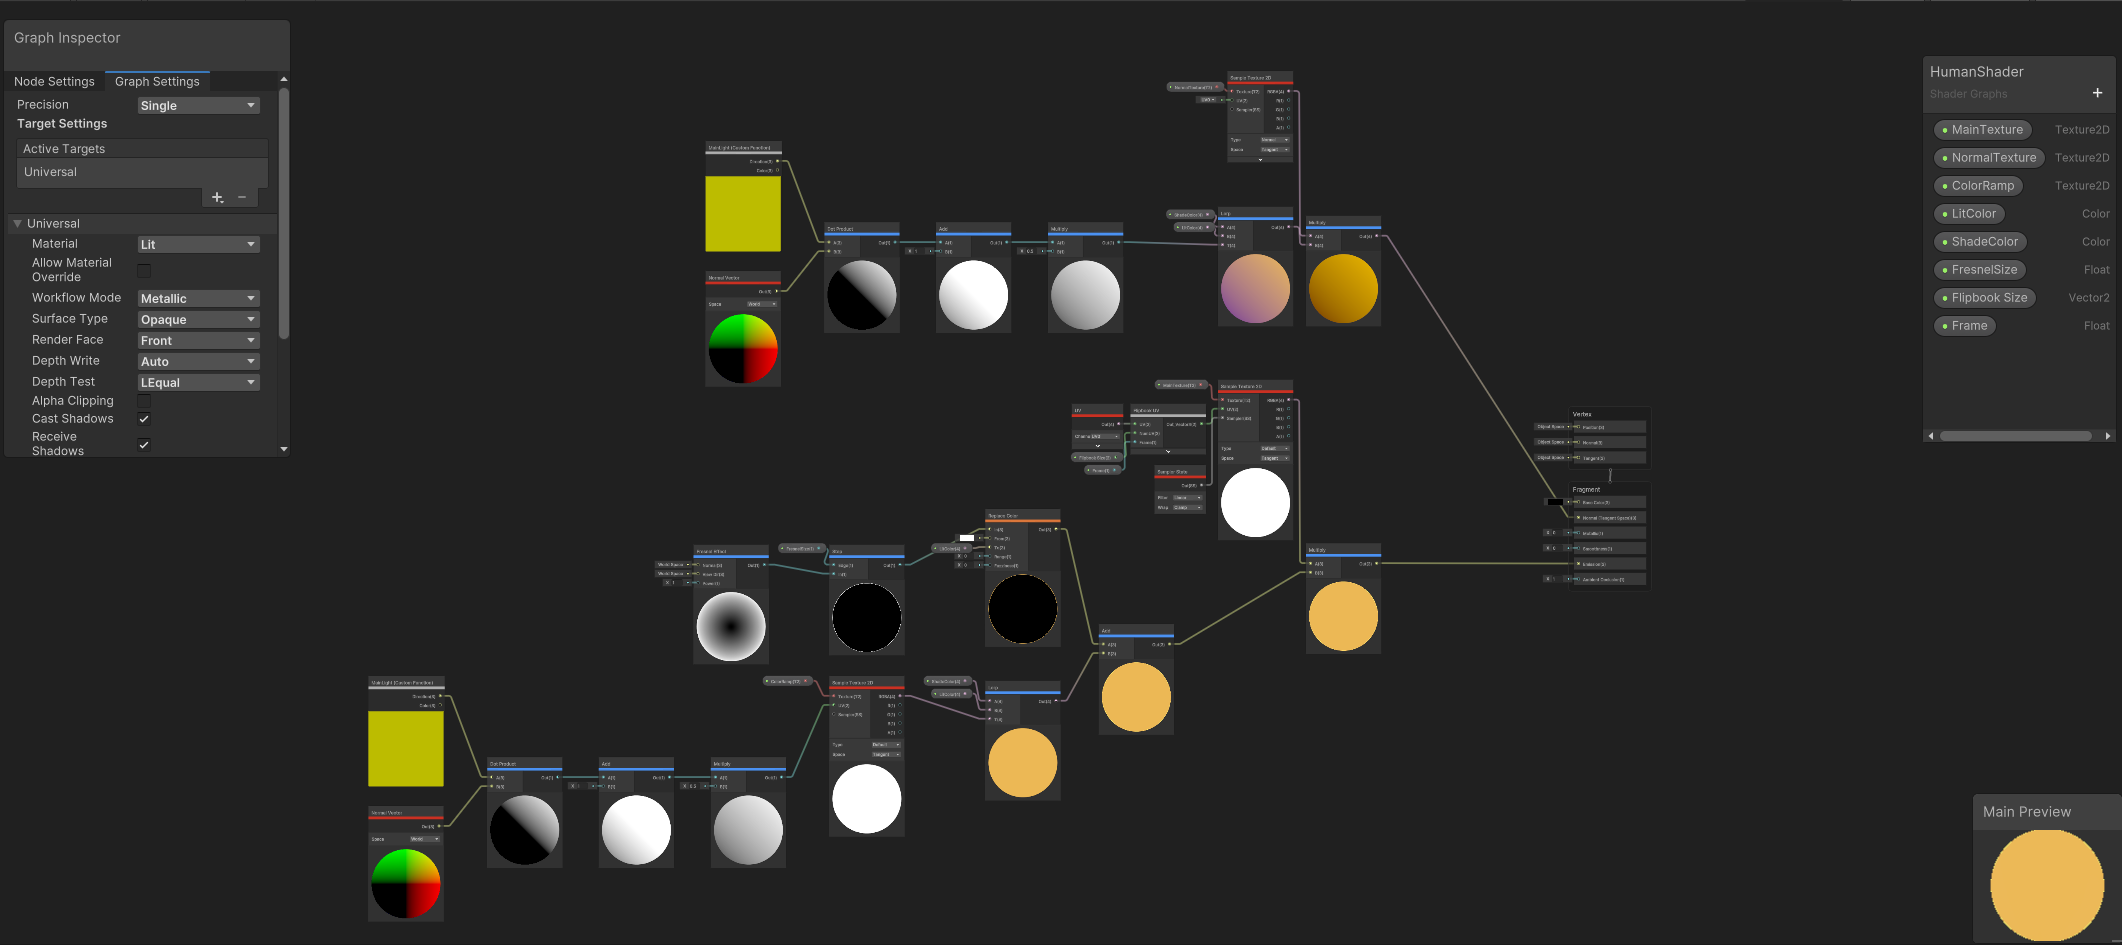
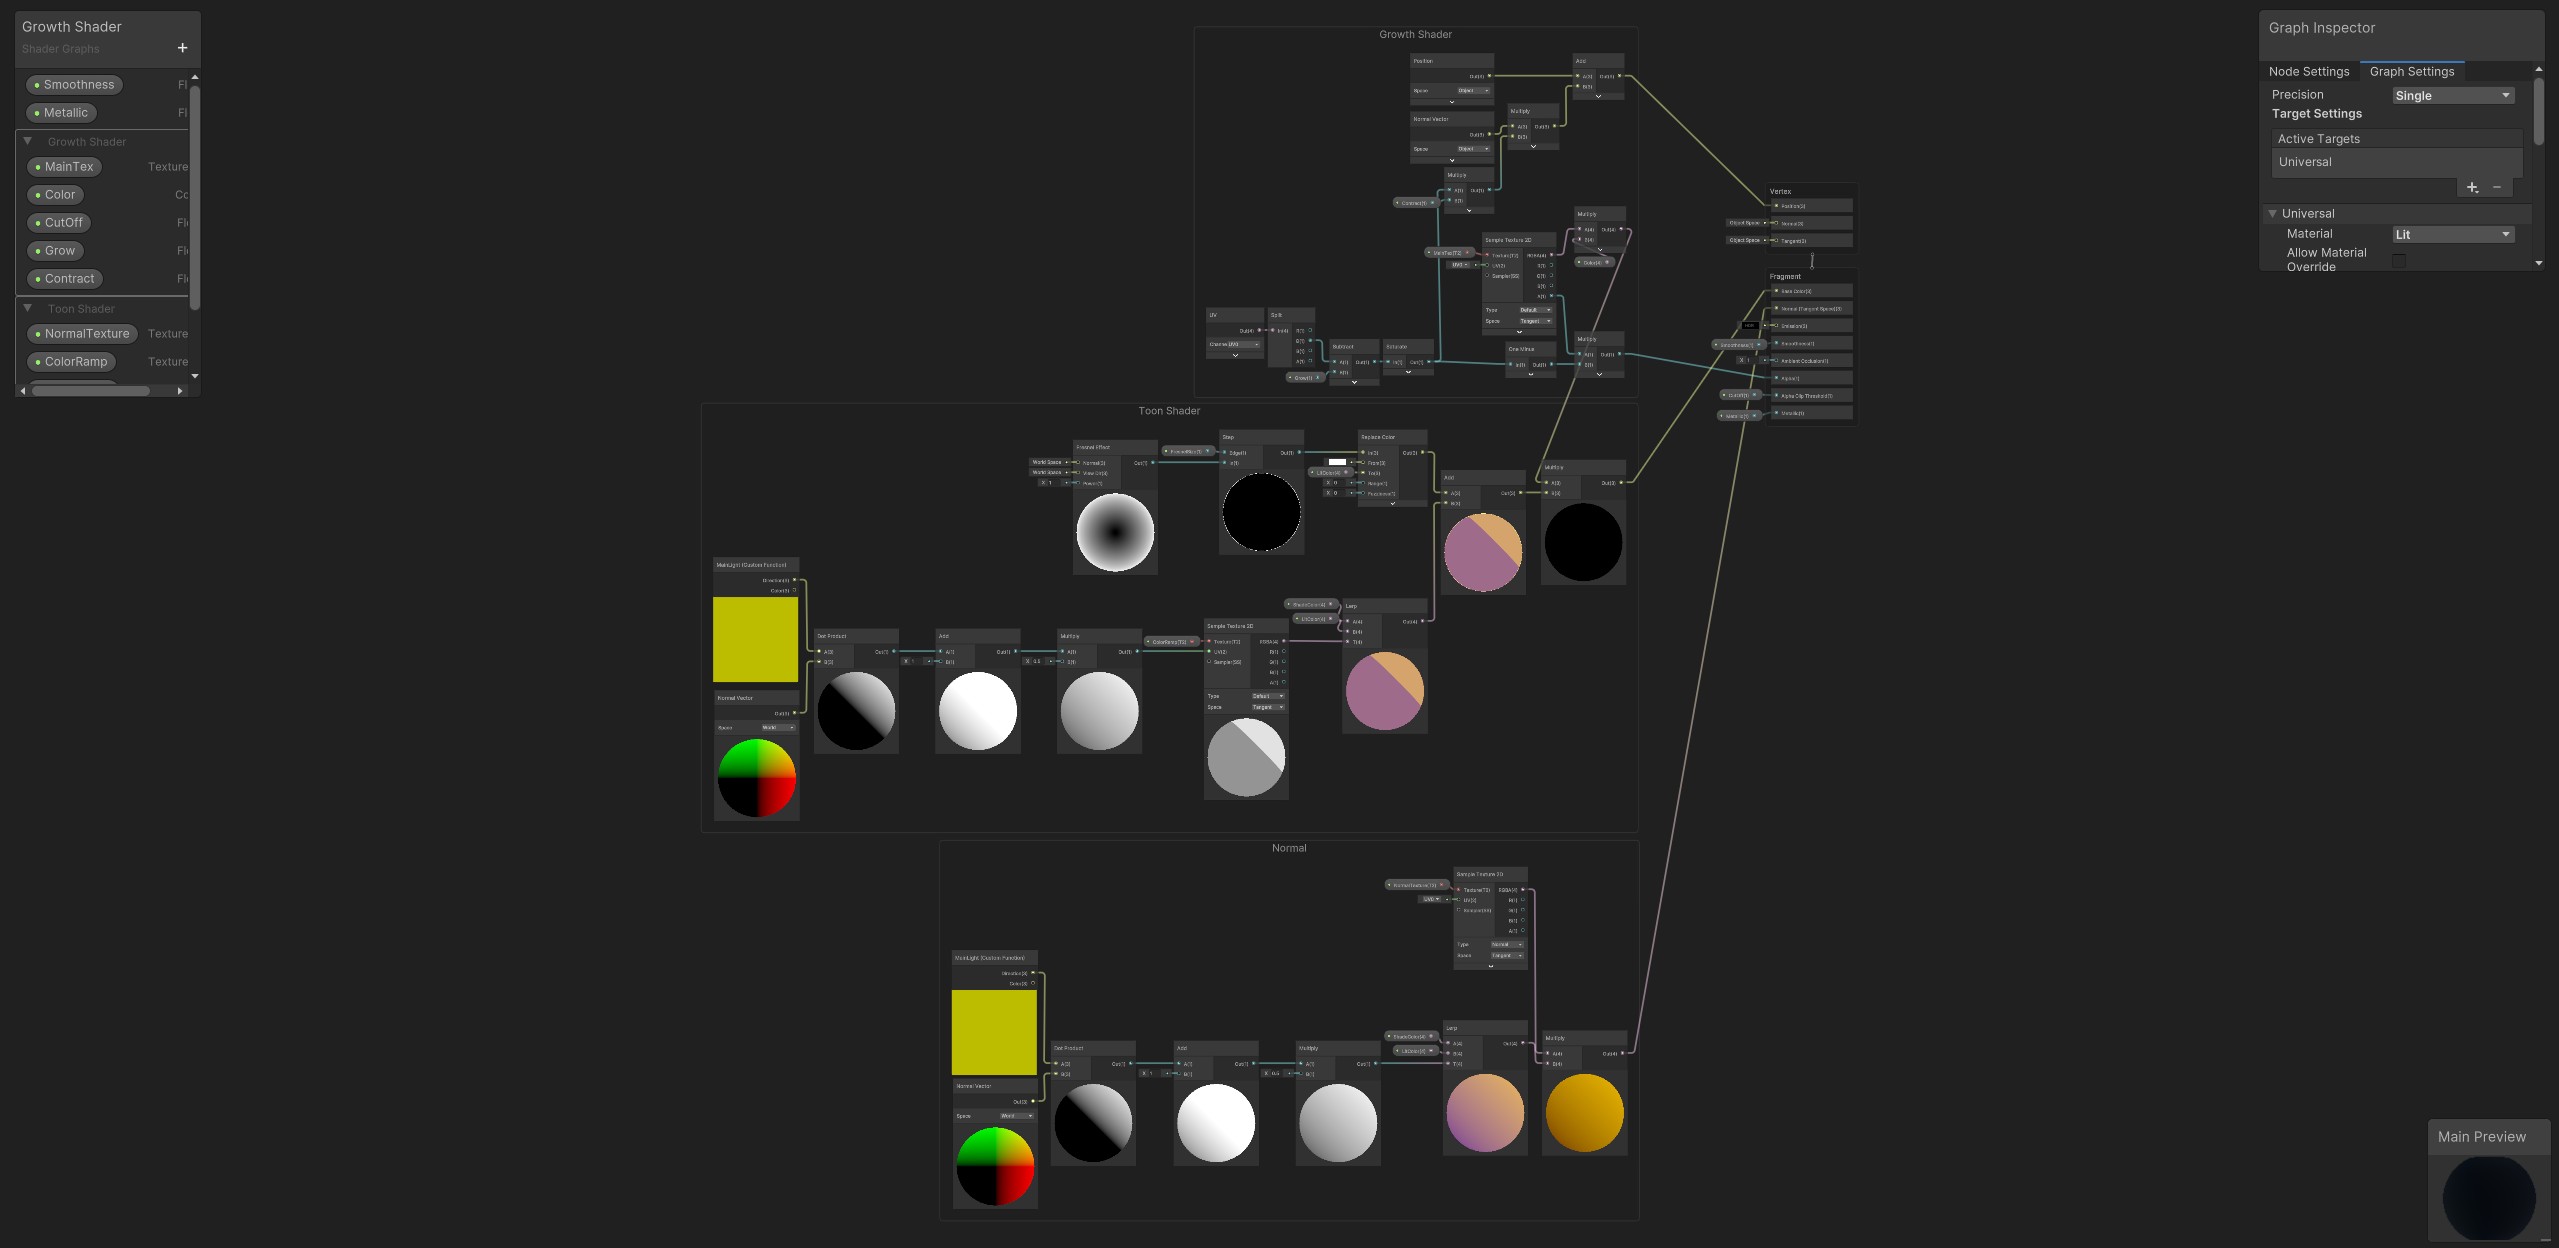
The human NPCs in Mortimer went through several iterations in terms of look and feel. The initial concept was to make them appear strange, frightening and almost monstrous as they might be interpreted by a Raccoon's eye. This concept was later scrapped as it wasn't working how we wanted it to. Our Lead Programmer came up with a flipbook node structure through which a selection of textures could be randomly assigned via scripting upon NPC instantiation, allowing for different looks for the characters while still appearing strange. This iteration was better, but still not quite what we wanted. My solution took our programmer's flipbook structure and added the following:
- Toon Shading: Added a color ramp for simplified lighting bands, giving the characters a stylized cartoon look.
- Fresnel Glow: Implemented edge highlighting to emphasize character silhouettes and increase their separation from the background.
- Dynamic Flipbook Textures: Enhanced the existing flipbook structure to cycle through pre-baked textures, allowing for unique appearances per NPC while retaining their strange, otherworldly style.
In the end, this re-worked shader allowed for 16 options for each category (Skin, Shirt, Pants and Shoes), allowing for 65,536 unique combinations of humans which can exist with roughly a 3.7% chance of 2 NPCs in 100 instantiating using the same exact look.
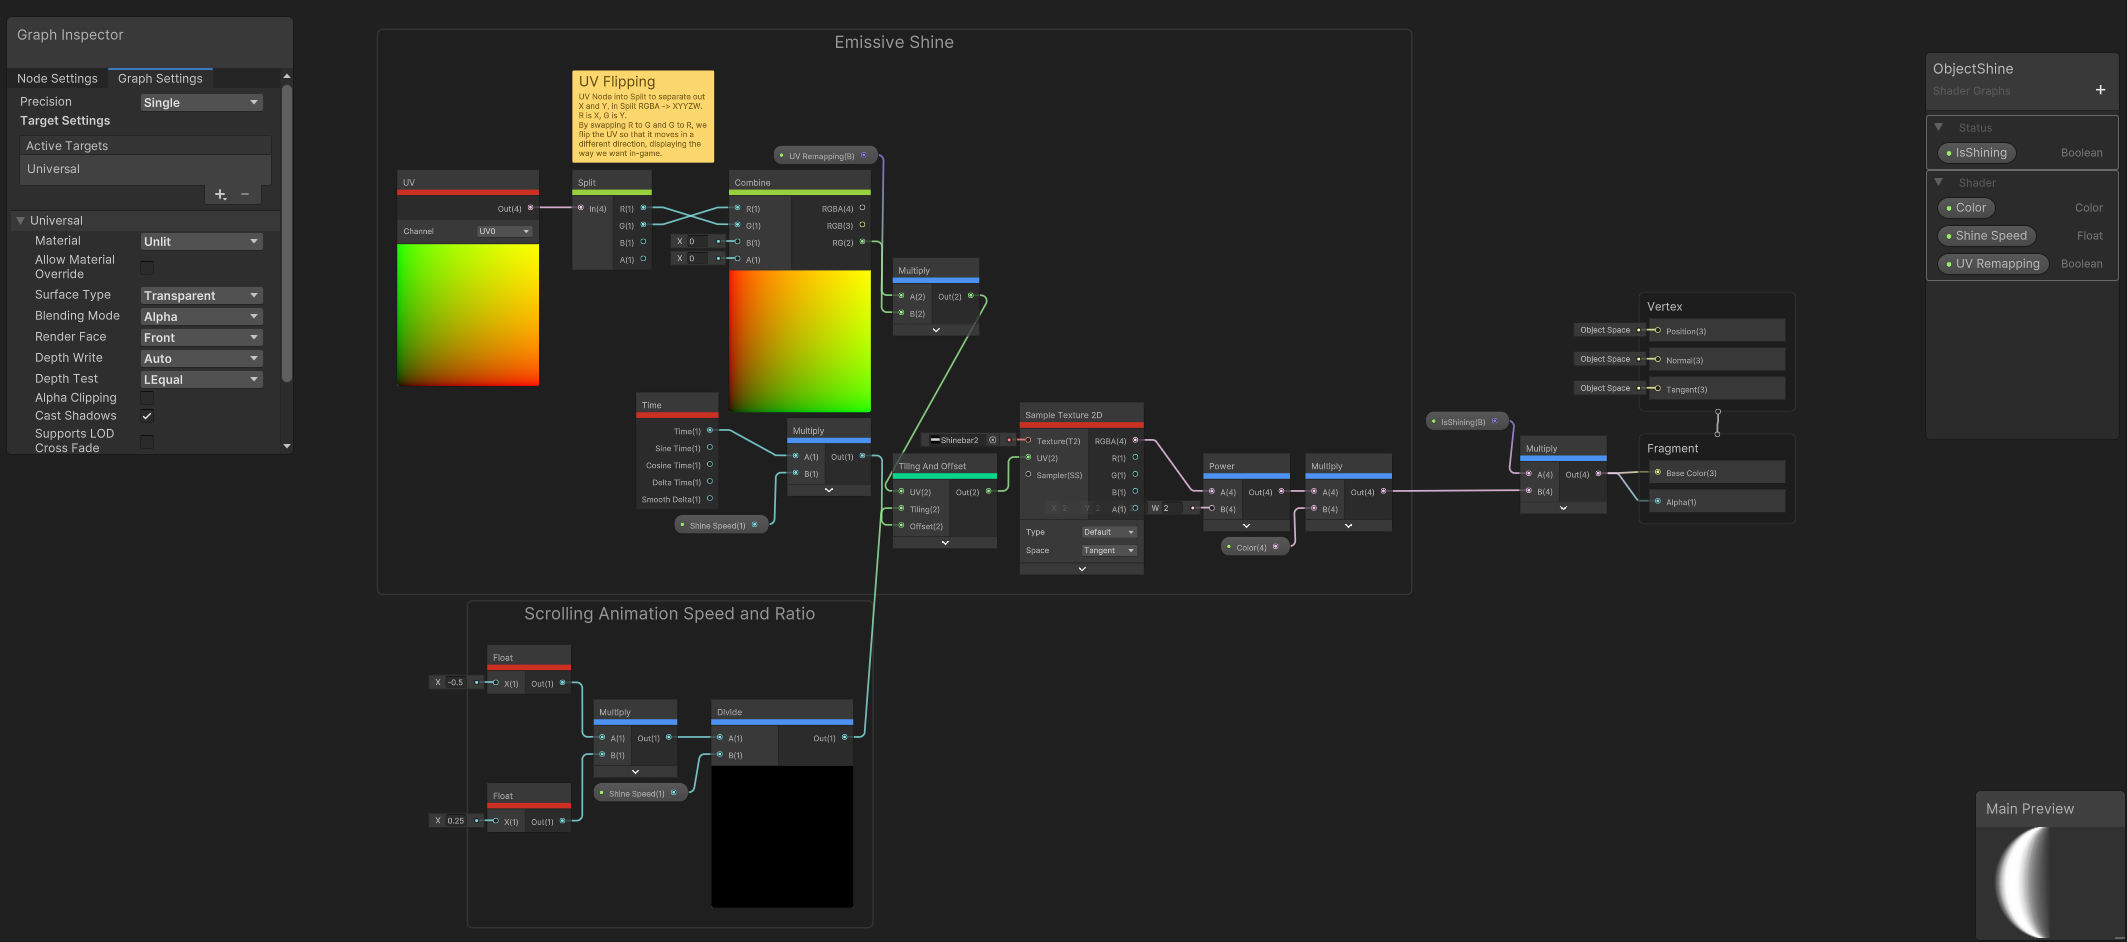
This shader was our team's chosen solution for highlighting interactable objects during the tutorial and regular gameplay sections. It adds a dynamic, animated, emissive shine effect to objects by scrolling a supplied texture across an objects vertices.
The features of the shader are as follows:
- UV Remapping: The UV coordinates are split, flipped, and recombined to enable directional movement of the shine effect.
- Scrolling Animation: Shine speed and direction are controlled by a scrolling UV animation tied to customizable time parameters.
- Emissive Power: A power multiplier adjusts the brightness and intensity of the shine, blending seamlessly with the object's base texture.
- Dynamic Control: Boolean properties allow toggling the shine effect on or off and adjusting its parameters dynamically via scripts.
A brief explanation of how it works:
- The UV Coordinates define how a texture is wrapped around an object's vertices.
- Through altering these coordinates the texture appears to move across the surface even though the object itself remains static.
- For the scrolling mechanic the shader uses a Time node to create a continuously changing value. The value of the time node is multiplied by a speed factor and added to the UV coordinates.
- The updated UV coordinates then shift the sampled texture over the object's vertices, giving the appearance of motion.
Materials
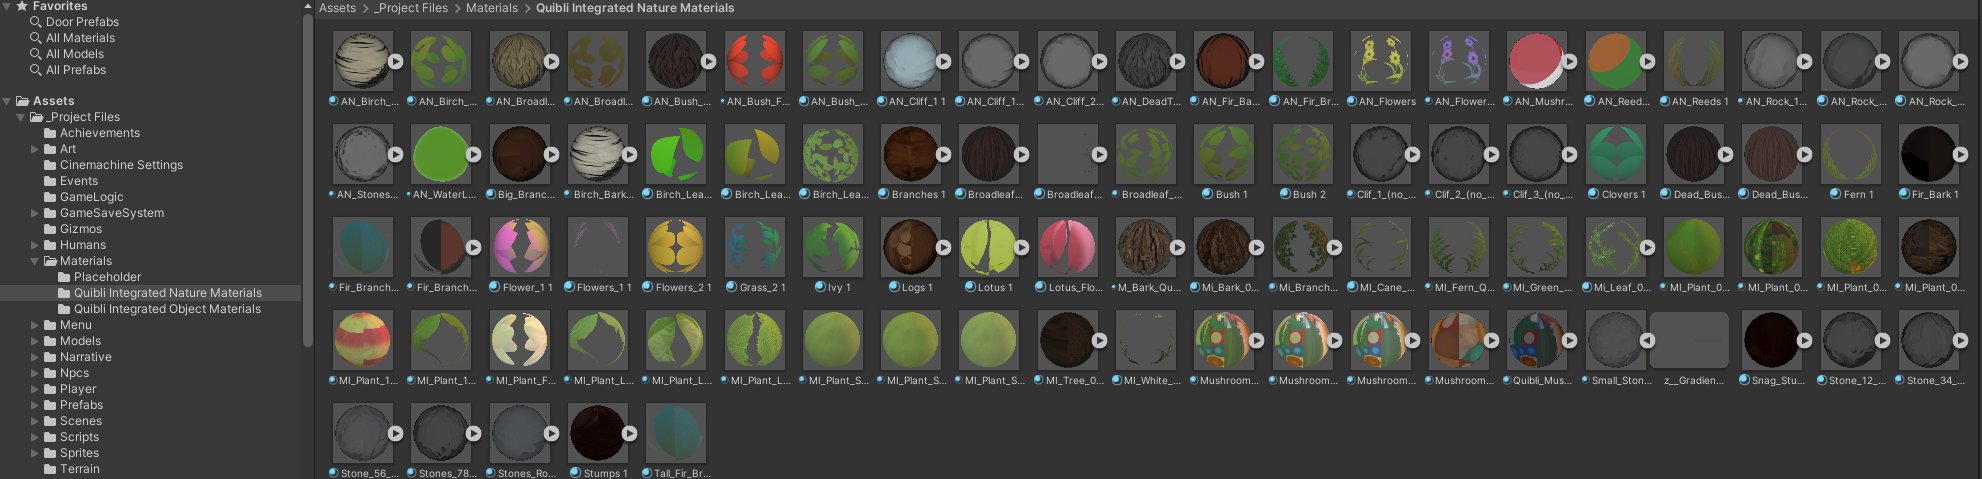
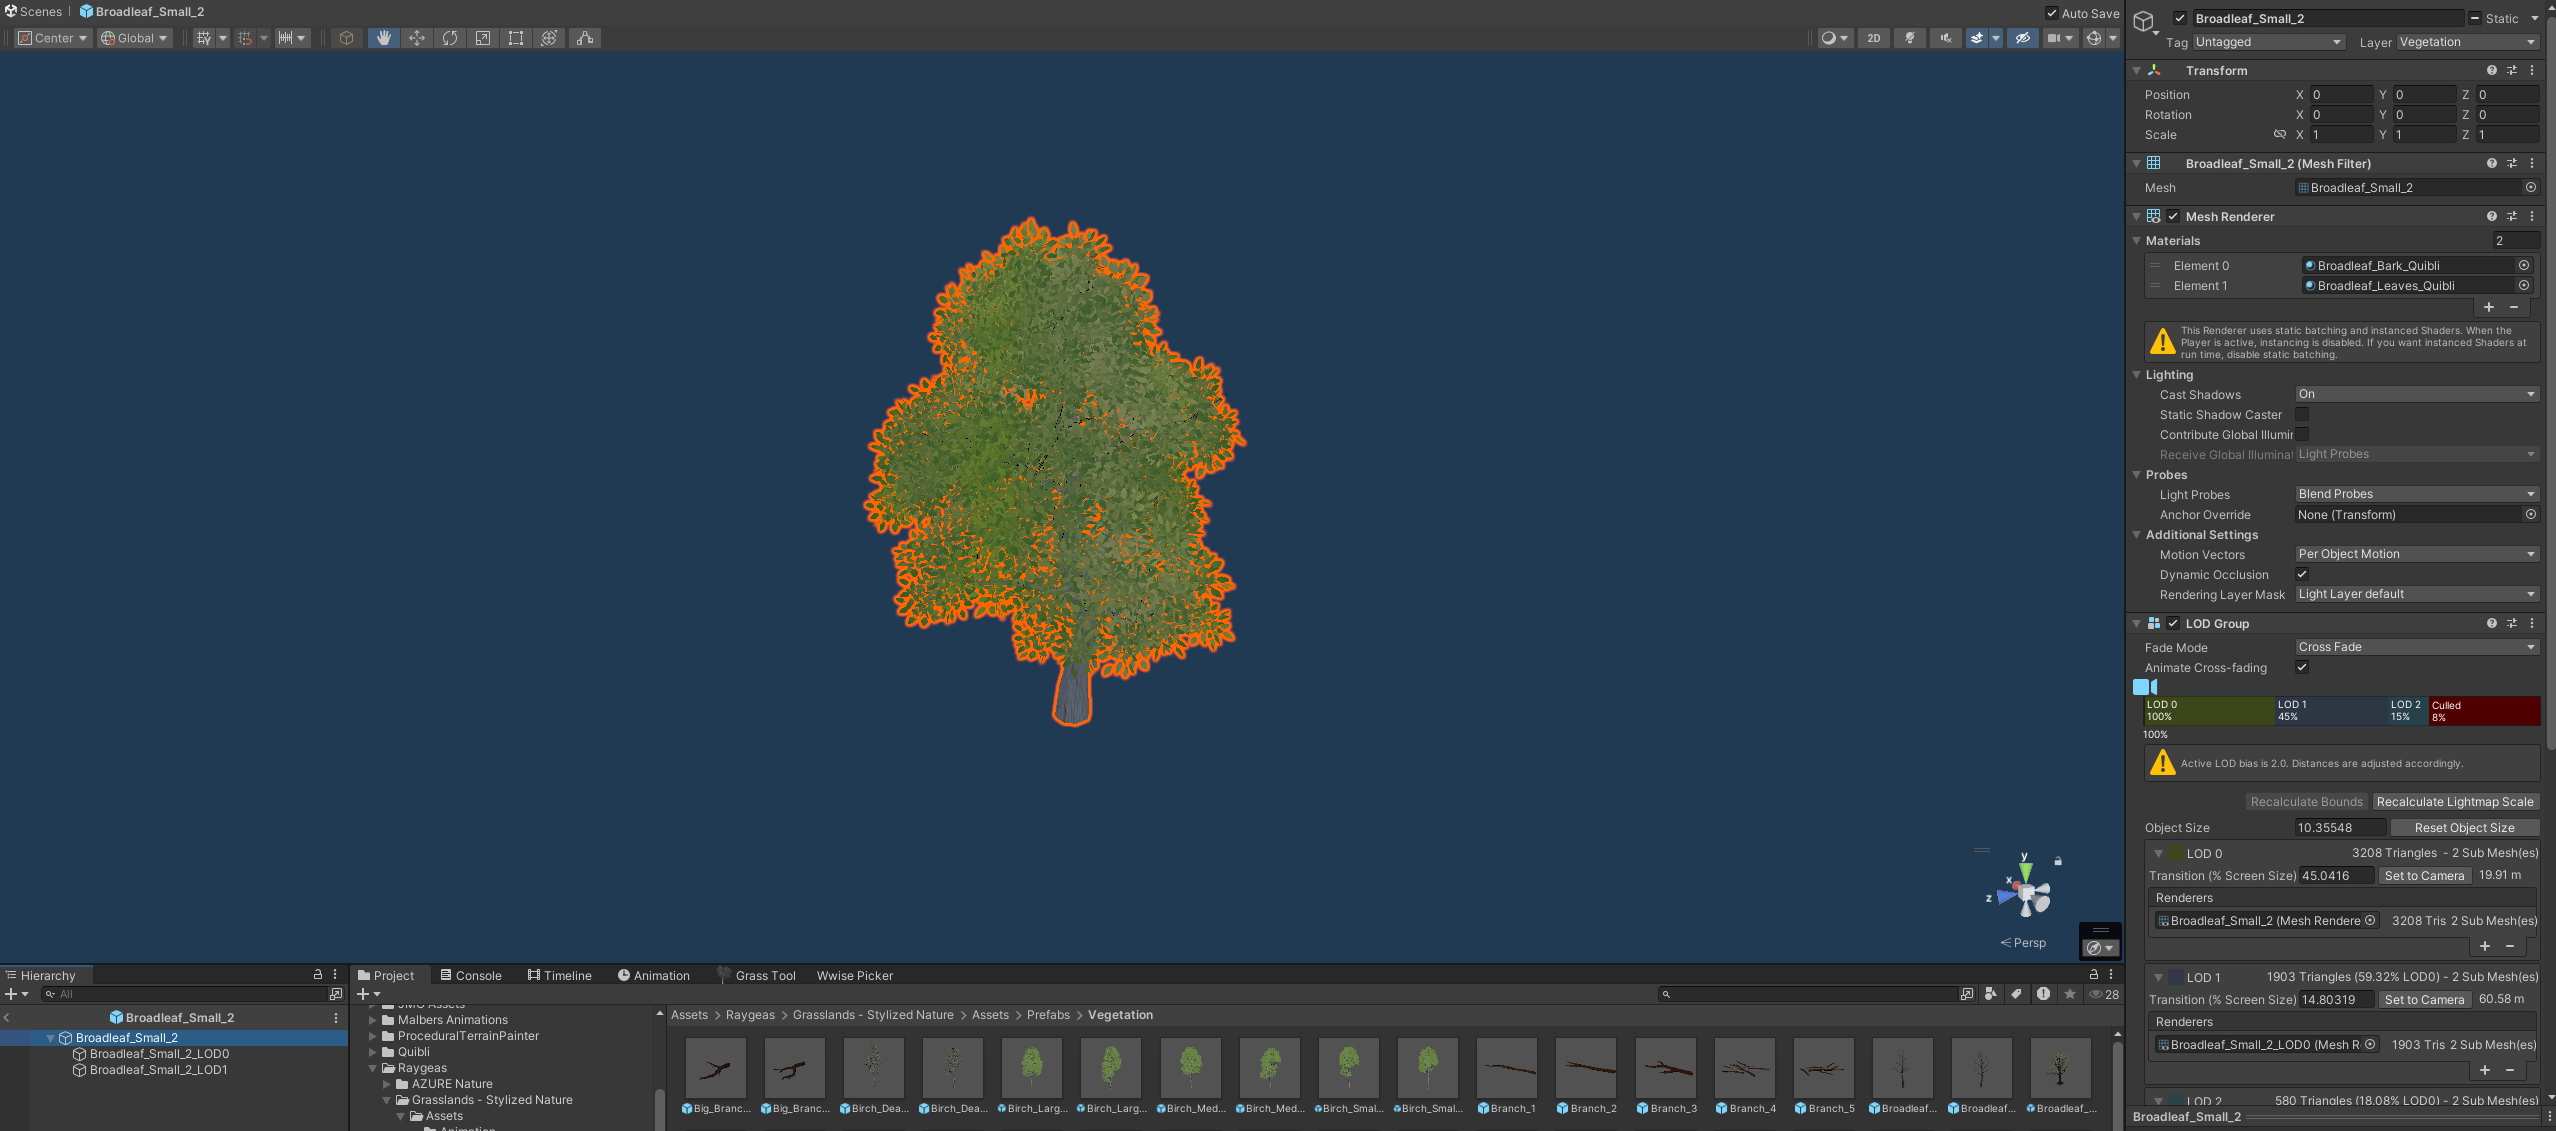
In addition to the custom shaders, I created and maintained a library of materials based off of the Quibli: Anime Shaders and Tools asset pack. In total 112 materials were created for use in the game (89 used for vegetation objects, 23 used for various other objects placed in the game world.) Quibli was chosen as the style best represented what our team agreed was the look we wanted for the project. From the baseline offering I trialed several different custom settings options before the final look for Mortimer: First Launch was approved by our Art Lead.
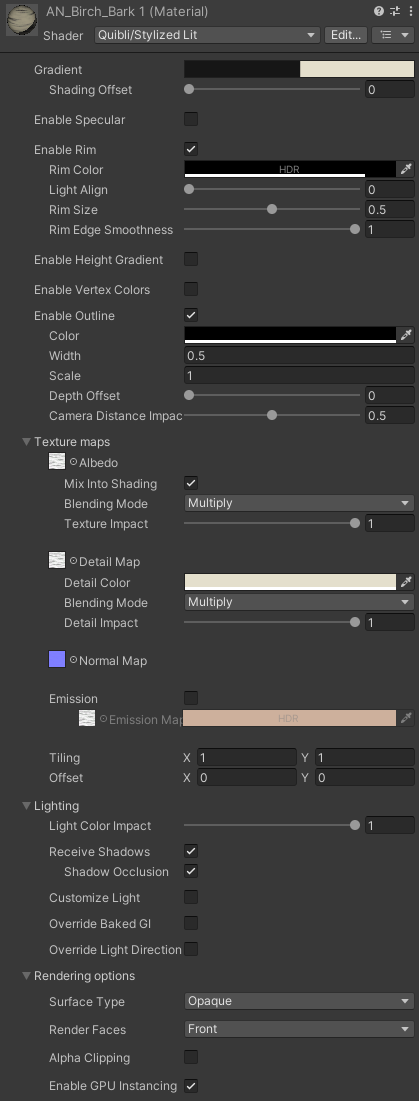
The end result was a hand-drawn, cartoon look with a hint of anime influence via flat shading and clearly defined outlines for the edges of static objects, while objects in motion such as leaves, grass and smaller ground vegetation retained the flat shading but abandoned the outline in favor of blending in with their surroundings. A key consideration was ensuring that the materials and settings used would respond well to shadows and the specific lighting used in the scenes, this required several iterations in order to get it right.
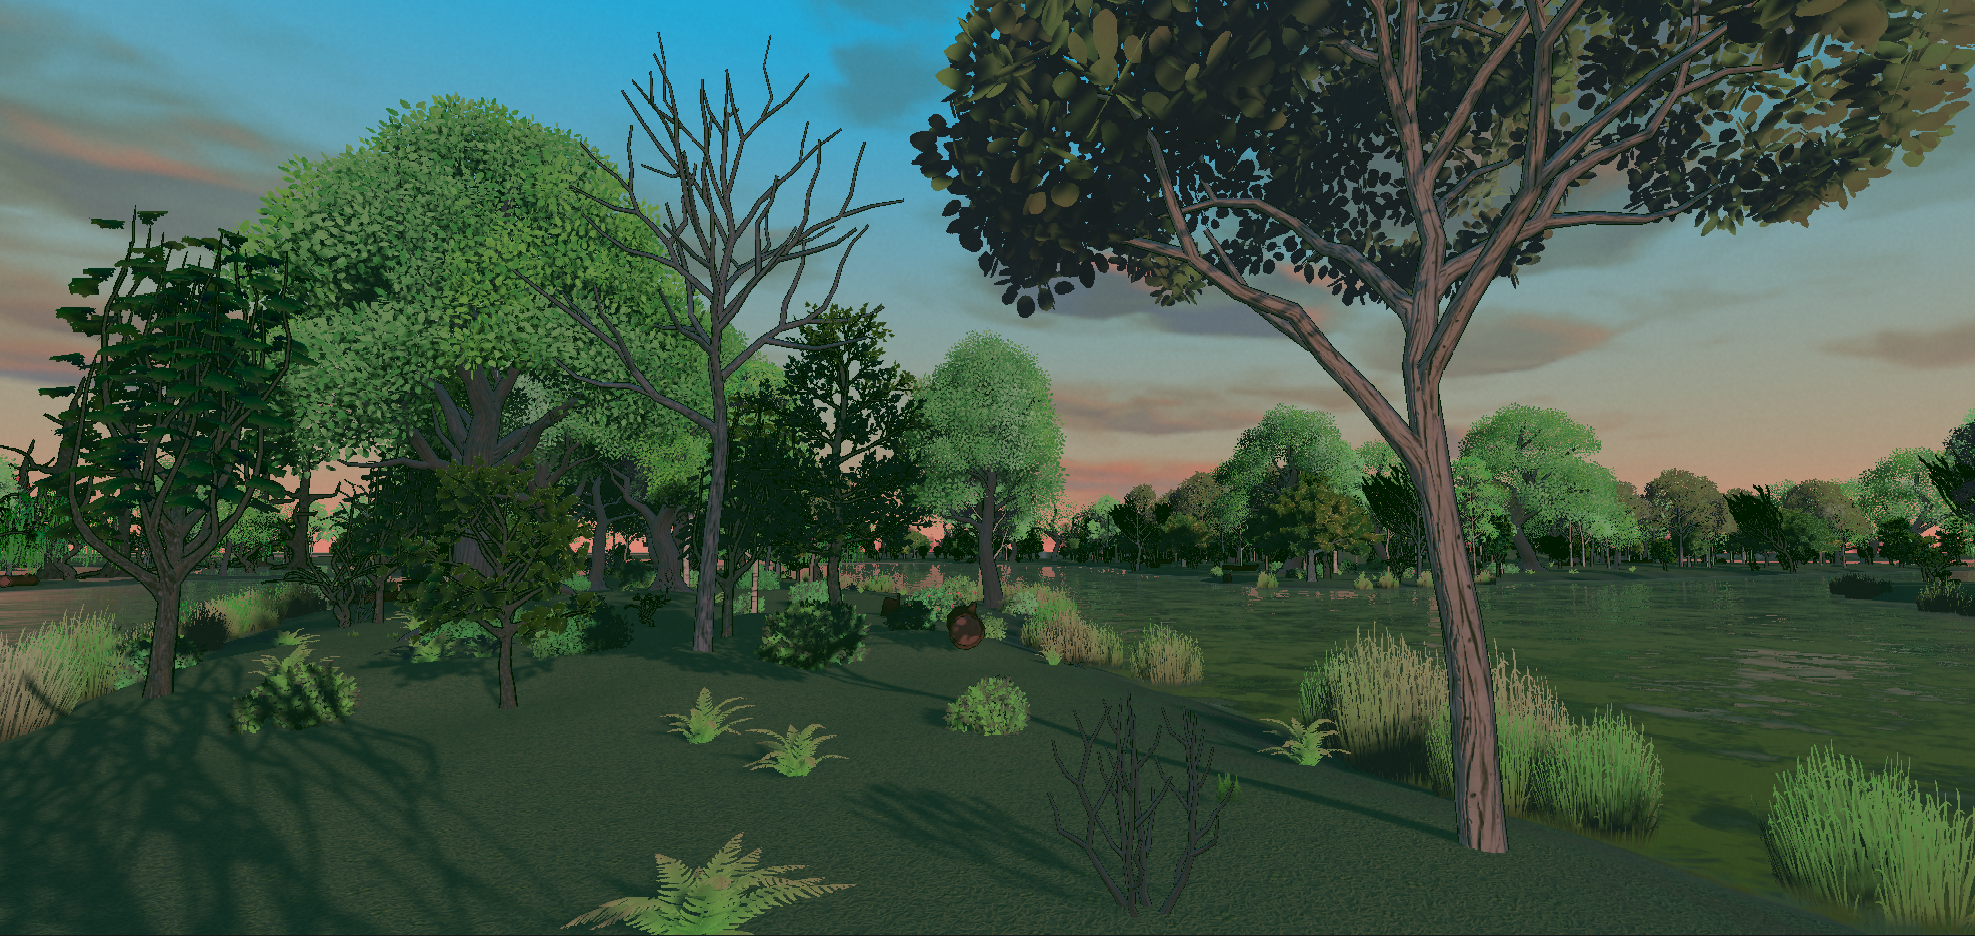
Above is a closer look of the materials in game.
Real-time visual effects
In Mortimer: First Launch, I created a total of 10 distinct visual effects using Unity's VFX Graph and Particle System. These effects were carefully designed to enhance the game's whimsical tone while maintaining visual consistency. Four of the effects were built using VFX Graph for high-impact, dynamic visuals, while six utilized the Particle System for more straightforward yet effective animations.
- Campfire: A dynamic, flickering fire effect paired with a heat distortion shader. Additional to the fire are a rising smoke effect, and dynamic comic book "crackle" and "pop" text particles.
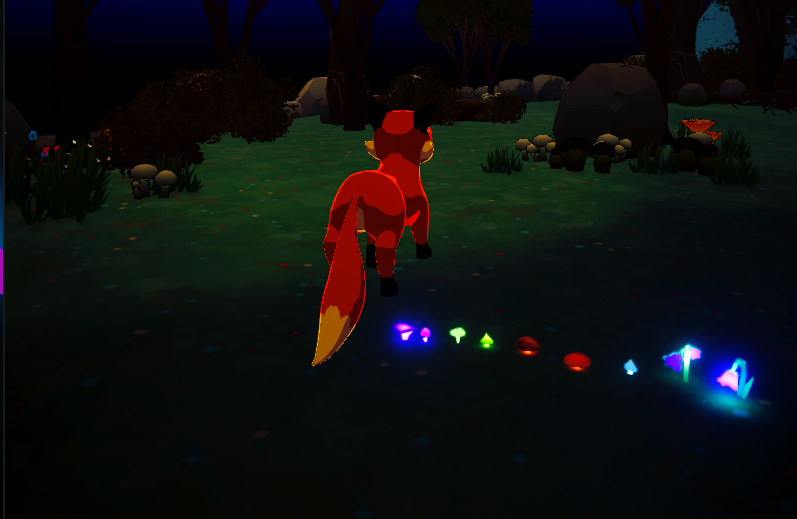
- Guiding Wind: A tailed particle effect which instantiates from food items, winding their way toward Mortimer. This serves as a directional guide for players.
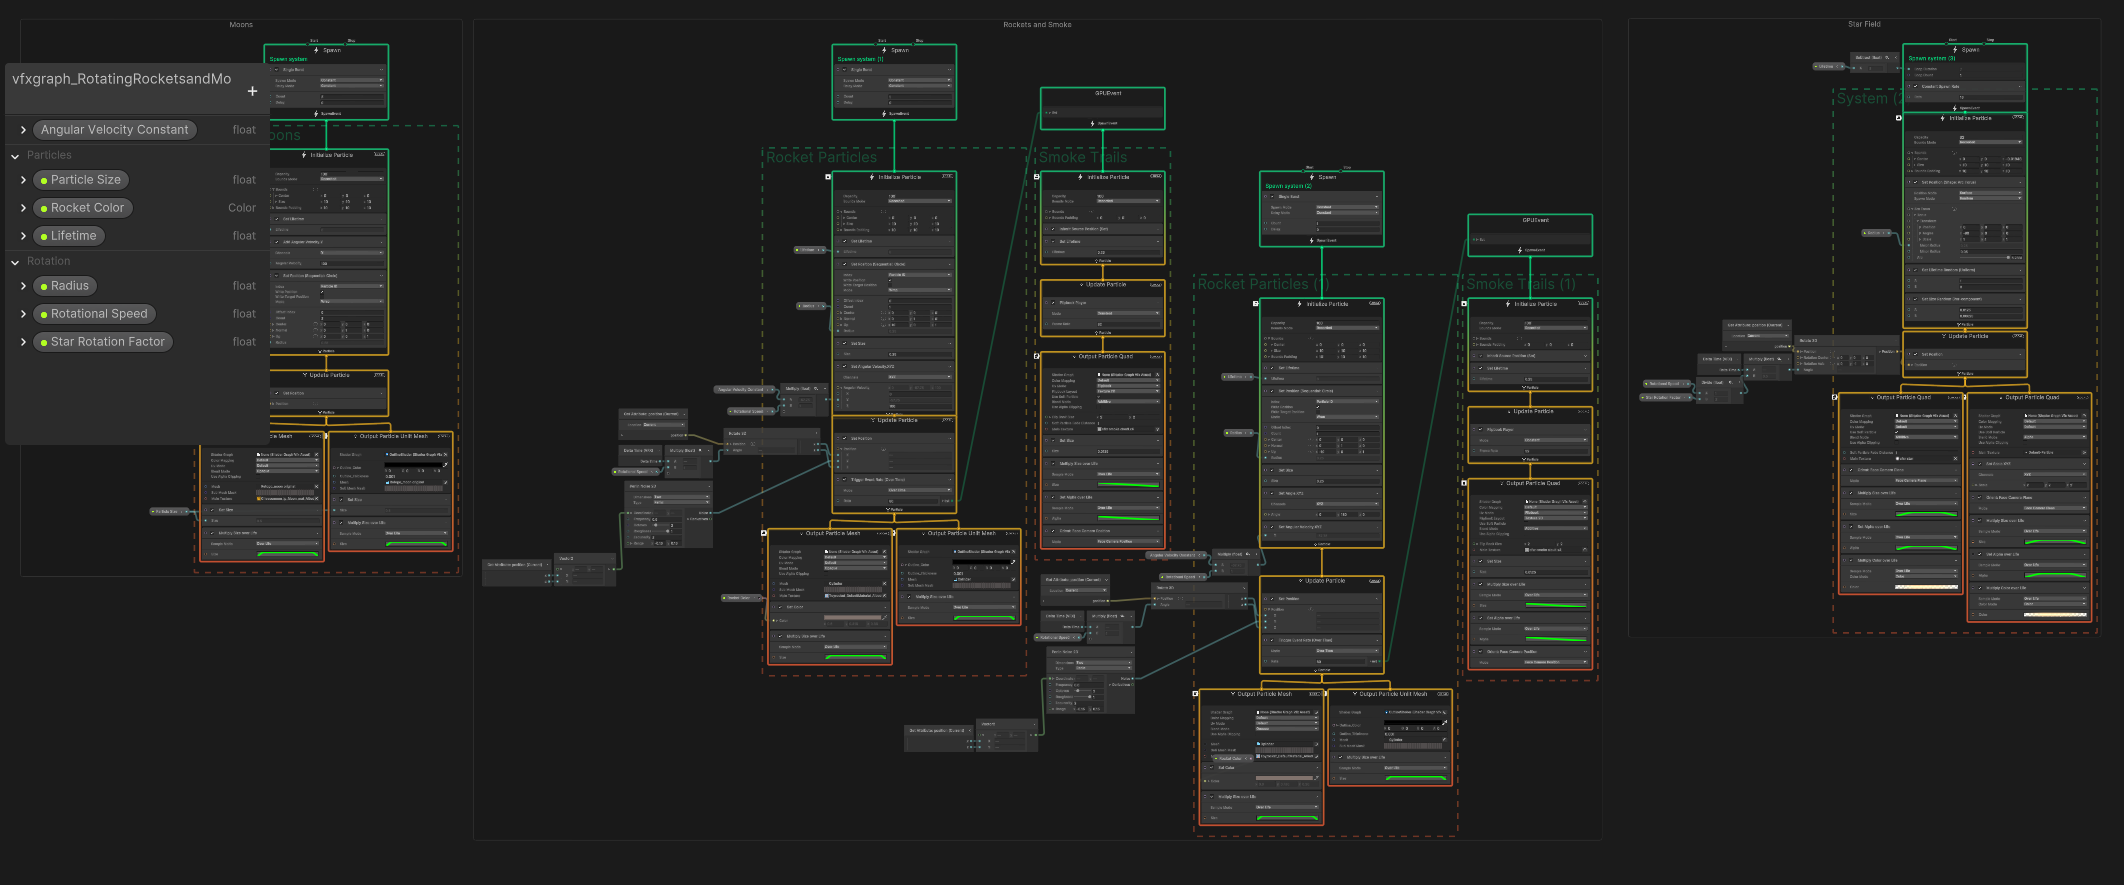
- Rockets and Moons: An effect where 3D mesh particles resembling rockets and moons orbit Mortimer's head in a field of stars after he loses a life and respawns. Inspired by classic Looney Tunes visuals.
- Stylized Rocket Smoke: A highly stylized VFX graph used during the Space Shuttle launch sequence in the tutorial. The effect simulates cartoonish smoke trails, creating an engaging and memorable cinematic moment.
- Bonfire Smoke: A complementary, long-distance visible rising smoke effect to aid in navigation towards landmarks and points of interest.
- Conveyor Belt Smoke: Puffs of cartoon style smoke emitted from the end of a conveyor belt after Mortimer activates it, giving life to static objects.
- Landing Smoke: A burst of cartoon-style smoke triggered when Mortimer lands from a significant height, adding feedback to his movement.
- Mortimer Eating: A chaotic, comic-book-inspired effect featuring clouds of smoke, shooting lines, colorful debris, and animated "nom nom nom" text. This hides object swaps and enhances Mortimer's eating animations.
- Soda Bottle Drop: A smoke puff which occurs when Mortimer drops a bag of soda bottles off a conveyor belt, reinforcing cause-and-effect mechanics.
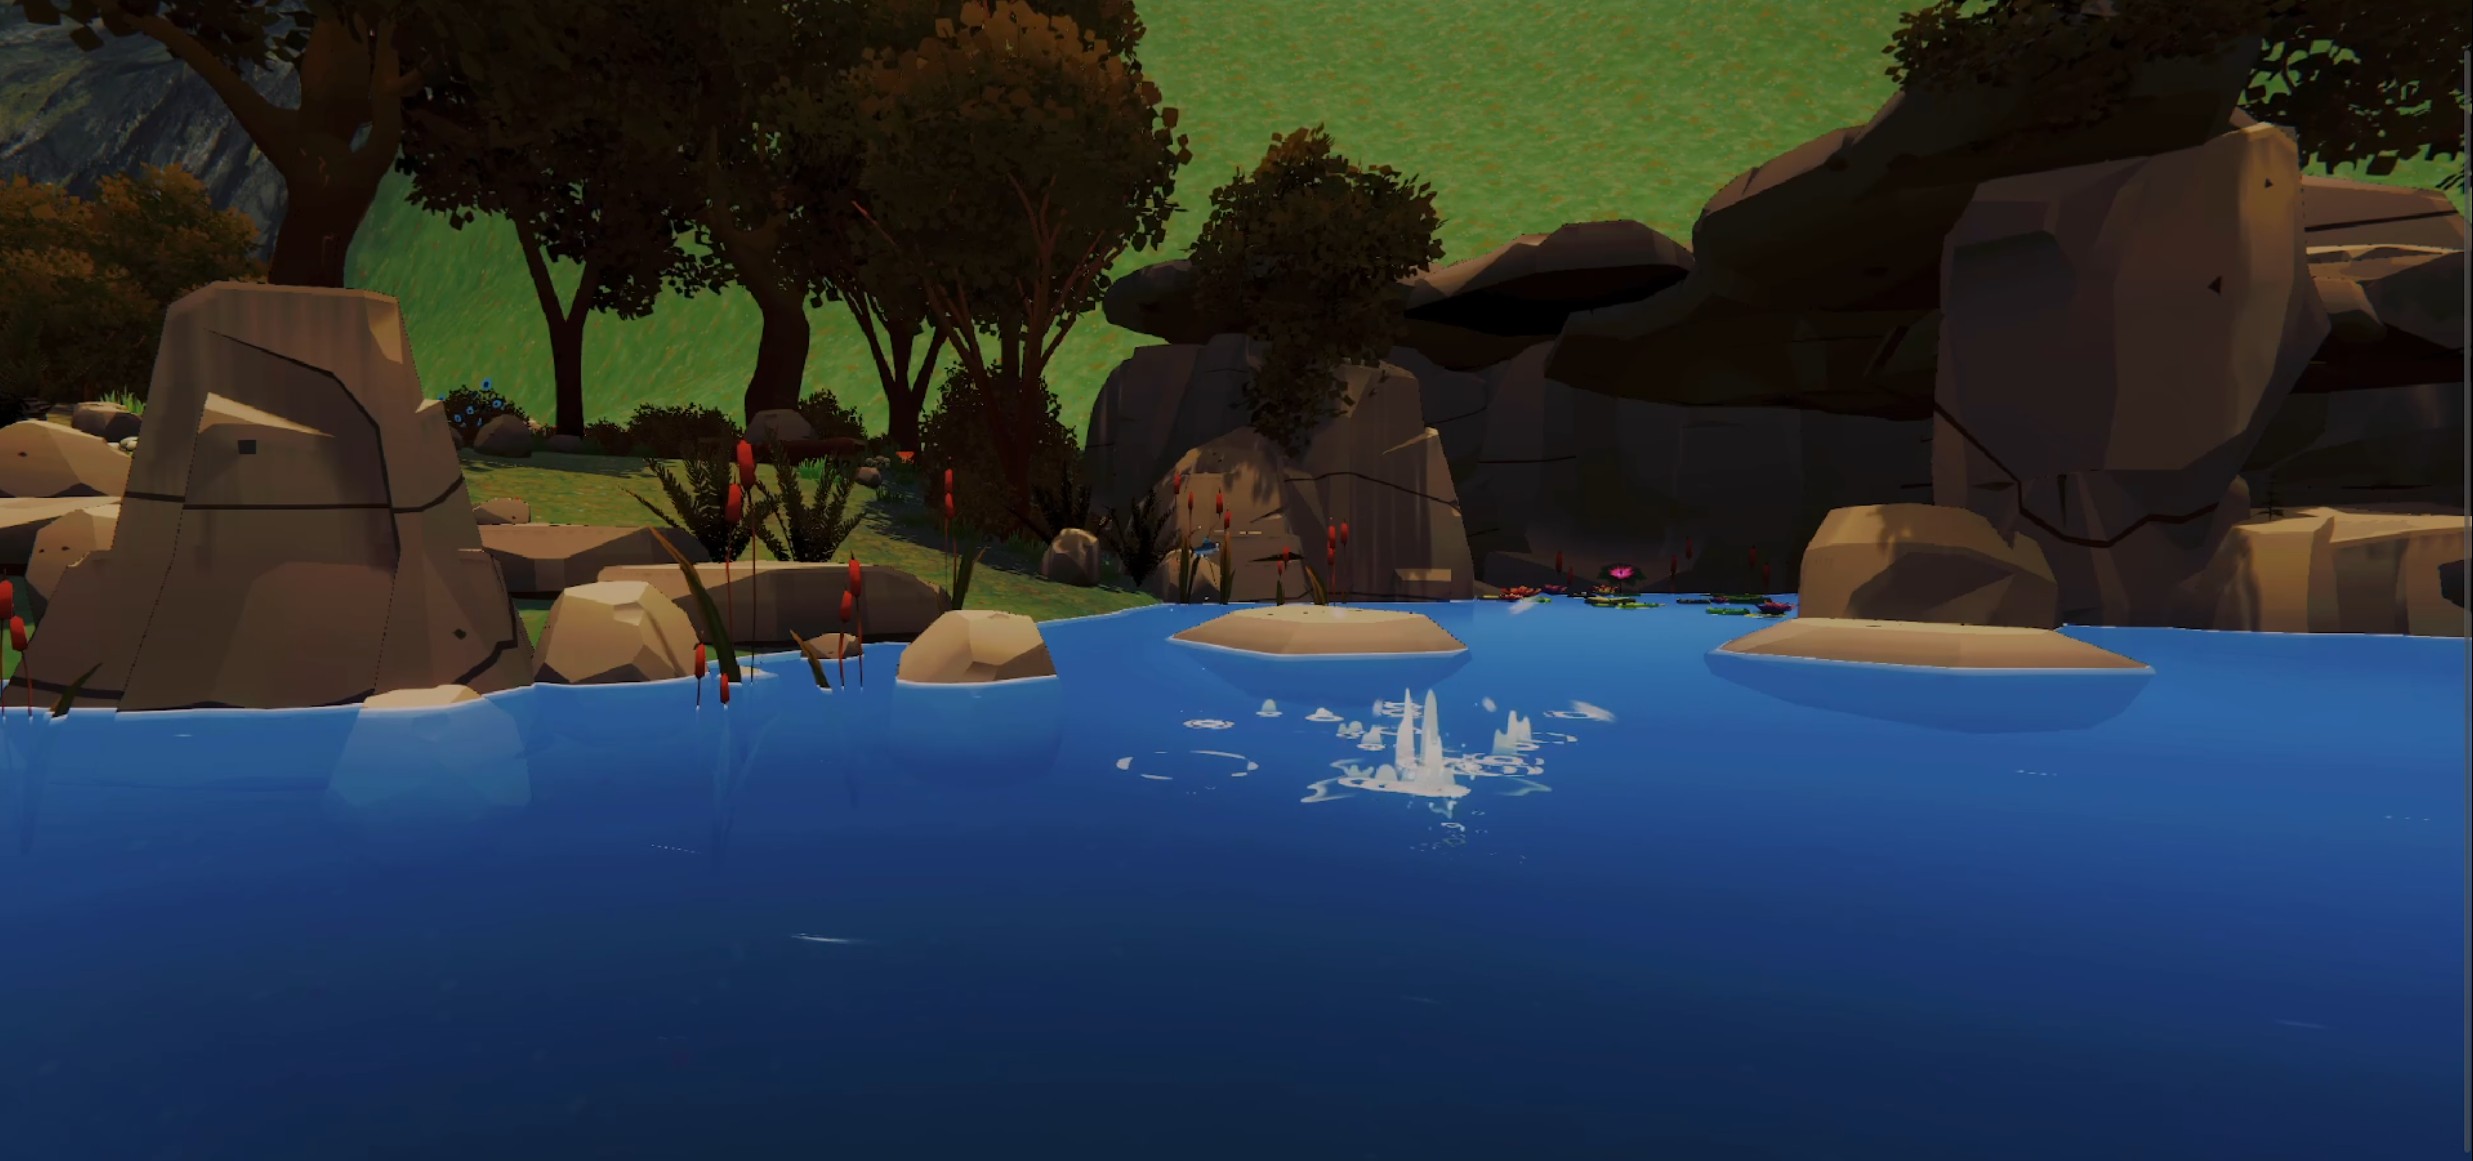
- Water Splash: A cartoon style splash effect with ripples at impact points, triggered when Mortimer jumps or falls into water.
Lighting and post-processing
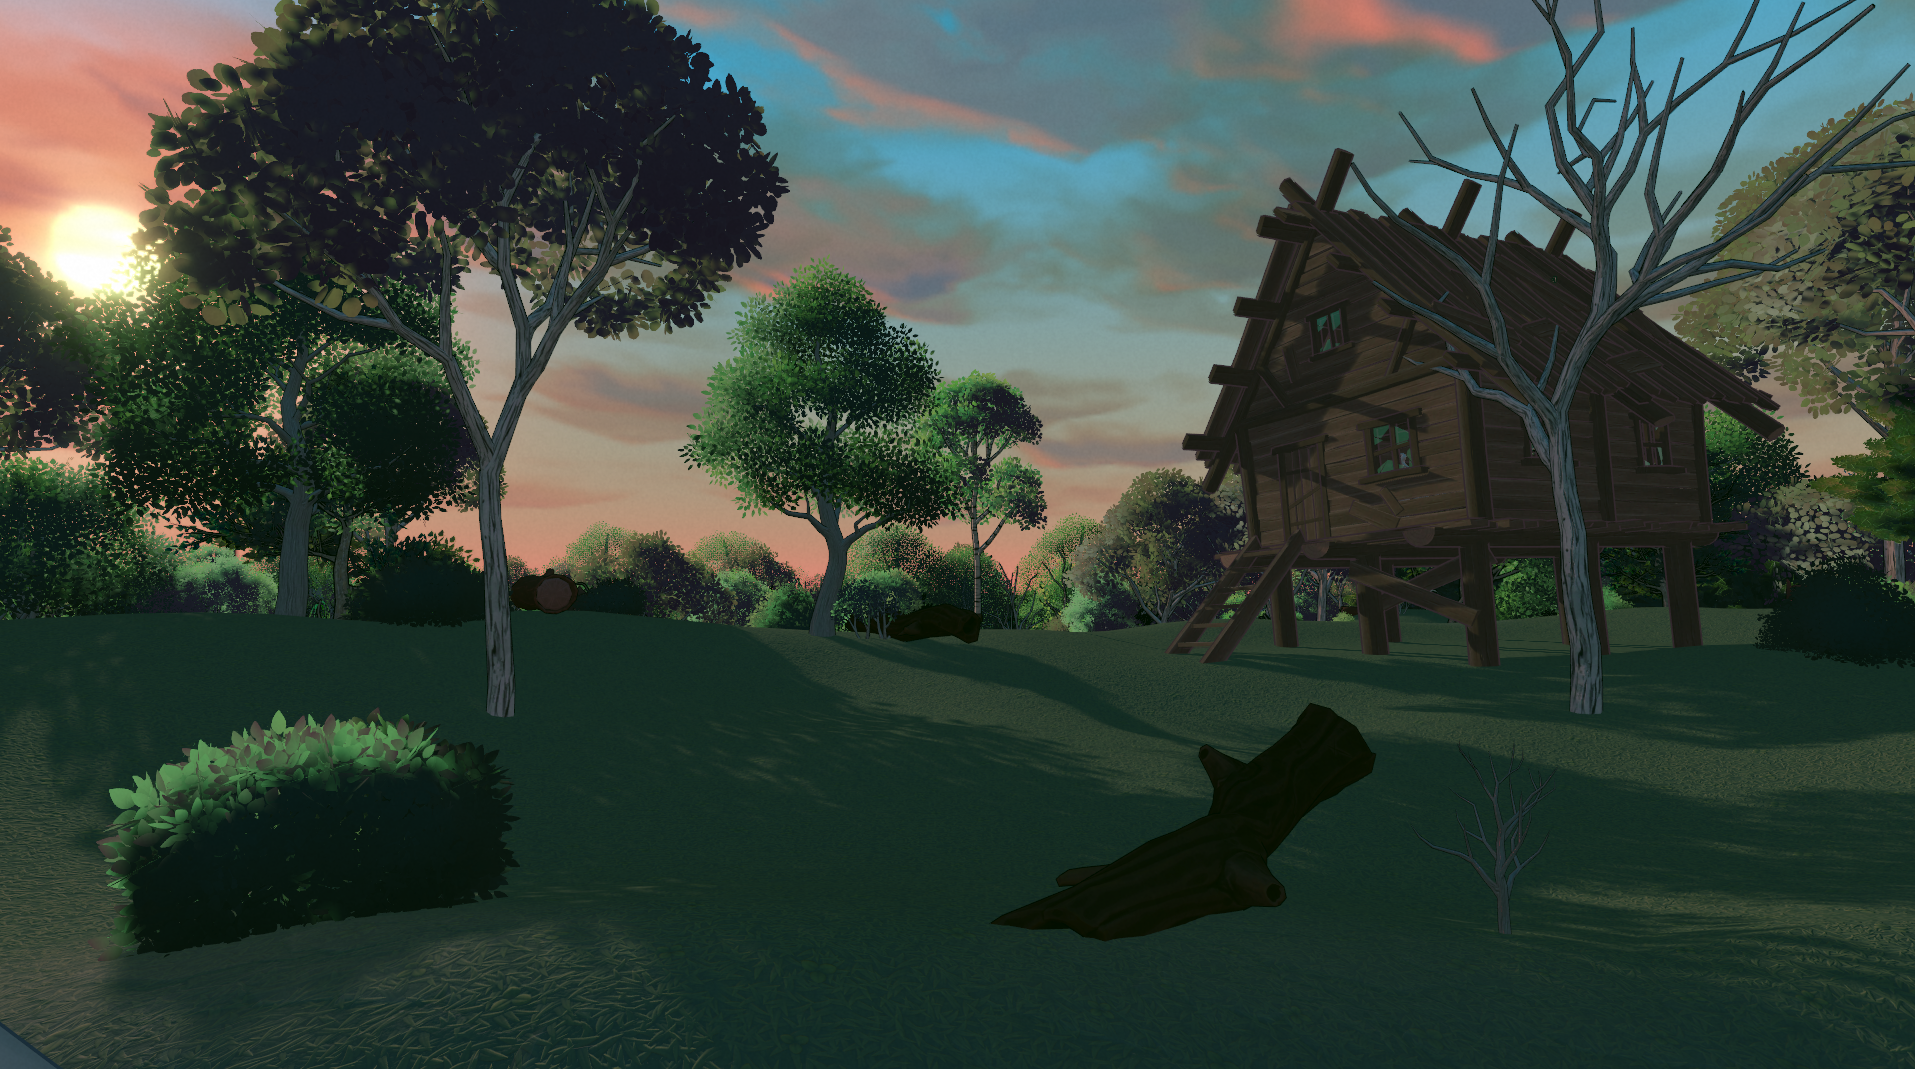
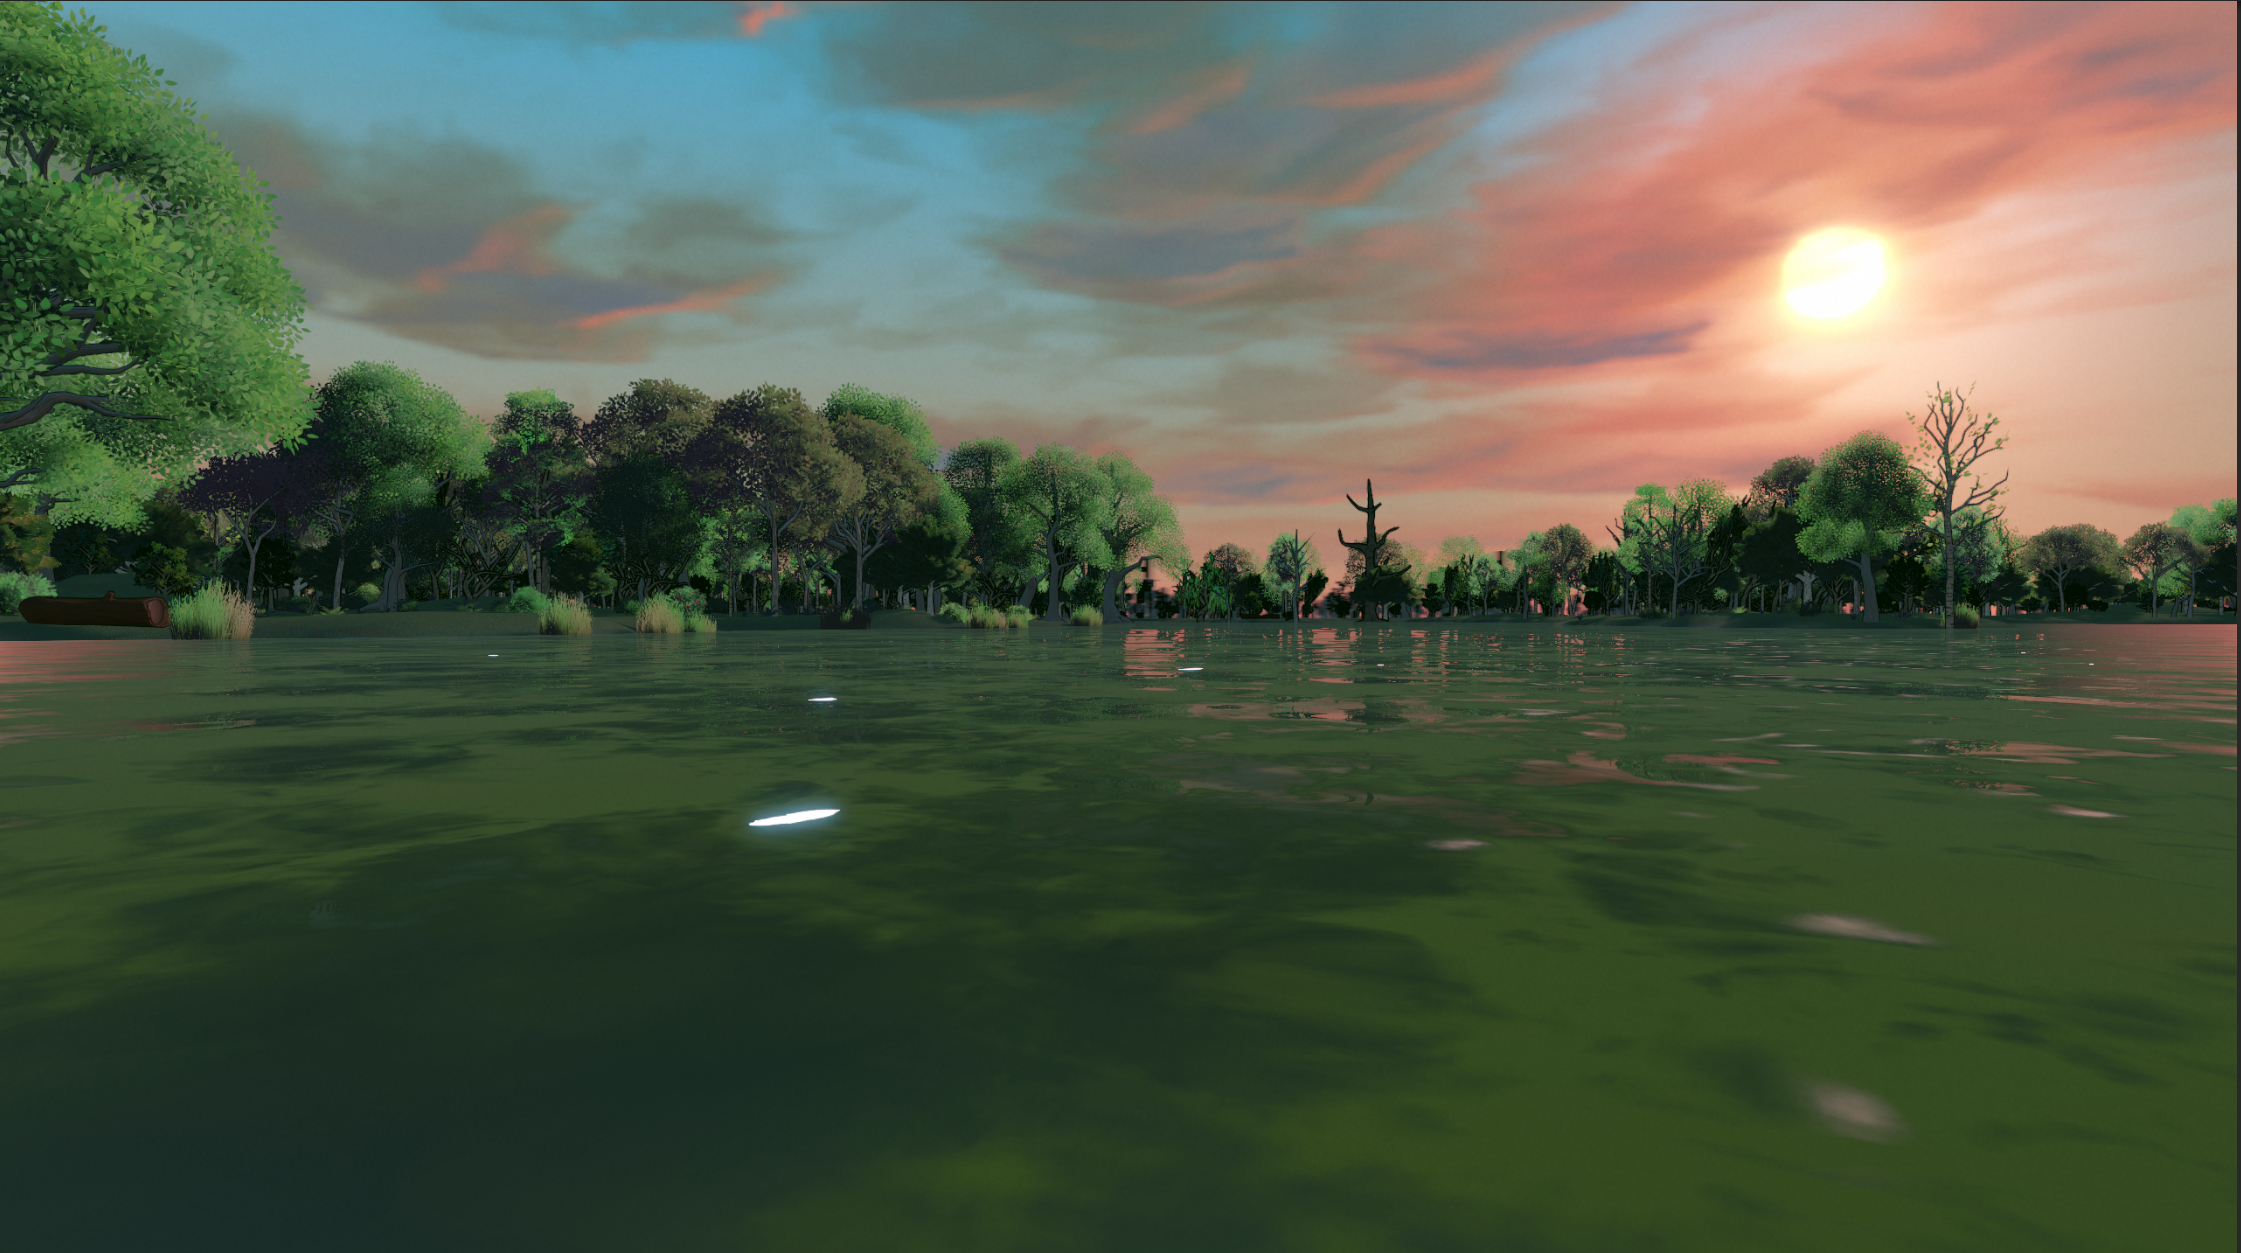
I designed the lighting to mimic a summer sunset. Using a directional light positioned as the sun setting in the west (negative X rotation), I shifted the color palette towards more soft pastel tones of orange and pink. This approach ensured the lighting felt natural and believable while complementing the vibrant colors in the scene without overwhelming them. Shadows were carefully adjusted to balance the moody sunset aesthetic with the practical need for visibility, further offset by a secondary directional light set to low intensity pointed in opposition to the main directional light, to fake light reflection from the surface onto the underside of vegetation.
For performance and flexibility, I opted for dynamic, real-time lighting instead of baked lighting. This decision reduced the need for time-consuming GPU lightmap bakes during development and allowed for potential future implementation of a day/night cycle without additional rework.
Post-processing was implemented through a global volume, the following effects were applied:
- Bloom: To create a subtle glow around brighter areas and emphasize highlights.
- Tonemapping: For adjusting the overall tone and dynamic range of the scene.
- Film Grain: To add texture and a cinematic feel to the visuals.
- Lift, Gamma, Gain: For precise control over brightness and contrast in different tonal ranges.
- Shadows, Midtones, Highlights: To fine-tune color balance and contrast across specific tonal areas.
- Channel Mixer: For advanced color adjustments and balancing.
- Color Grading: To harmonize the overall color palette and enhance the sunset-inspired aesthetic.
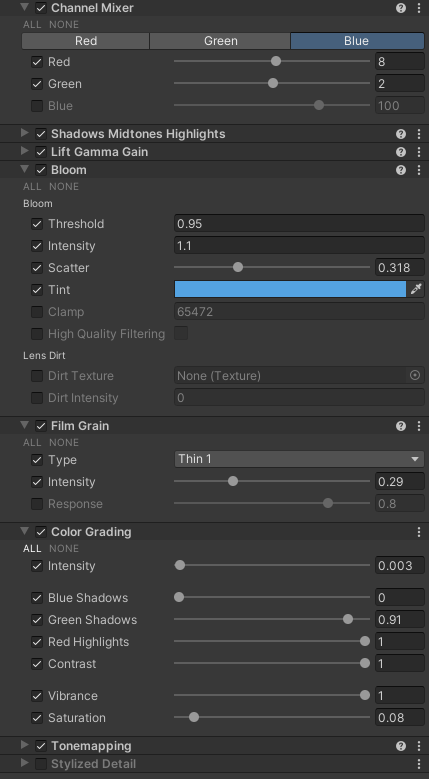
Above is an image of the Post Processing stack as it appears in project.
Environmental Creation

The primary focus of the environmental design in Mortimer: First Launch was to establish a sense of believable realism. The goal was to create an environment that felt authentic enough for those familiar with the real Hatbill Park in Florida to recognize specific sections of the waterways, even with the limitations of vegetation detail and the addition of fantastical elements.
I created the terrain using a modified satellite image of the Hatbill Park area provided by our lead designer. This terrain included waterways, three campgrounds, and a small township named Utopia, situated in the northwest corner. Using the satellite image as a guide, I traced the waterways with Unity's terrain tools to establish the basic structure. Feedback led to the addition of a hill within Hatbill Park, designed as a viewpoint and landmark for player navigation.
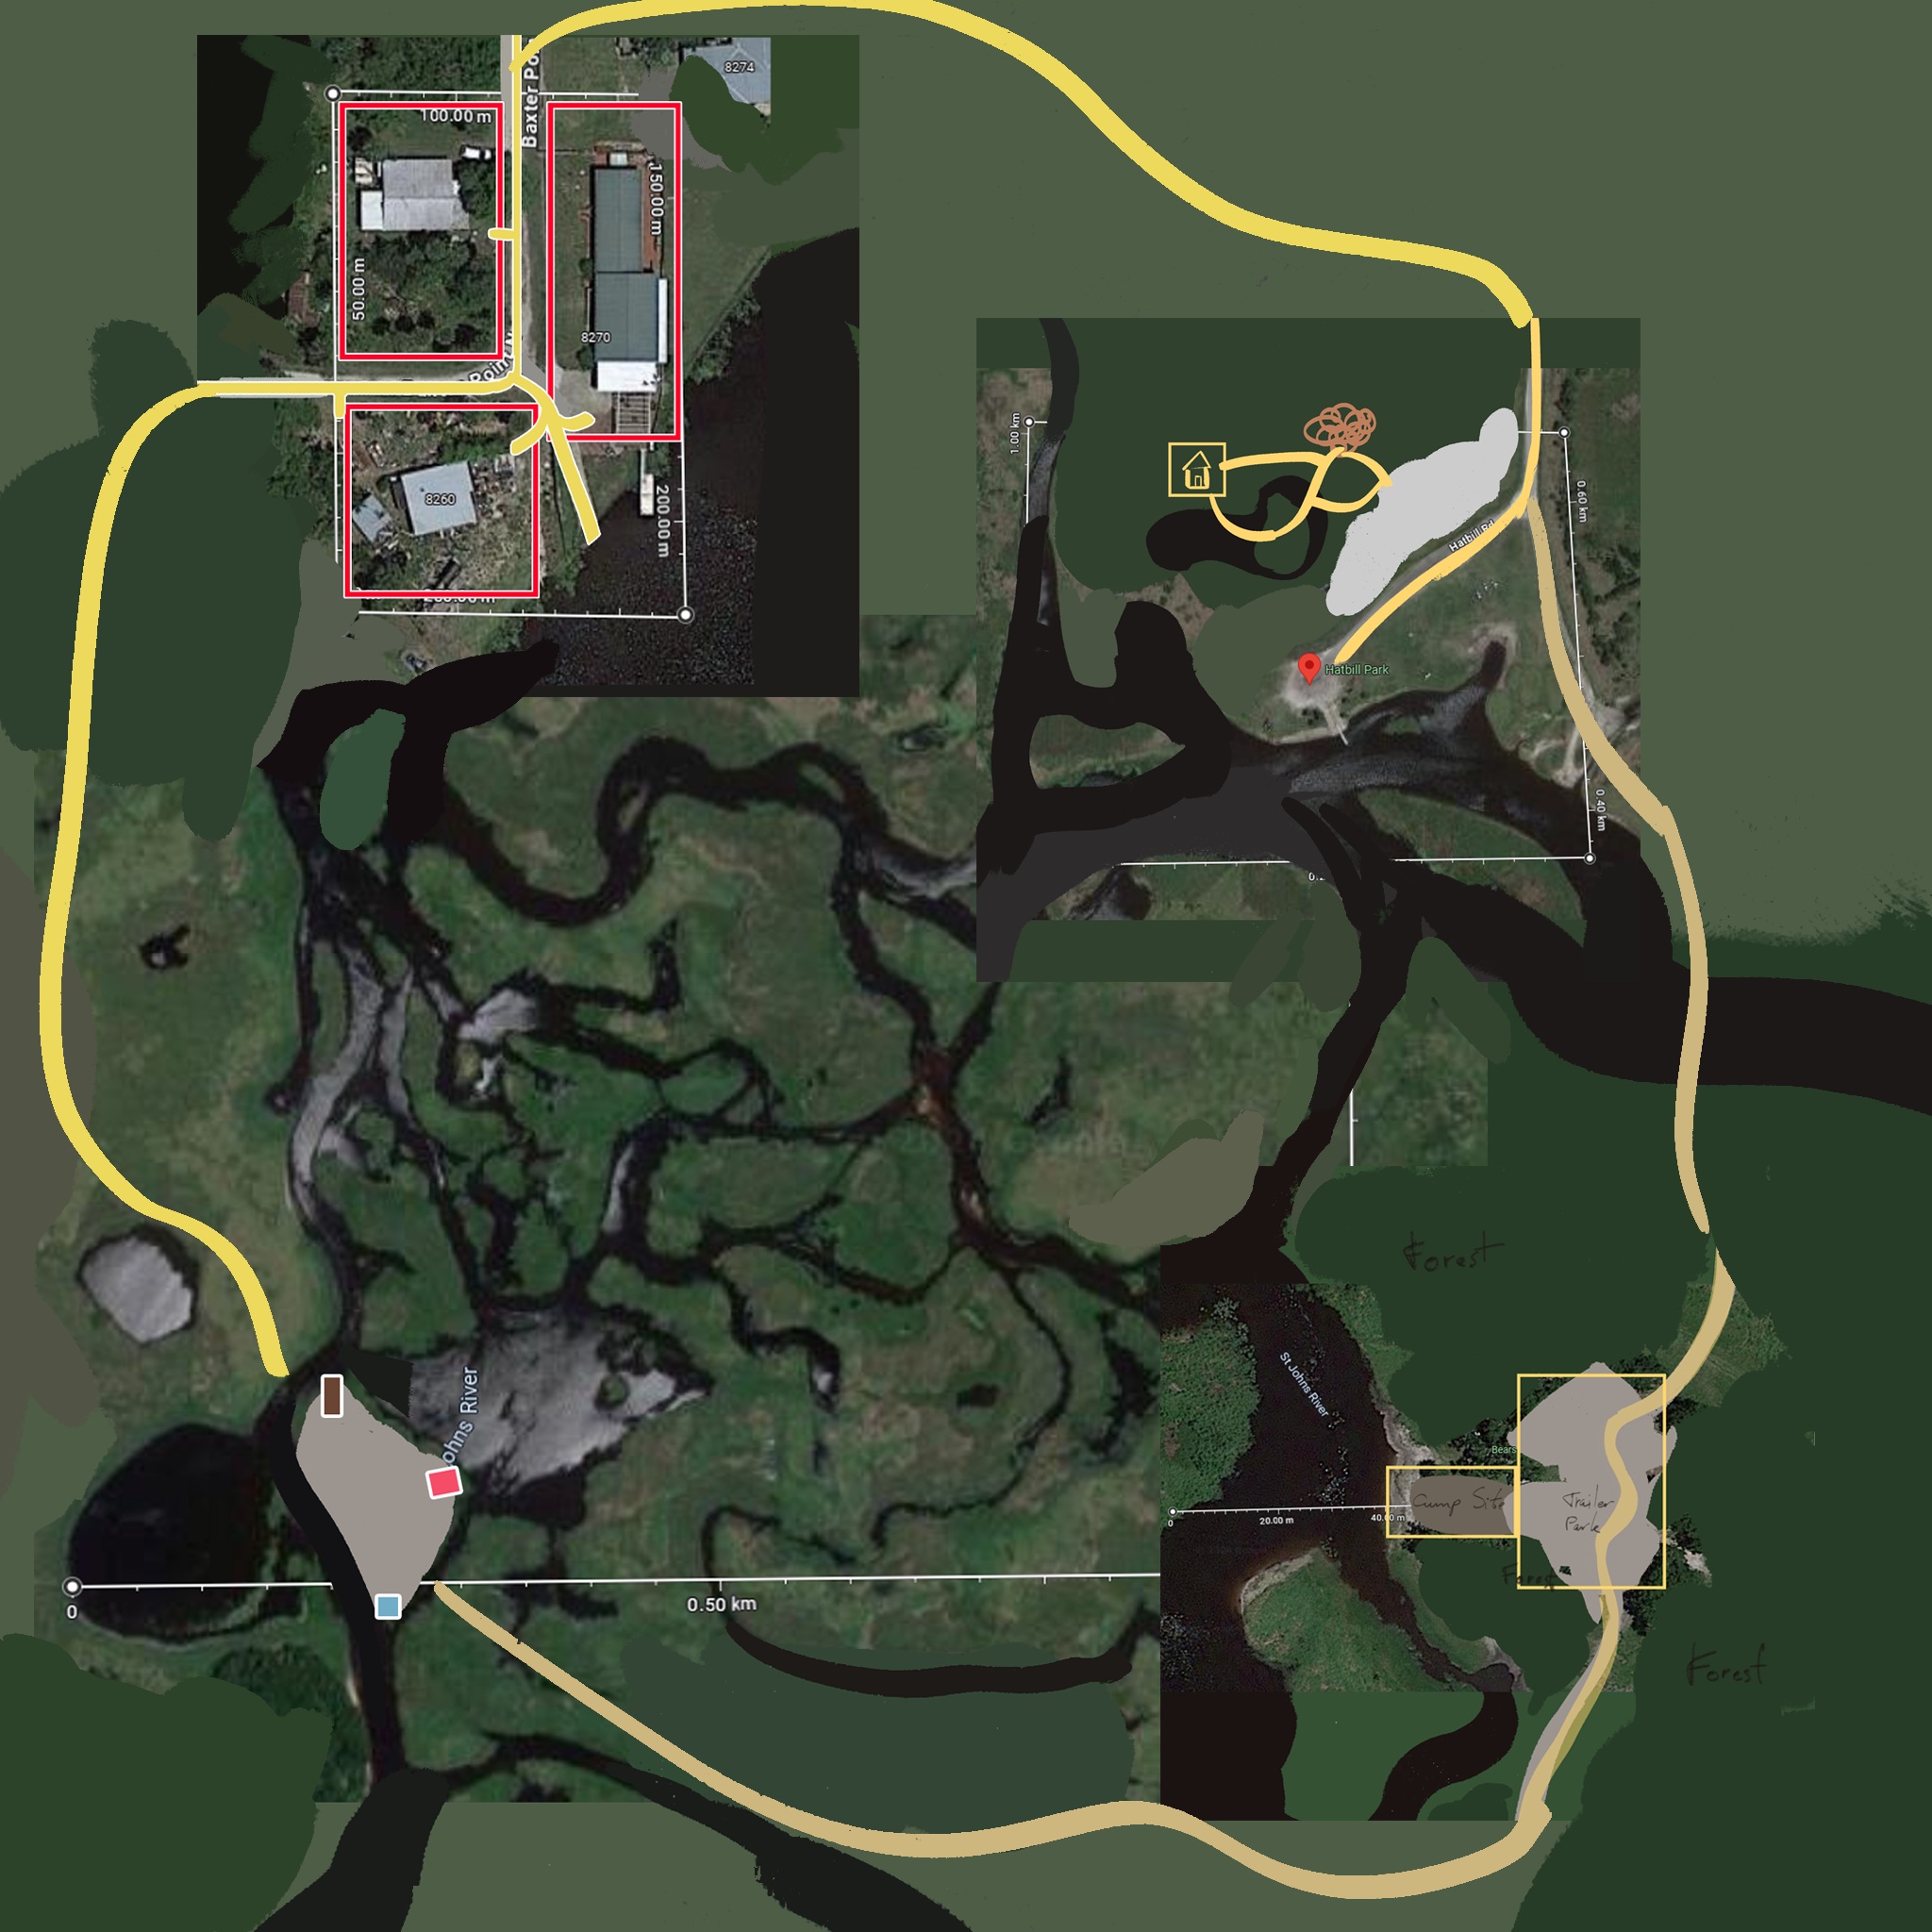
The workflow relied on importing the designer's image and transforming it into a semi-transparent material applied to a plane. This served as a tracing paper overlay, scaled to match the terrain at a 1:1 ratio. Unity's Terrain Tools asset pack was used for sculpting, smoothing, and refining the terrain. Vegetation was placed using Staggart Creations' Vegetation Spawner, while Terrain Painter by Staggart Creations was used to create detailed terrain texture layers. Grass was generated using Minions Art's Computer Shader grass tool as a baseline, with the bulk of the effort spent on ensuring a visually consistent environment.
Technical art and optimization
My work on Mortimer: First Launch involved extensive optimization and technical art responsibilities to ensure the game maintained a balance between visual fidelity and performance. I focused heavily on baking and refining occlusion culling maps, modifying Levels of Detail (LoDs) to achieve optimal rendering, and adjusting the number of vegetation items spawned in the scene to provide high-quality visuals without compromising performance. Additionally, I handled the implementation of all assets, verifying their proper integration into the game world, and reporting bugs to the QA Lead or respective team members when issues arose.


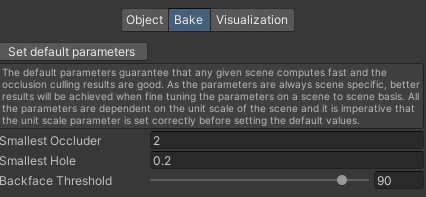
One major performance challenge occurred after vegetation was fully implemented on the completed terrain, causing significant FPS drops. To address this, I employed what I referred to as a triage based optimization strategy:
- Modified LoDs to balance rendering detail with performance.
- Reduced the number of vegetation instances in the terrain while maintaining visual consistency.
- Split the terrain into smaller chunks to be loaded on demand, reducing resource overhead.
- Divided parts of the game world into separate scenes to be loaded additively when needed, improving overall efficiency.
An additional issue arose in the Hatbill Park campground, where severe FPS drops occurred, even when viewed from a distance. After thorough investigation, I discovered that a 3D chain-link and barbed wire fence model created by our Art Lead was the cause. Disabling the barbed wire portion of the model resolved the issue, allowing me to deliver detailed bug reports and findings to the artist. Through collaboration, the model was reworked, and the problem was permanently resolved.
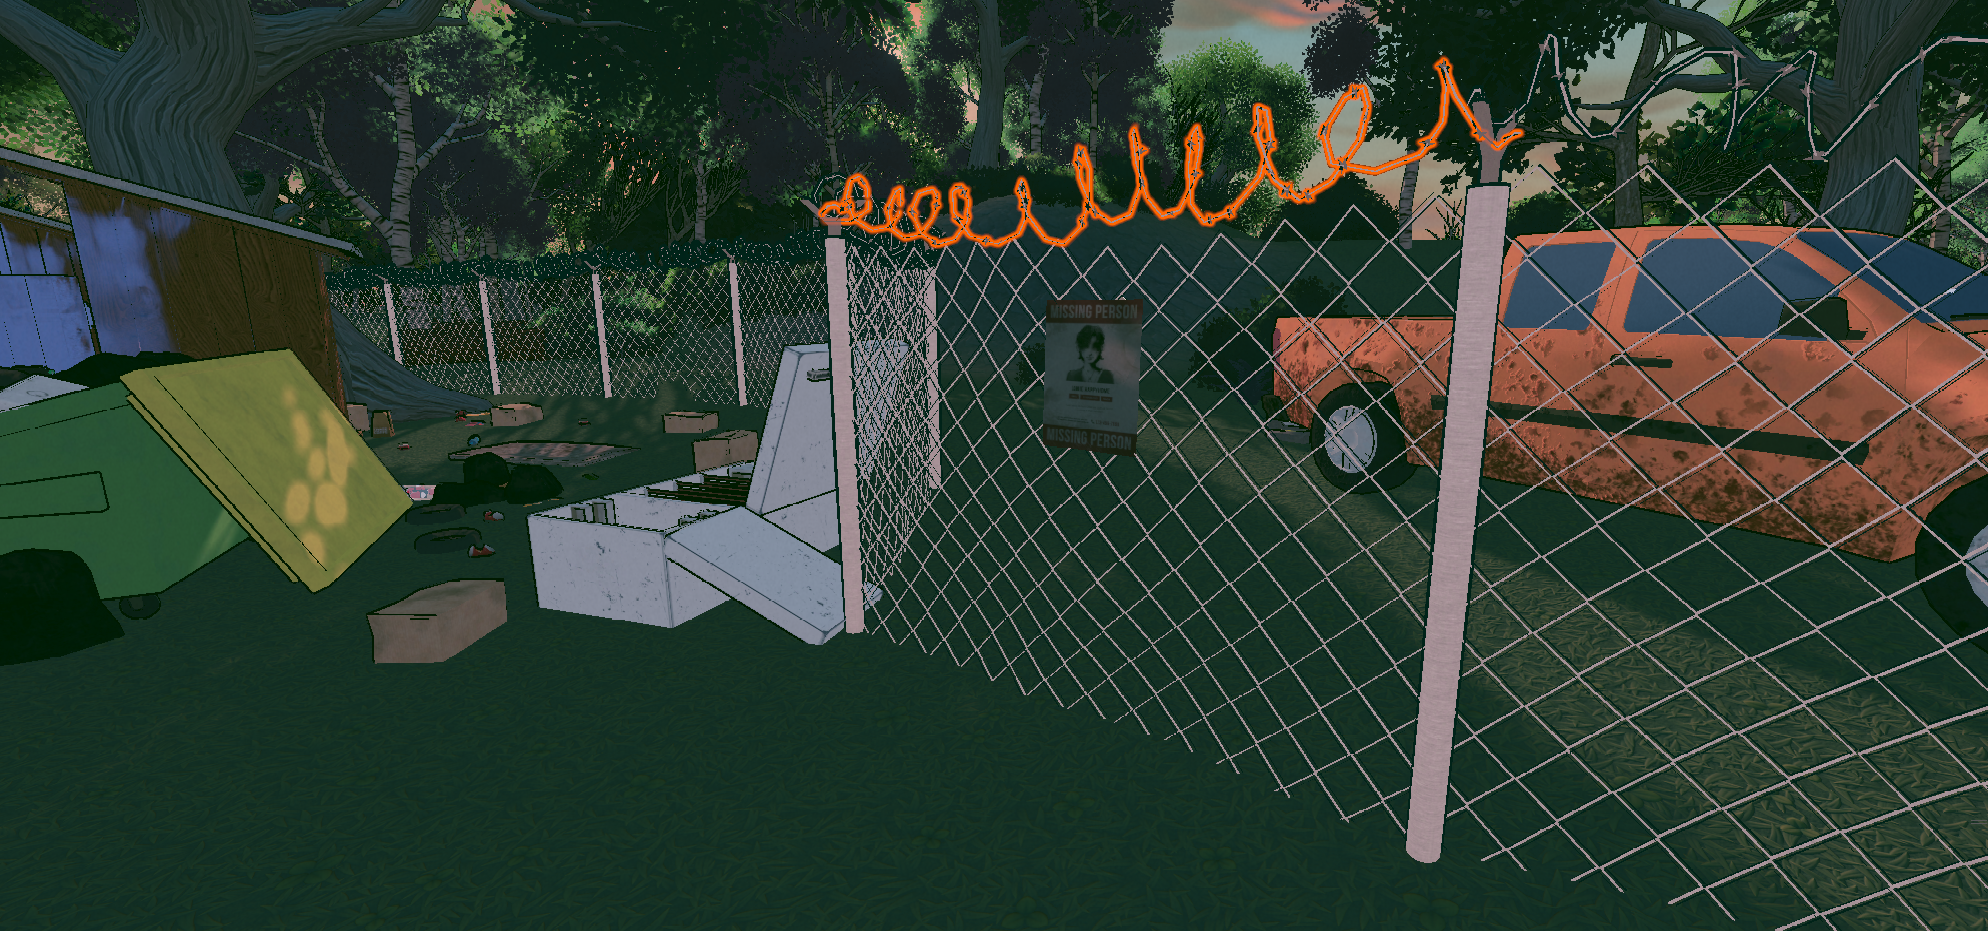
The fence model in question, with the problematic barbed wire section highlighted.
Harmony in the Wild
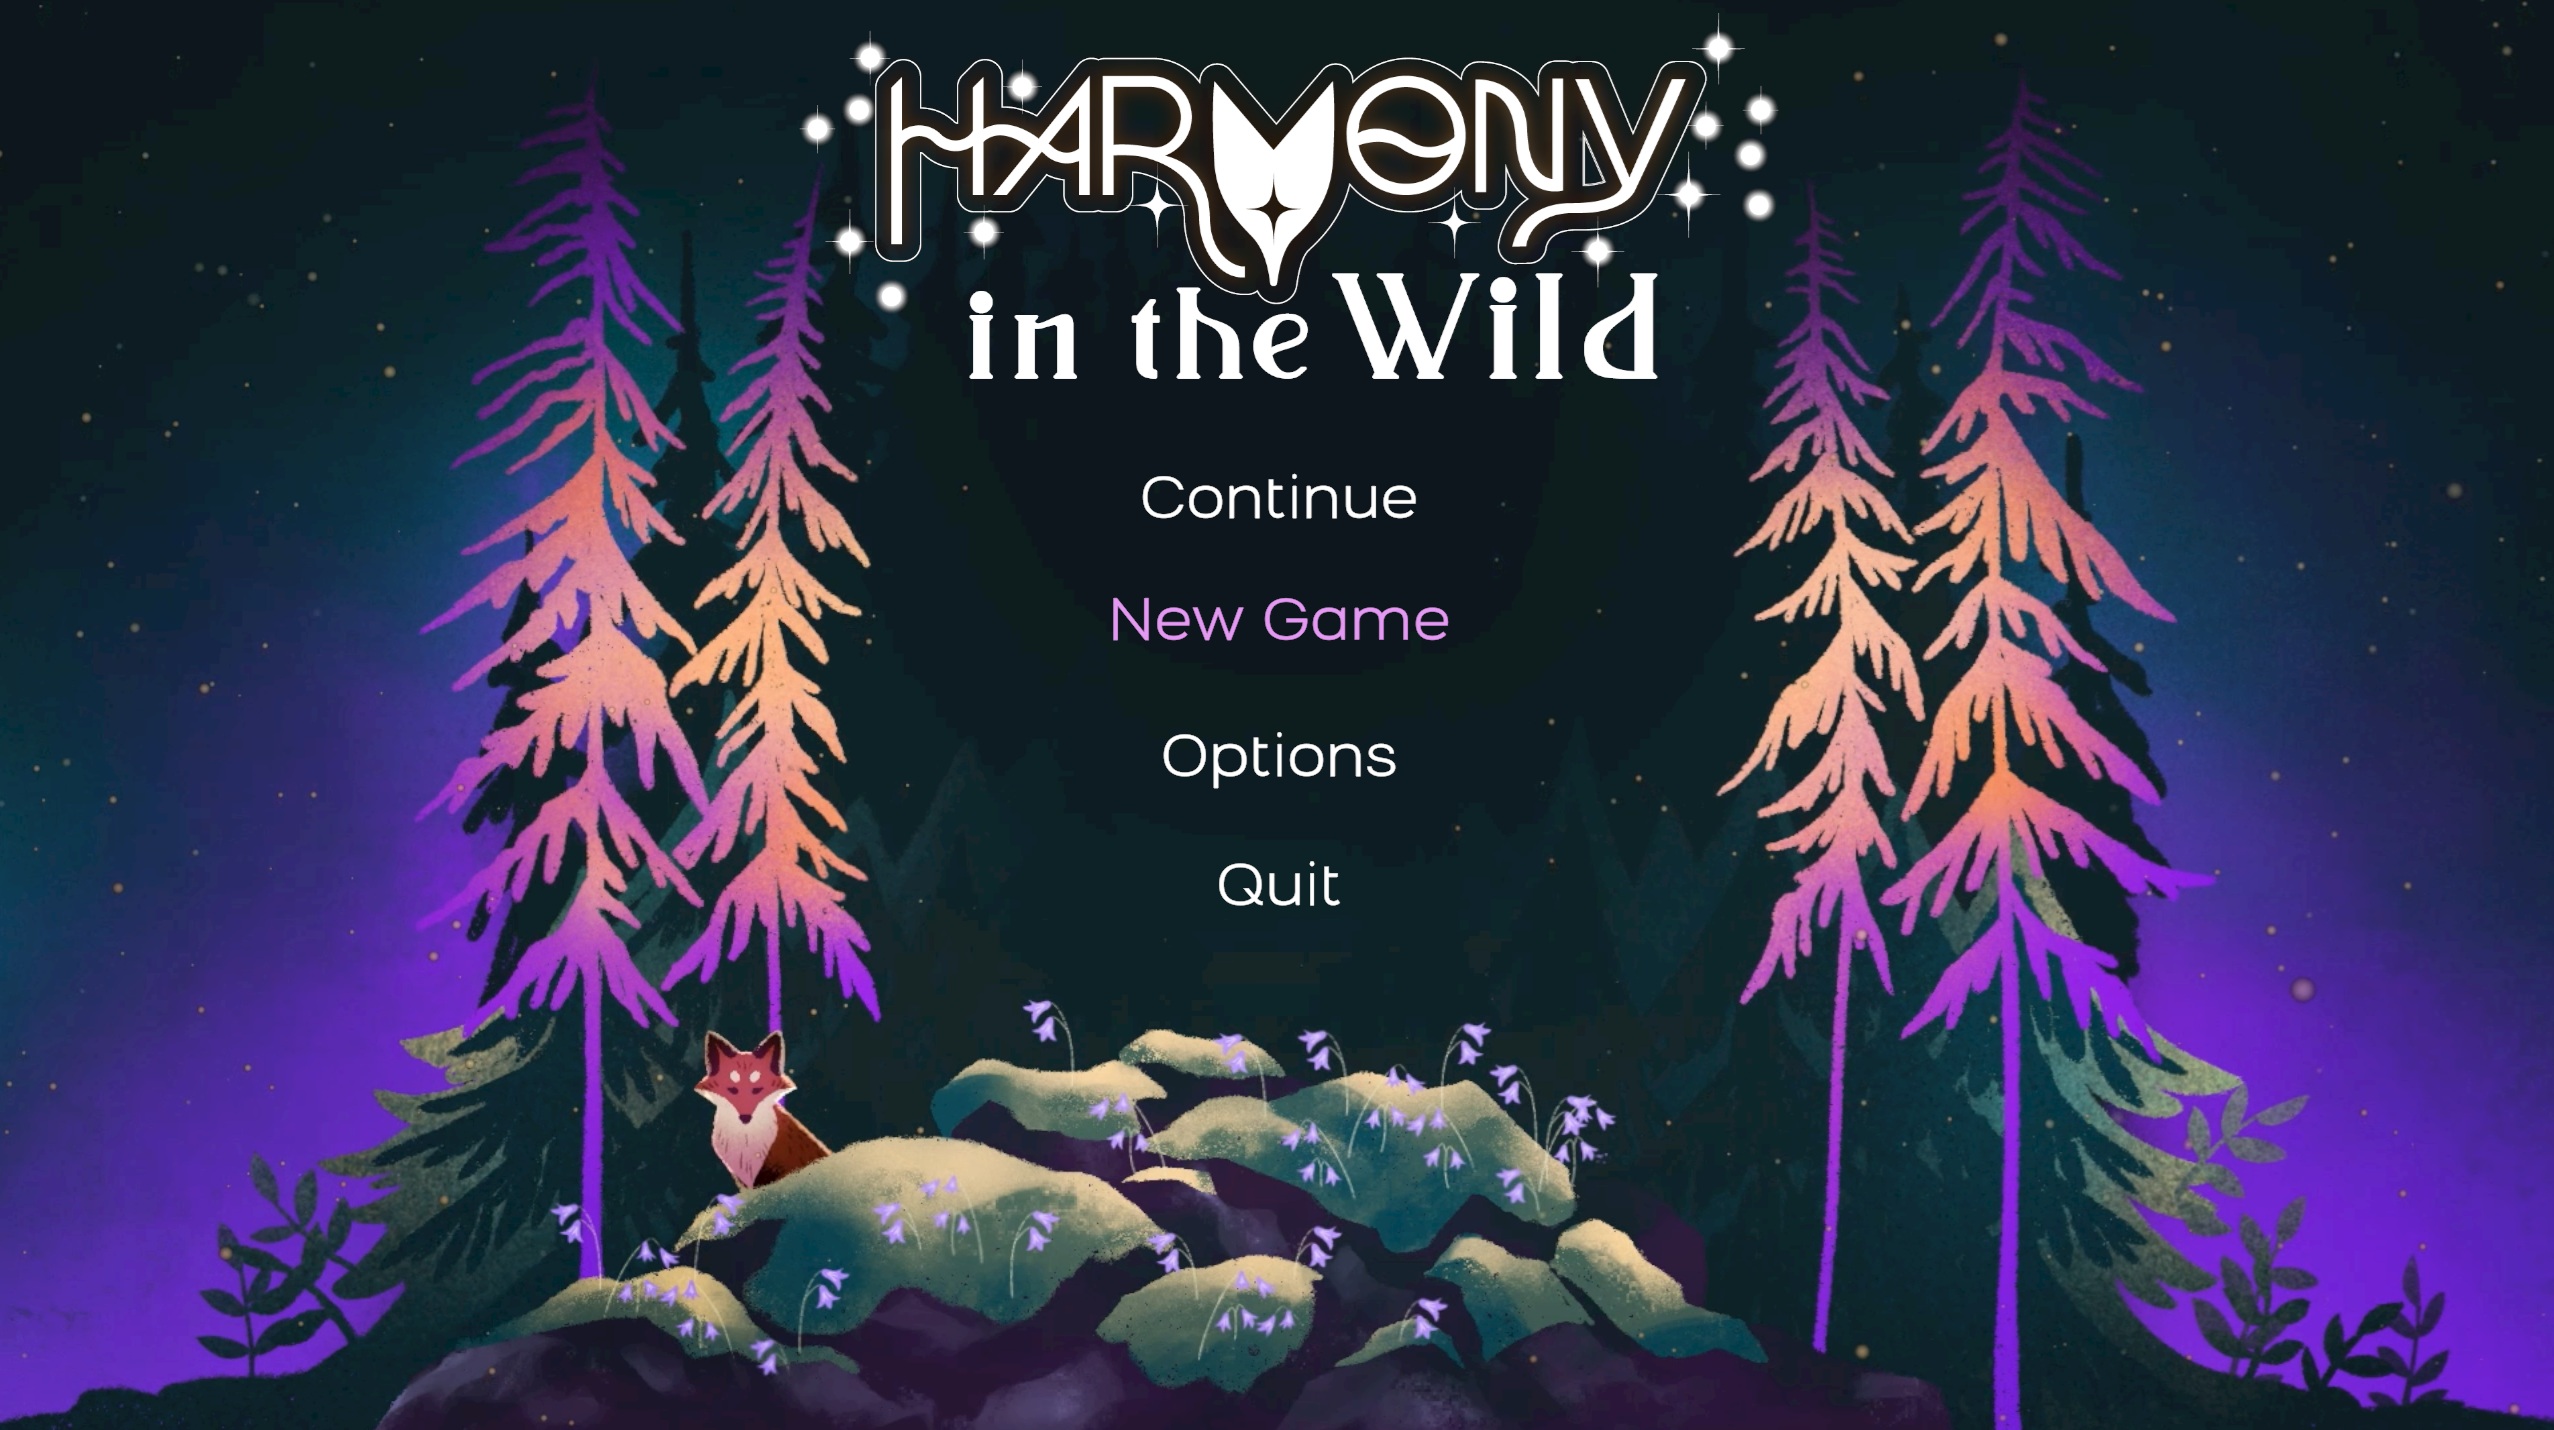
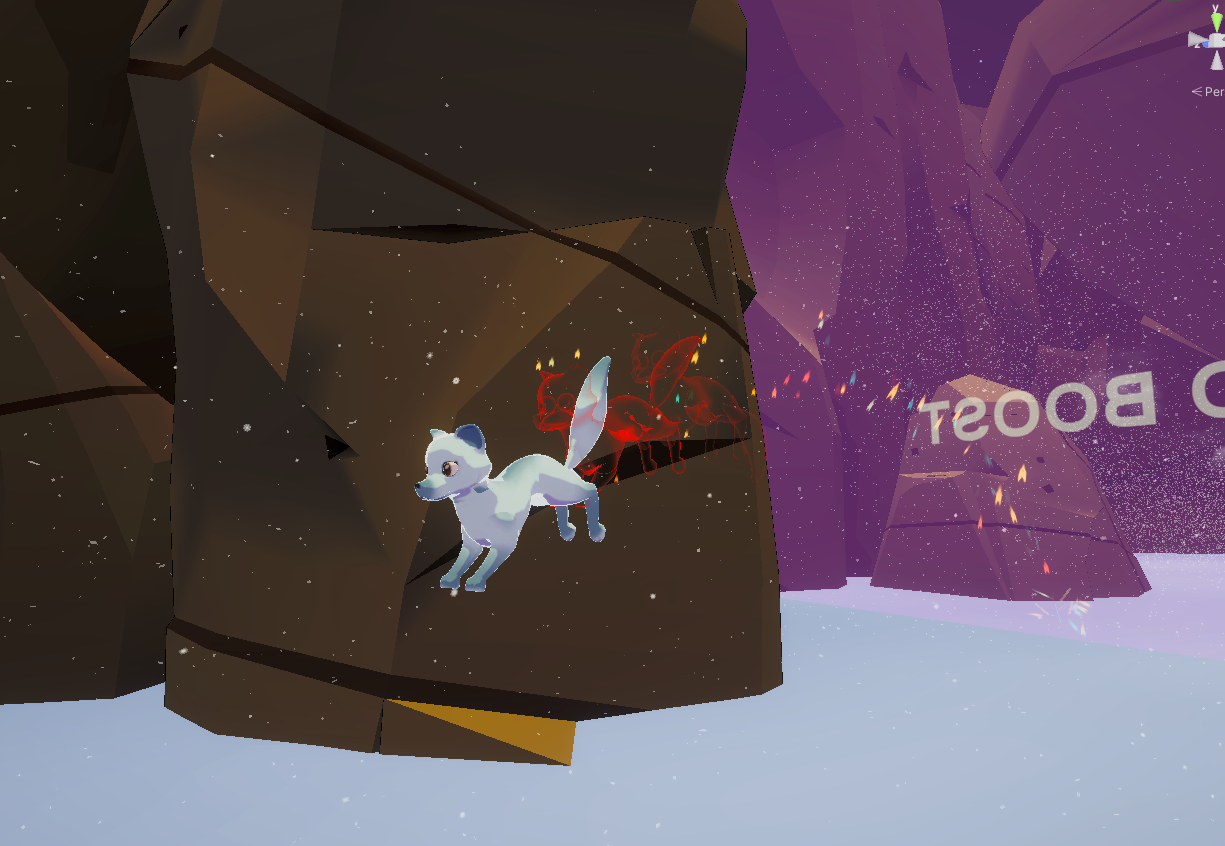
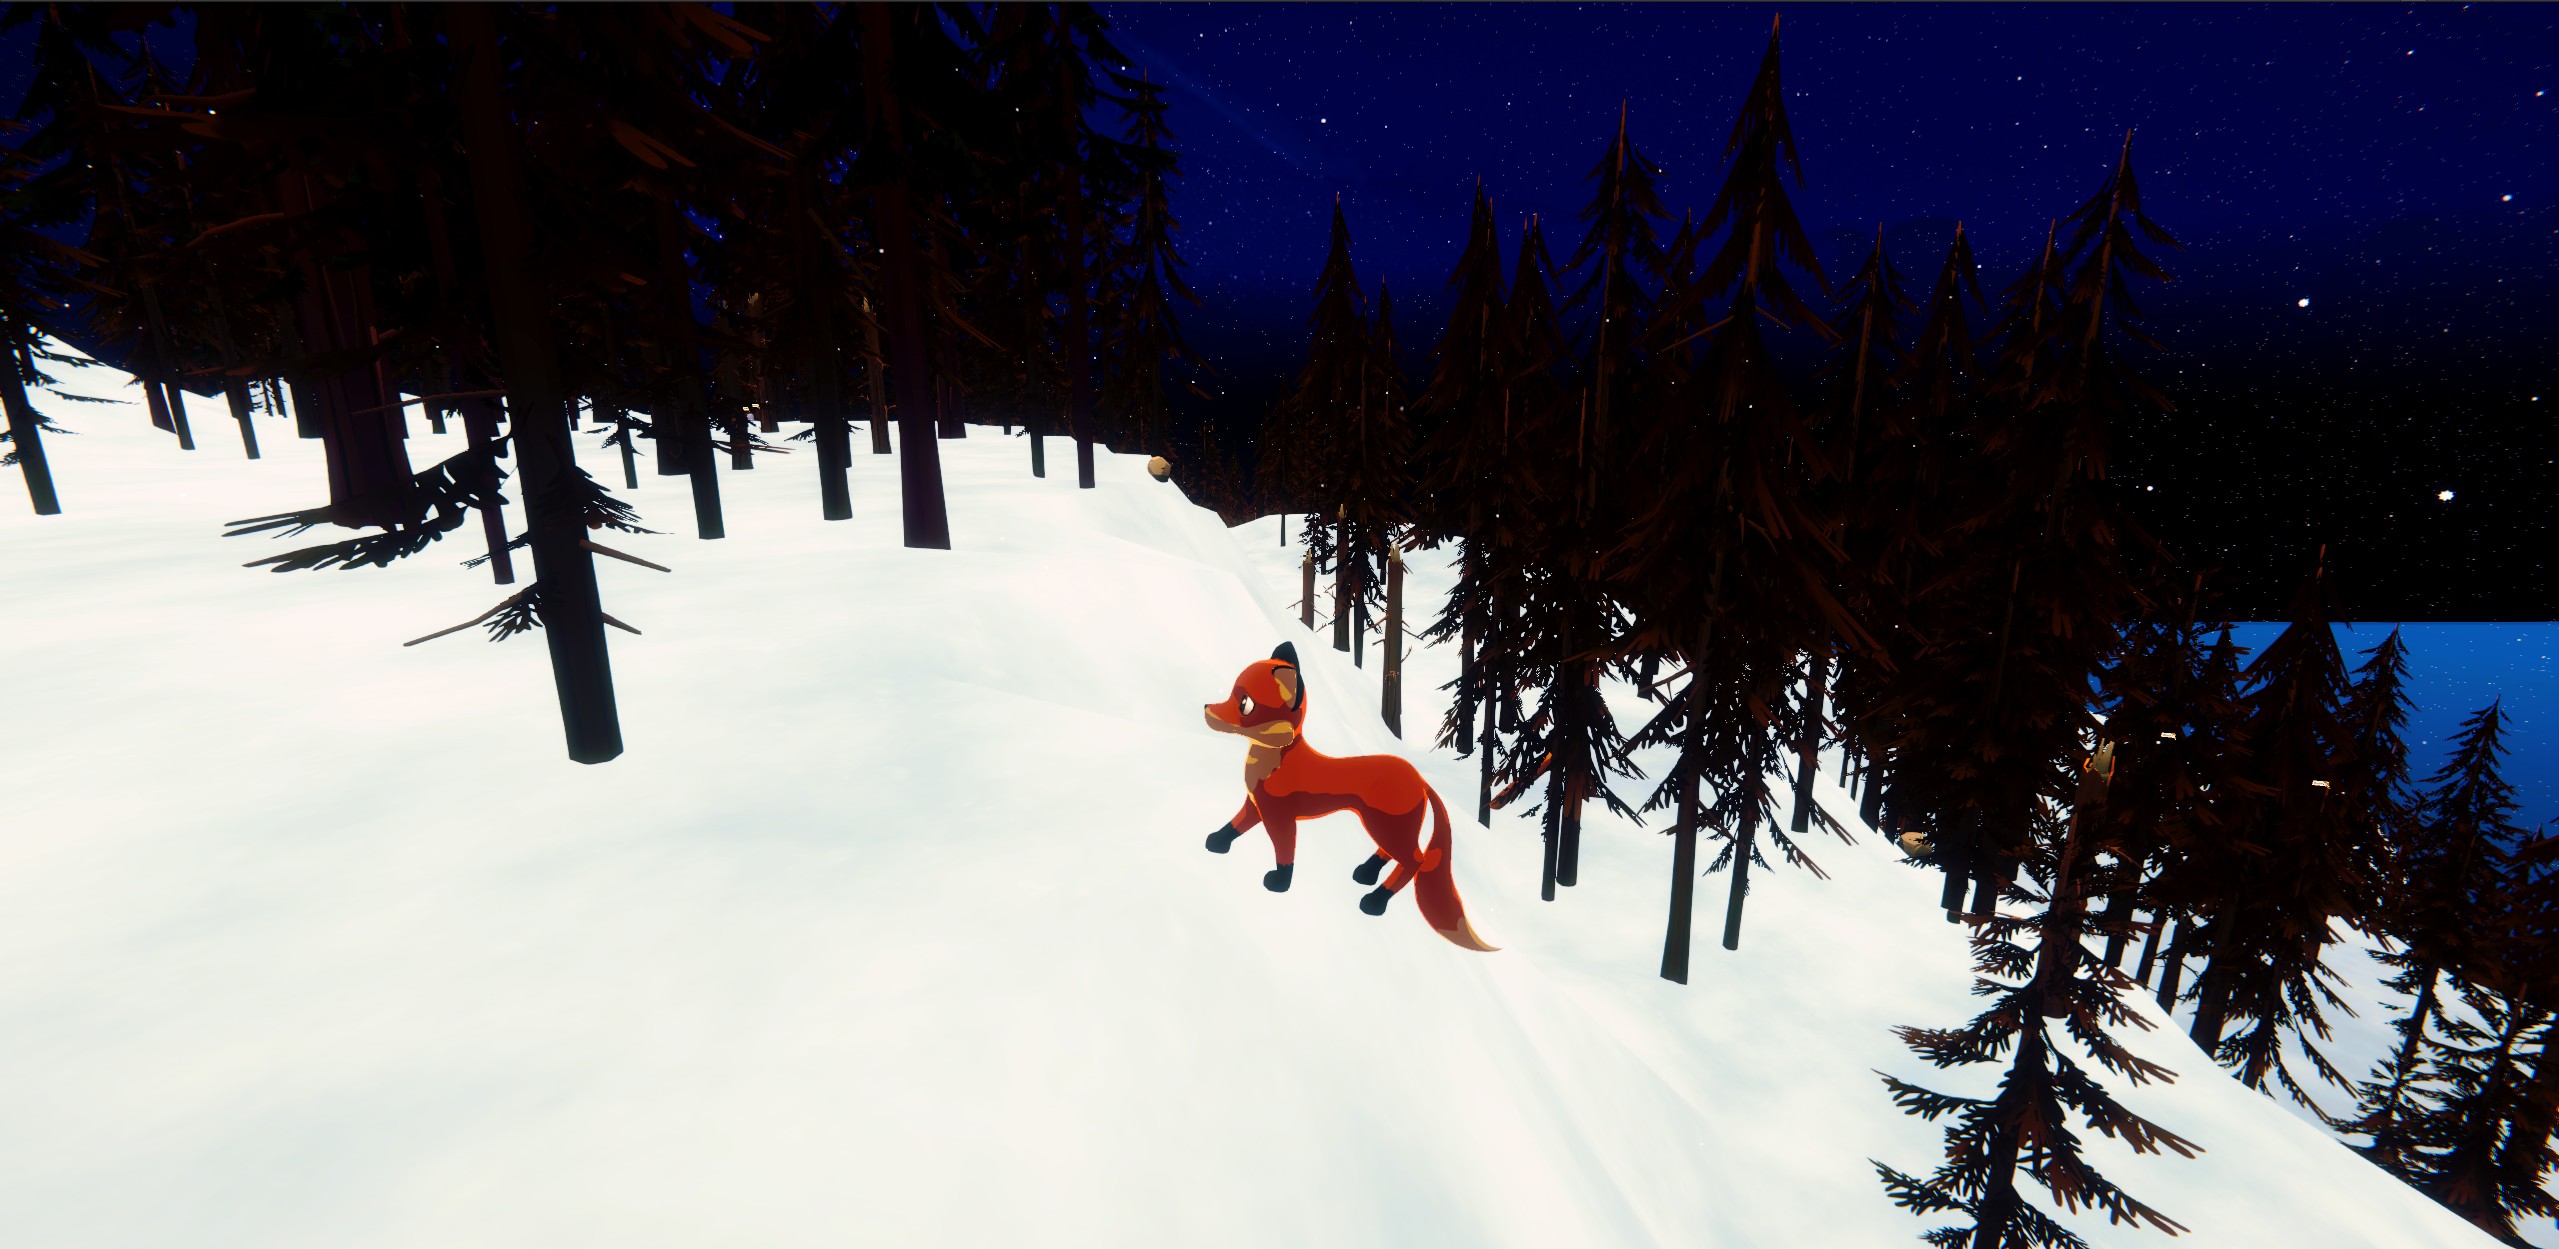
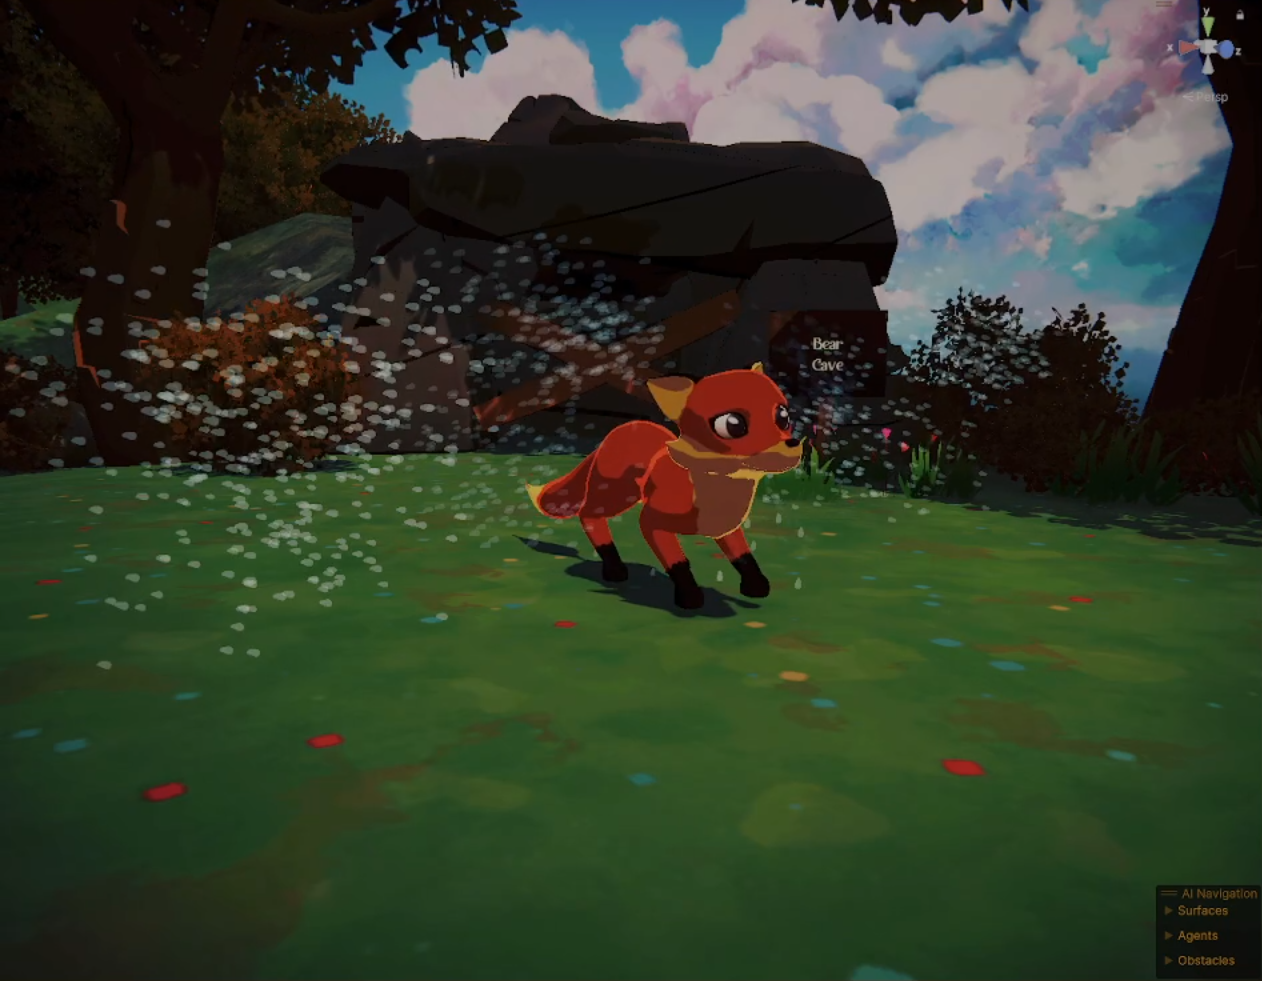
Harmony in the Wild is a 3D casual adventure game made in Unity 2022.3.17f1 using the Universal Rendering Pipeline as its base. In the game, users take control of a nameable fox on their quest to restore balance to nature on an island, and find out what happened to their parents following a mishap on the ocean. Throughout the game, users will encounter friendly animals which will train the fox in how to use special abilities that will help users achieve their goals, complete puzzles, and gain what they need to restore the Tree of Life. The game was made to be approachable for people of all ages, and in testing has found that younger users in particular are drawn to the game's aesthetics and gameplay patterns. The core game loop involves exploring the island, finding a quest, completing a task or solving a puzzle, and receiving a reward or ability for the user's efforts.
The adage "Many hands make light work" may ring true for the development of Harmony in the Wild. While the core team started out small (around 5 developers who were students at the time), there have been many volunteers offering to help with the project throughout its development. I began as one of those volunteers, looking for somewhere that I could sink my teeth into my budding interest in Visual Effects creation, as well as continue polishing my Technical Art abilities. While some volunteers have left after their allotted time, myself and others have remained - in no small part due to the motivation, organizational skills, and kindness of the core development team. When the time came to discuss forming a company around the game, I took part in these discussions and eventually helped fund their startup costs in support of helping them achieve their goals of making Harmony become a reality. Throughout development I have mainly been involved as a VFX Artist, and while I took a five month sabbatical to focus on my own studies and projects (See: Mortimer: First Launch), I returned in January of 2025 to touch up the work I had previously done, and continue adding visual depth and responsiveness to the world through Visual Effects.
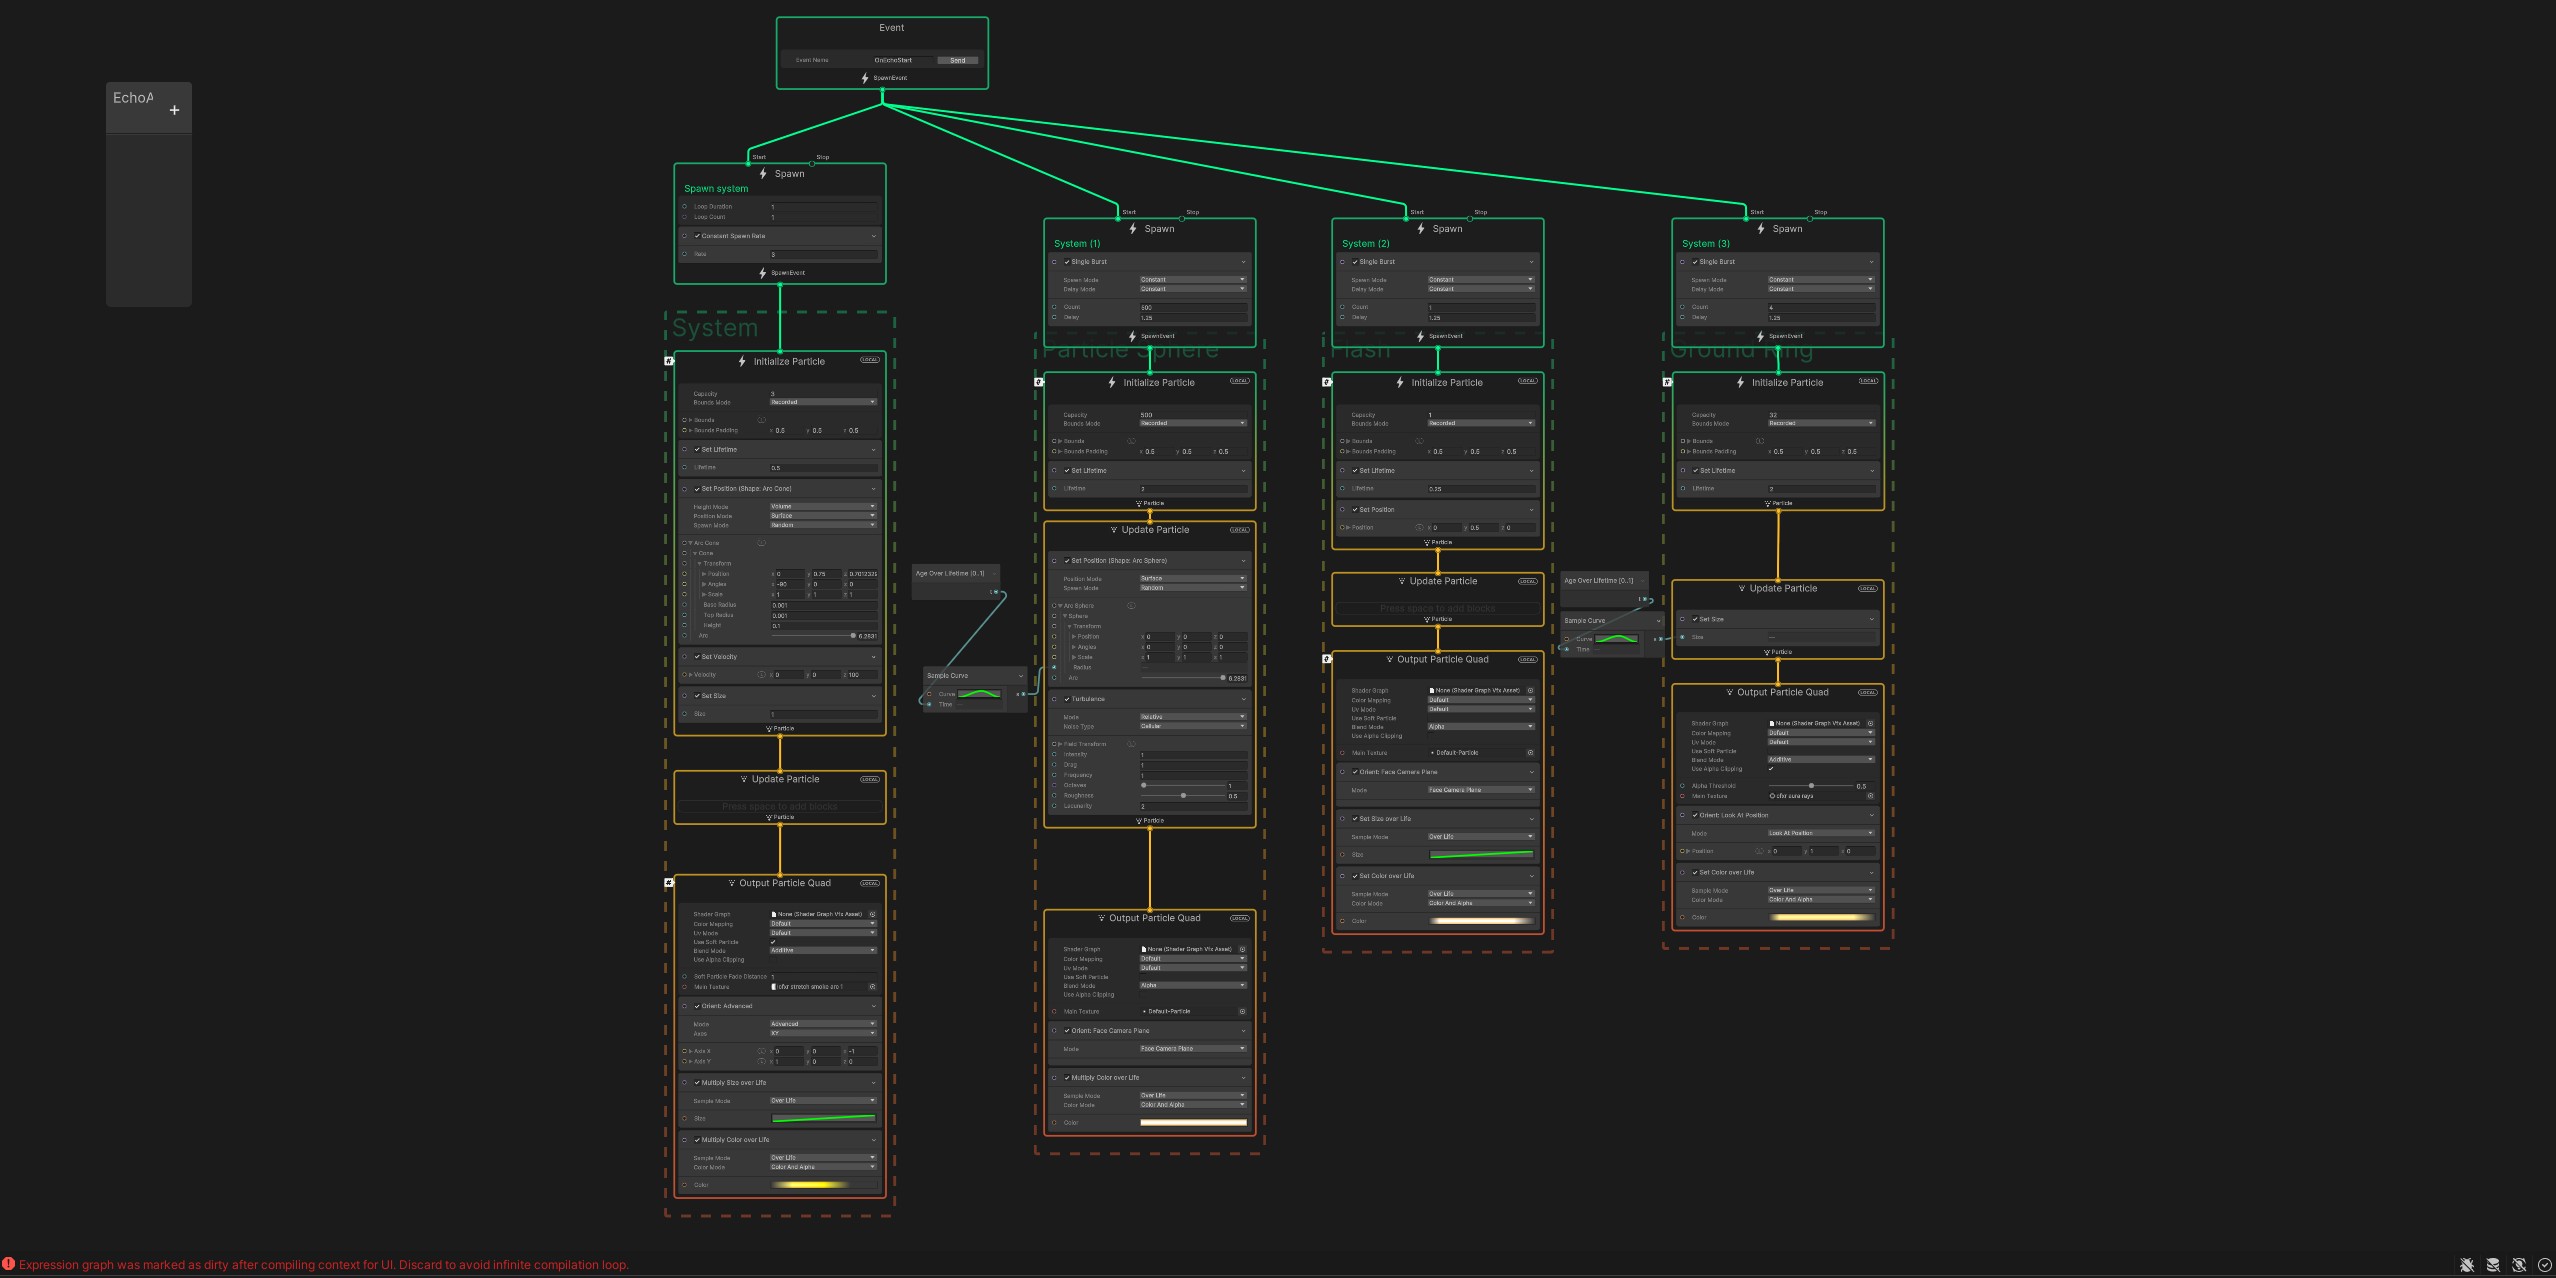
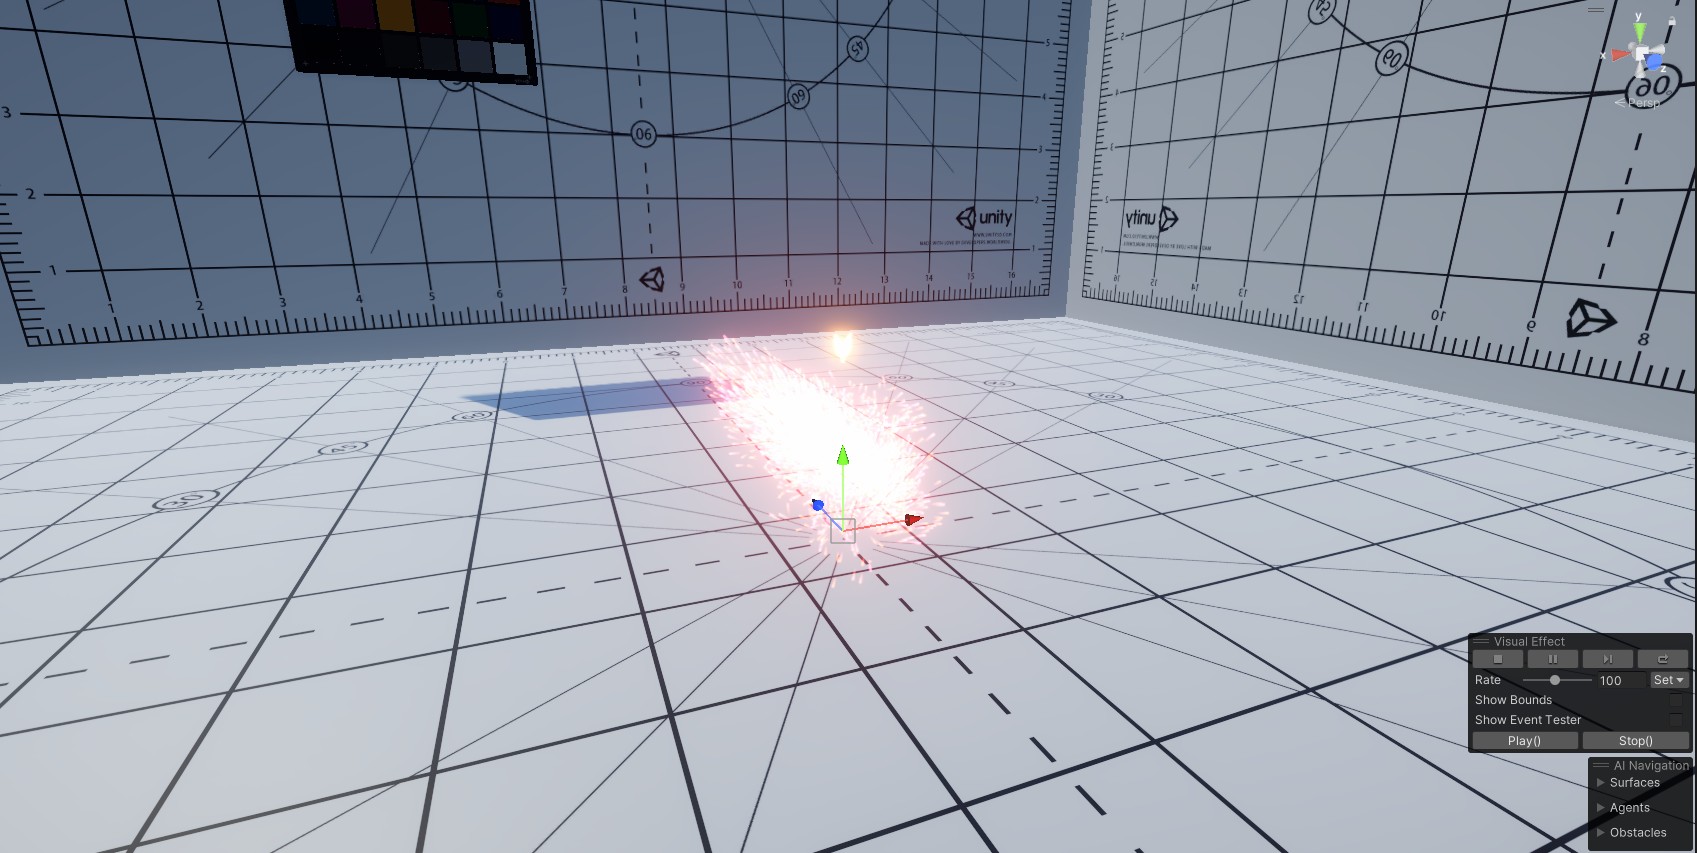
Ability Visual Effects
Lorem ipsum dolor sit amet, consectetur adipiscing elit. Suspendisse varius enim in eros elementum tristique. Duis cursus, mi quis viverra ornare, eros dolor interdum nulla, ut commodo diam libero vitae erat. Aenean faucibus nibh et justo cursus id rutrum lorem imperdiet. Nunc ut sem vitae risus tristique posuere.
Lorem ipsum dolor sit amet, consectetur adipiscing elit. Suspendisse varius enim in eros elementum tristique. Duis cursus, mi quis viverra ornare, eros dolor interdum nulla, ut commodo diam libero vitae erat. Aenean faucibus nibh et justo cursus id rutrum lorem imperdiet. Nunc ut sem vitae risus tristique posuere.
Lorem ipsum dolor sit amet, consectetur adipiscing elit. Suspendisse varius enim in eros elementum tristique. Duis cursus, mi quis viverra ornare, eros dolor interdum nulla, ut commodo diam libero vitae erat. Aenean faucibus nibh et justo cursus id rutrum lorem imperdiet. Nunc ut sem vitae risus tristique posuere.
Lorem ipsum dolor sit amet, consectetur adipiscing elit. Suspendisse varius enim in eros elementum tristique. Duis cursus, mi quis viverra ornare, eros dolor interdum nulla, ut commodo diam libero vitae erat. Aenean faucibus nibh et justo cursus id rutrum lorem imperdiet. Nunc ut sem vitae risus tristique posuere.
Lorem ipsum dolor sit amet, consectetur adipiscing elit. Suspendisse varius enim in eros elementum tristique. Duis cursus, mi quis viverra ornare, eros dolor interdum nulla, ut commodo diam libero vitae erat. Aenean faucibus nibh et justo cursus id rutrum lorem imperdiet. Nunc ut sem vitae risus tristique posuere.
Lorem ipsum dolor sit amet, consectetur adipiscing elit. Suspendisse varius enim in eros elementum tristique. Duis cursus, mi quis viverra ornare, eros dolor interdum nulla, ut commodo diam libero vitae erat. Aenean faucibus nibh et justo cursus id rutrum lorem imperdiet. Nunc ut sem vitae risus tristique posuere.
Lorem ipsum dolor sit amet, consectetur adipiscing elit. Suspendisse varius enim in eros elementum tristique. Duis cursus, mi quis viverra ornare, eros dolor interdum nulla, ut commodo diam libero vitae erat. Aenean faucibus nibh et justo cursus id rutrum lorem imperdiet. Nunc ut sem vitae risus tristique posuere.
Lorem ipsum dolor sit amet, consectetur adipiscing elit. Suspendisse varius enim in eros elementum tristique. Duis cursus, mi quis viverra ornare, eros dolor interdum nulla, ut commodo diam libero vitae erat. Aenean faucibus nibh et justo cursus id rutrum lorem imperdiet. Nunc ut sem vitae risus tristique posuere.
Lorem ipsum dolor sit amet, consectetur adipiscing elit. Suspendisse varius enim in eros elementum tristique. Duis cursus, mi quis viverra ornare, eros dolor interdum nulla, ut commodo diam libero vitae erat. Aenean faucibus nibh et justo cursus id rutrum lorem imperdiet. Nunc ut sem vitae risus tristique posuere.
Lorem ipsum dolor sit amet, consectetur adipiscing elit. Suspendisse varius enim in eros elementum tristique. Duis cursus, mi quis viverra ornare, eros dolor interdum nulla, ut commodo diam libero vitae erat. Aenean faucibus nibh et justo cursus id rutrum lorem imperdiet. Nunc ut sem vitae risus tristique posuere.
Lorem ipsum dolor sit amet, consectetur adipiscing elit. Suspendisse varius enim in eros elementum tristique. Duis cursus, mi quis viverra ornare, eros dolor interdum nulla, ut commodo diam libero vitae erat. Aenean faucibus nibh et justo cursus id rutrum lorem imperdiet. Nunc ut sem vitae risus tristique posuere.
using System;
using System.Collections;
using UnityEngine;
using UnityEngine.VFX;
public class Speedboost : MonoBehaviour
{
[Header("Config")]
[SerializeField] private float speedIncrease;
[SerializeField] private float boostVFXDuration = 5f;
[SerializeField] AudioSource speedBoostAudio;
[Header("VFX")]
[SerializeField] private VisualEffect speedBoostVFX;
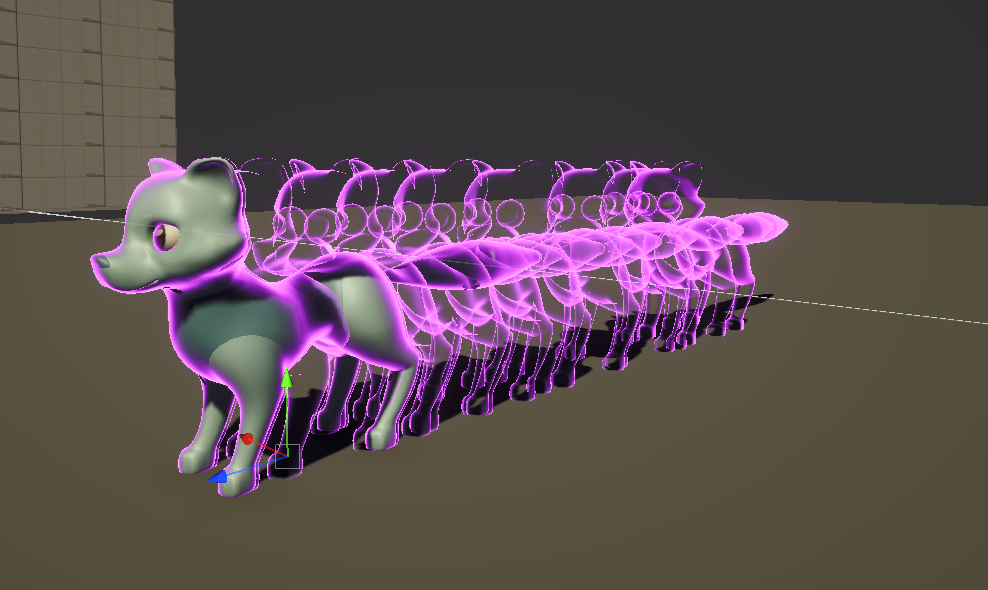
[SerializeField] internal MeshTrail meshTrail;
// Event IDs for the VFX graph events, because we can't directly reference them.
private int onEnableSpeedBoostID;
private int onDisableSpeedBoostID;
private void Awake()
{
// Get the property IDs for the VFX events as defined in the VFX graph event nodes and set them to the corresponding variables.
onEnableSpeedBoostID = Shader.PropertyToID("OnSpeedBoostStart");
onDisableSpeedBoostID = Shader.PropertyToID("OnSpeedBoostStop");
}
public void IncreasePlayerSpeed(GameObject player)
{
//speedBoostAudio.Play();
player.GetComponent<FoxMovement>().moveSpeed += speedIncrease;
StartCoroutine(SpeedBoostVFXCoroutine(player));
meshTrail.ActivateTrail();
}
private IEnumerator SpeedBoostVFXCoroutine(GameObject player)
{
if (speedBoostVFX != null)
{
Debug.Log("VFX Component found");
// Trigger the speed boost start VFX using the event ID we created earlier.
speedBoostVFX.SendEvent(onEnableSpeedBoostID);
// Wait for the duration of the VFX before stopping it.
yield return new WaitForSeconds(boostVFXDuration);
// Trigger the speed boost stop VFX using the event ID we created earlier.
speedBoostVFX.SendEvent(onDisableSpeedBoostID);
}
}
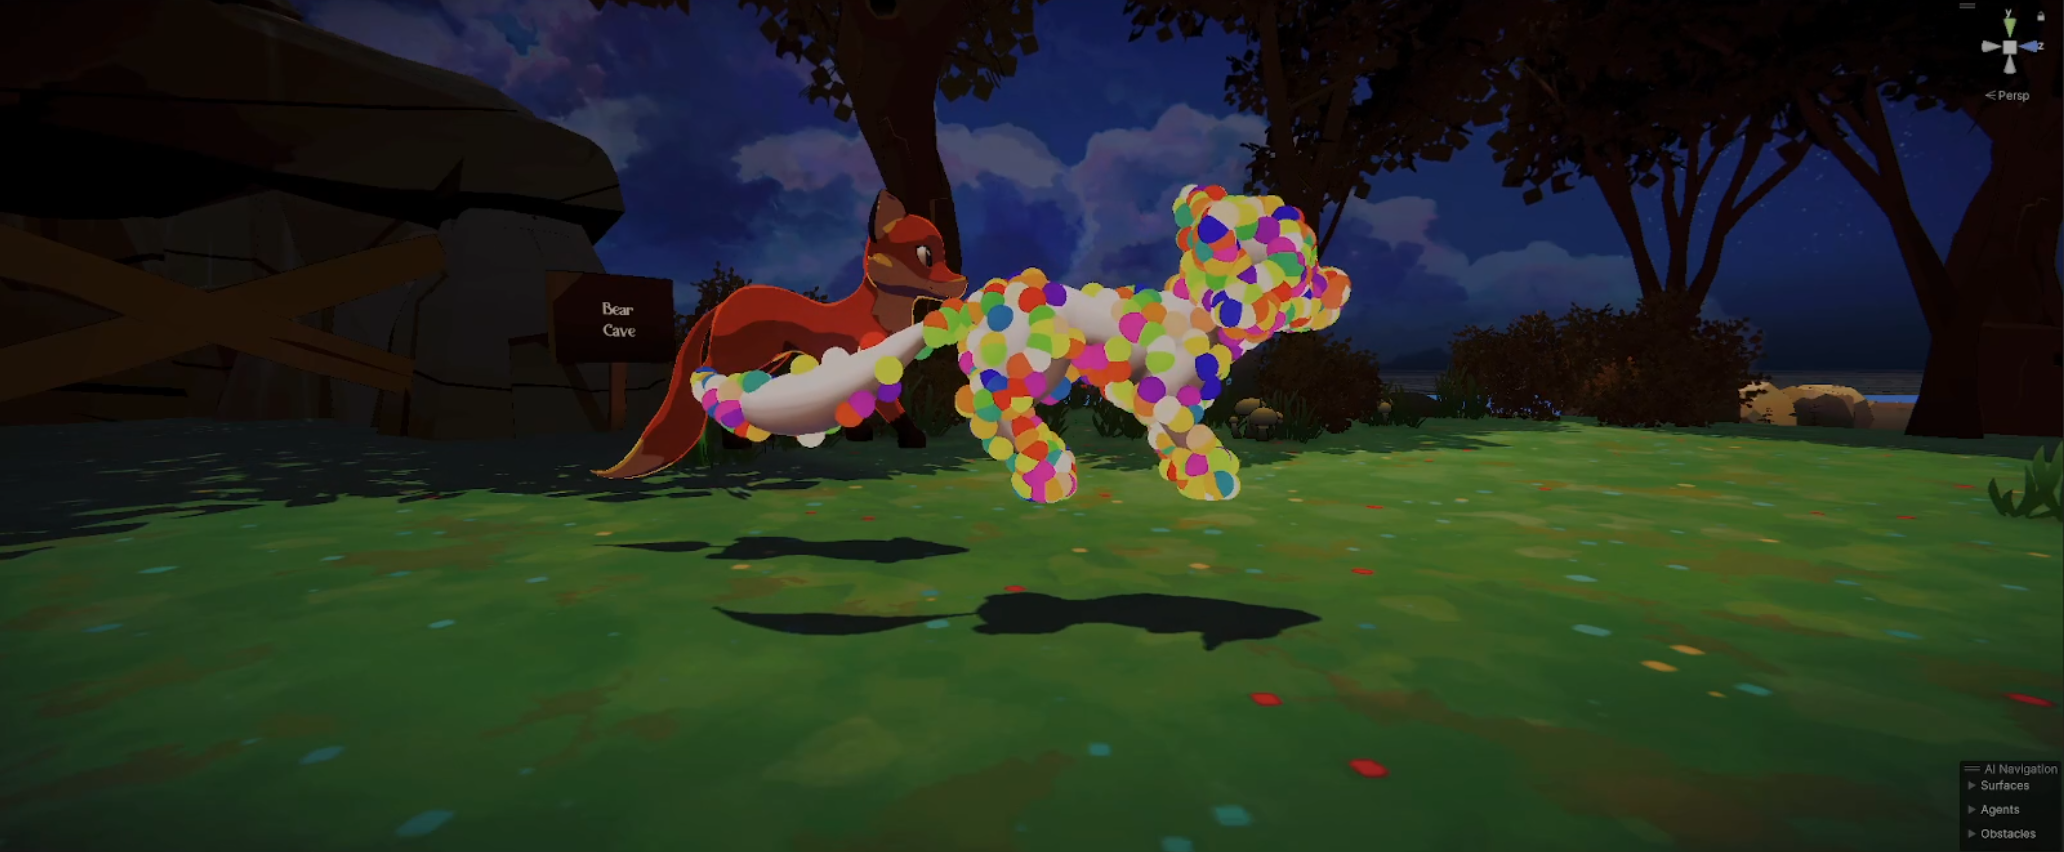
}Environmental Visual Effects
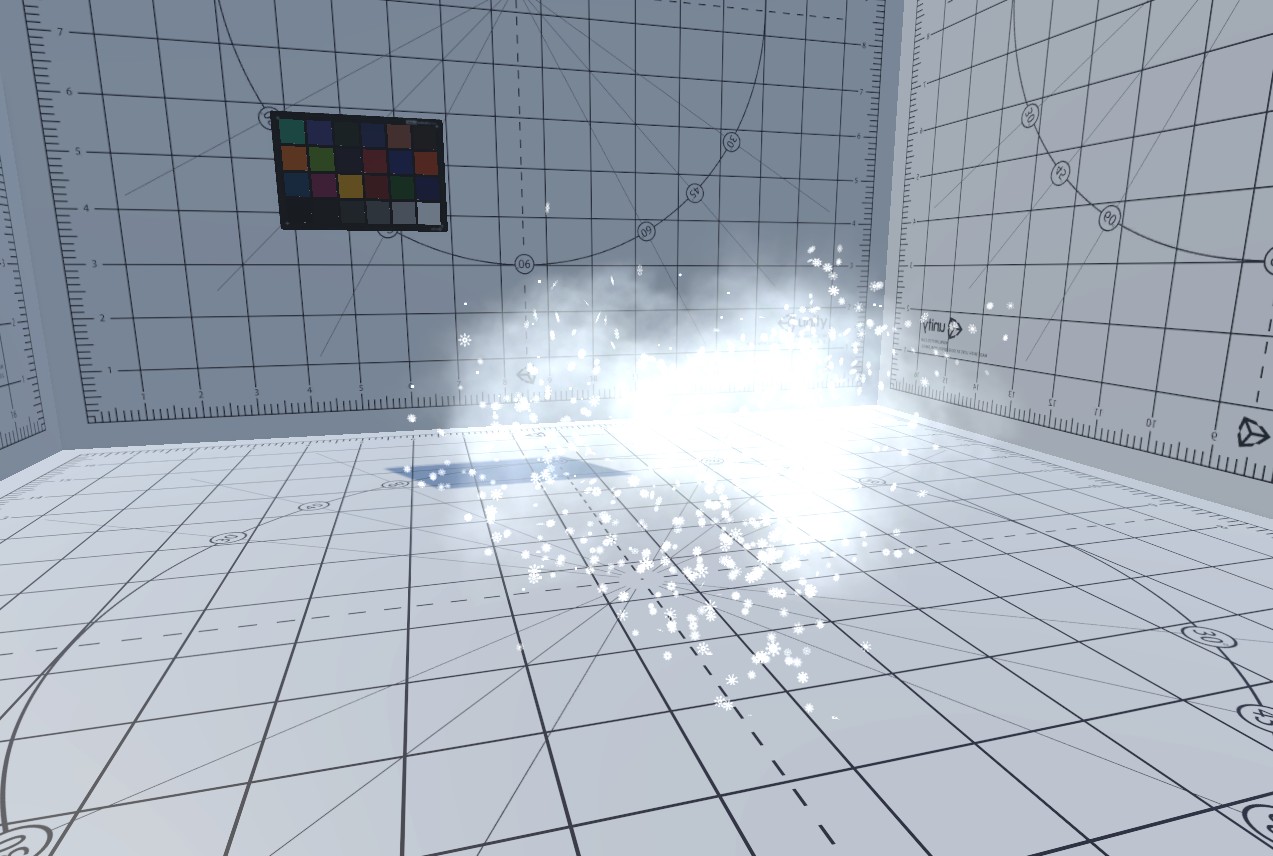
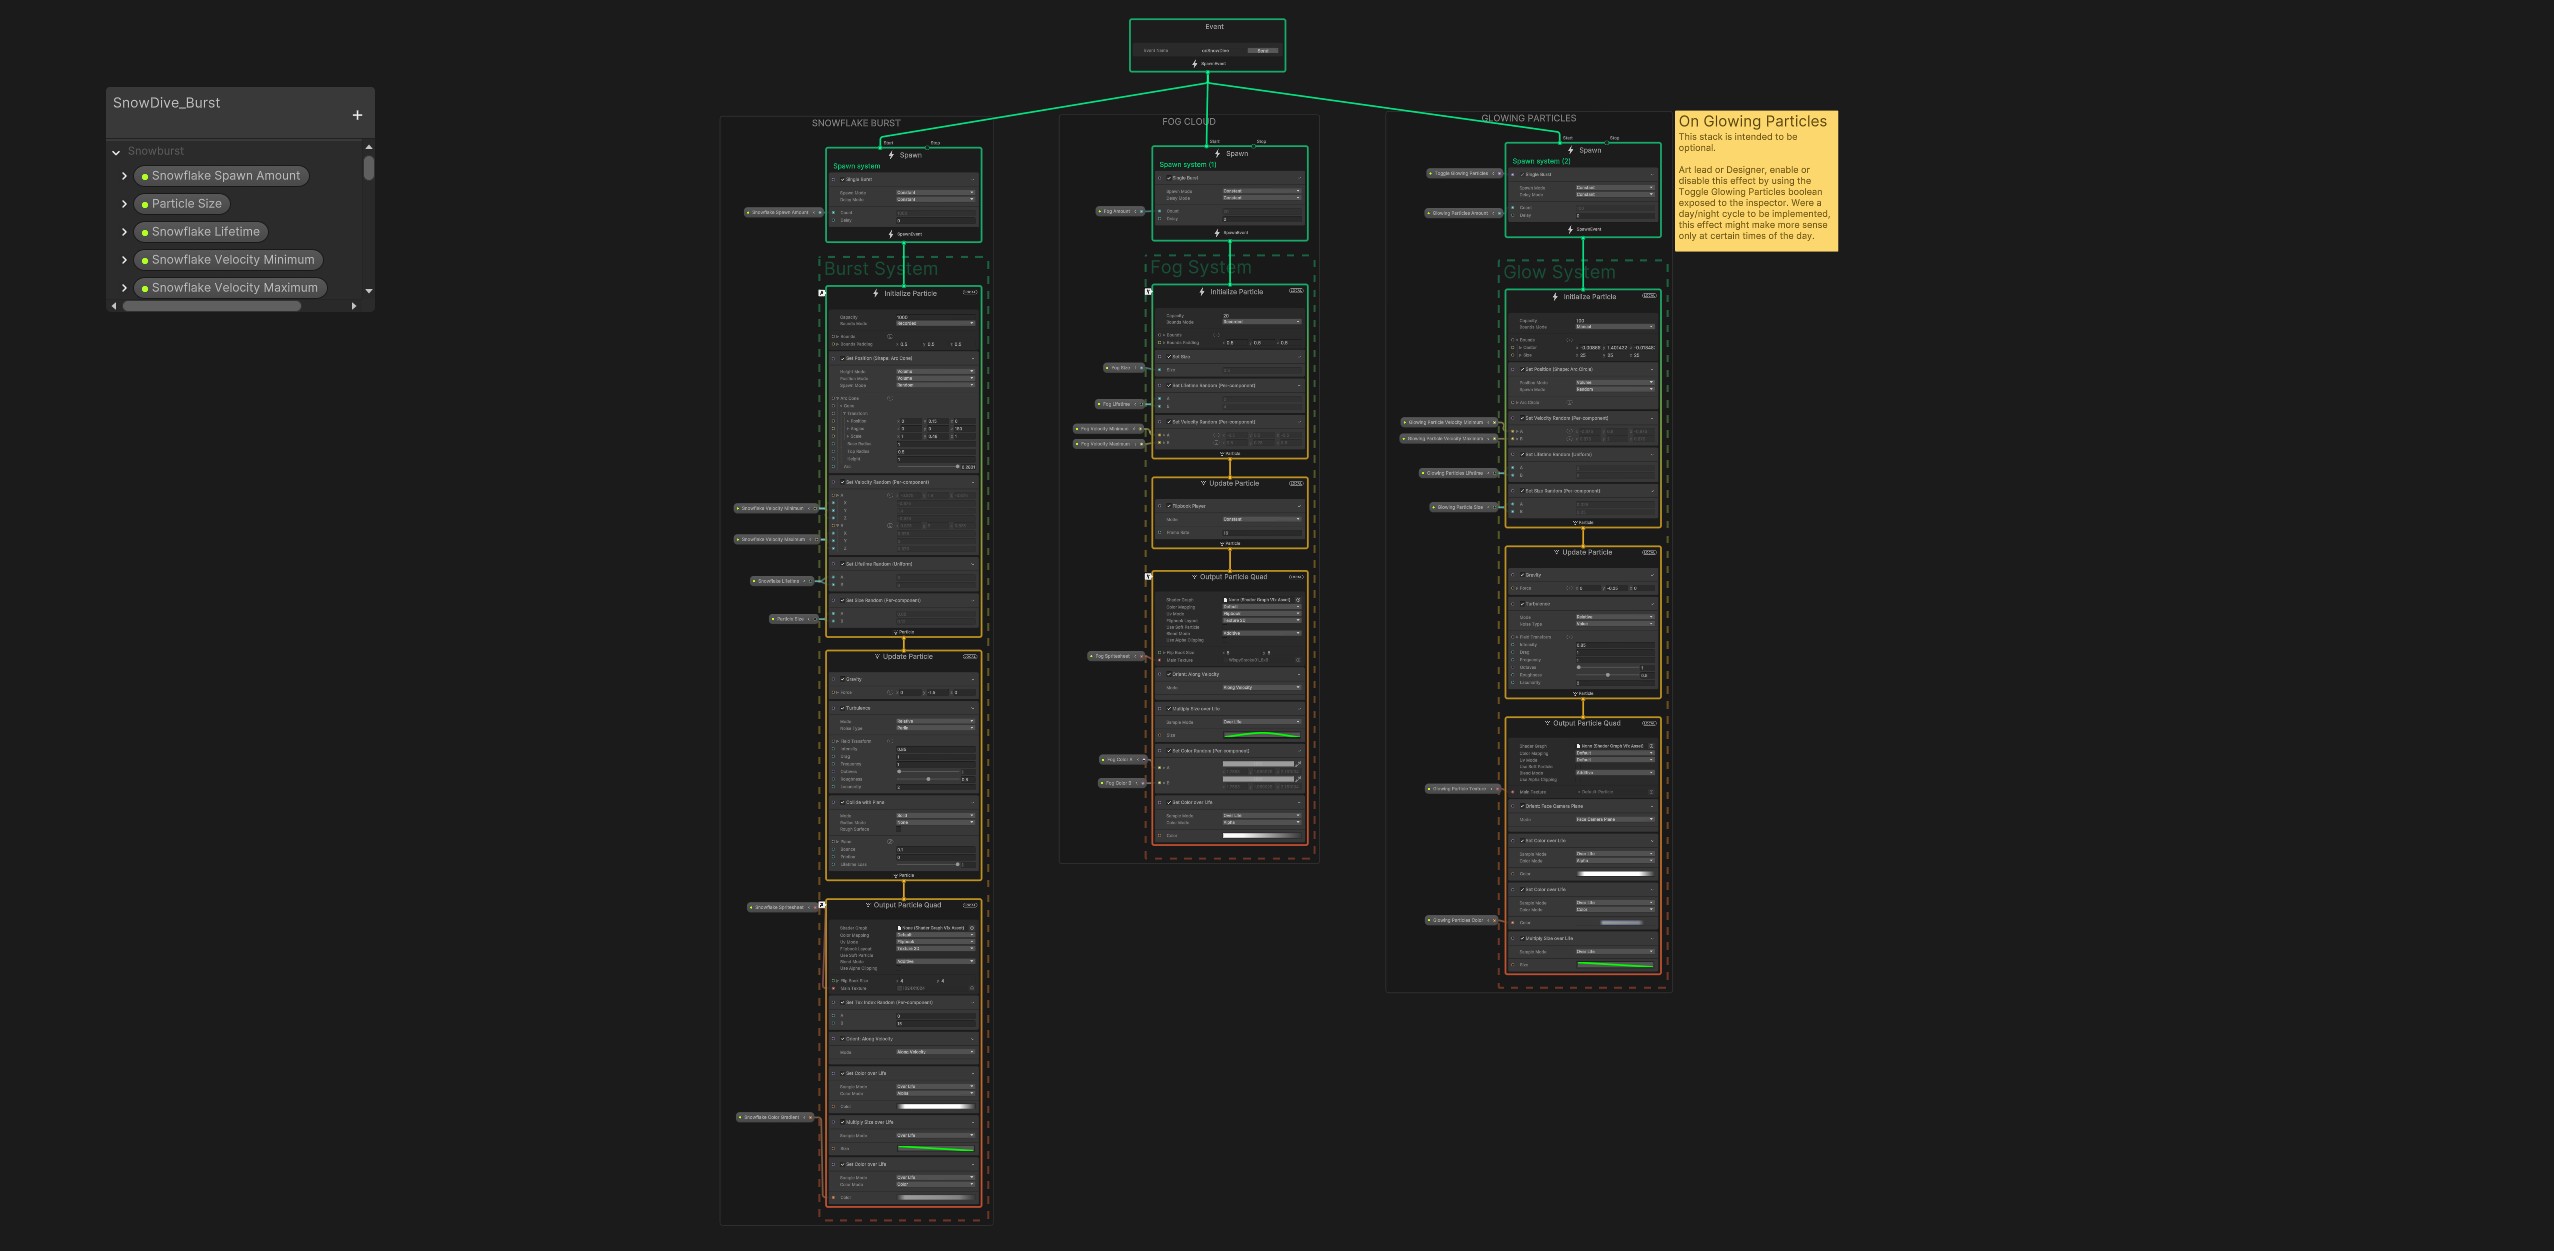
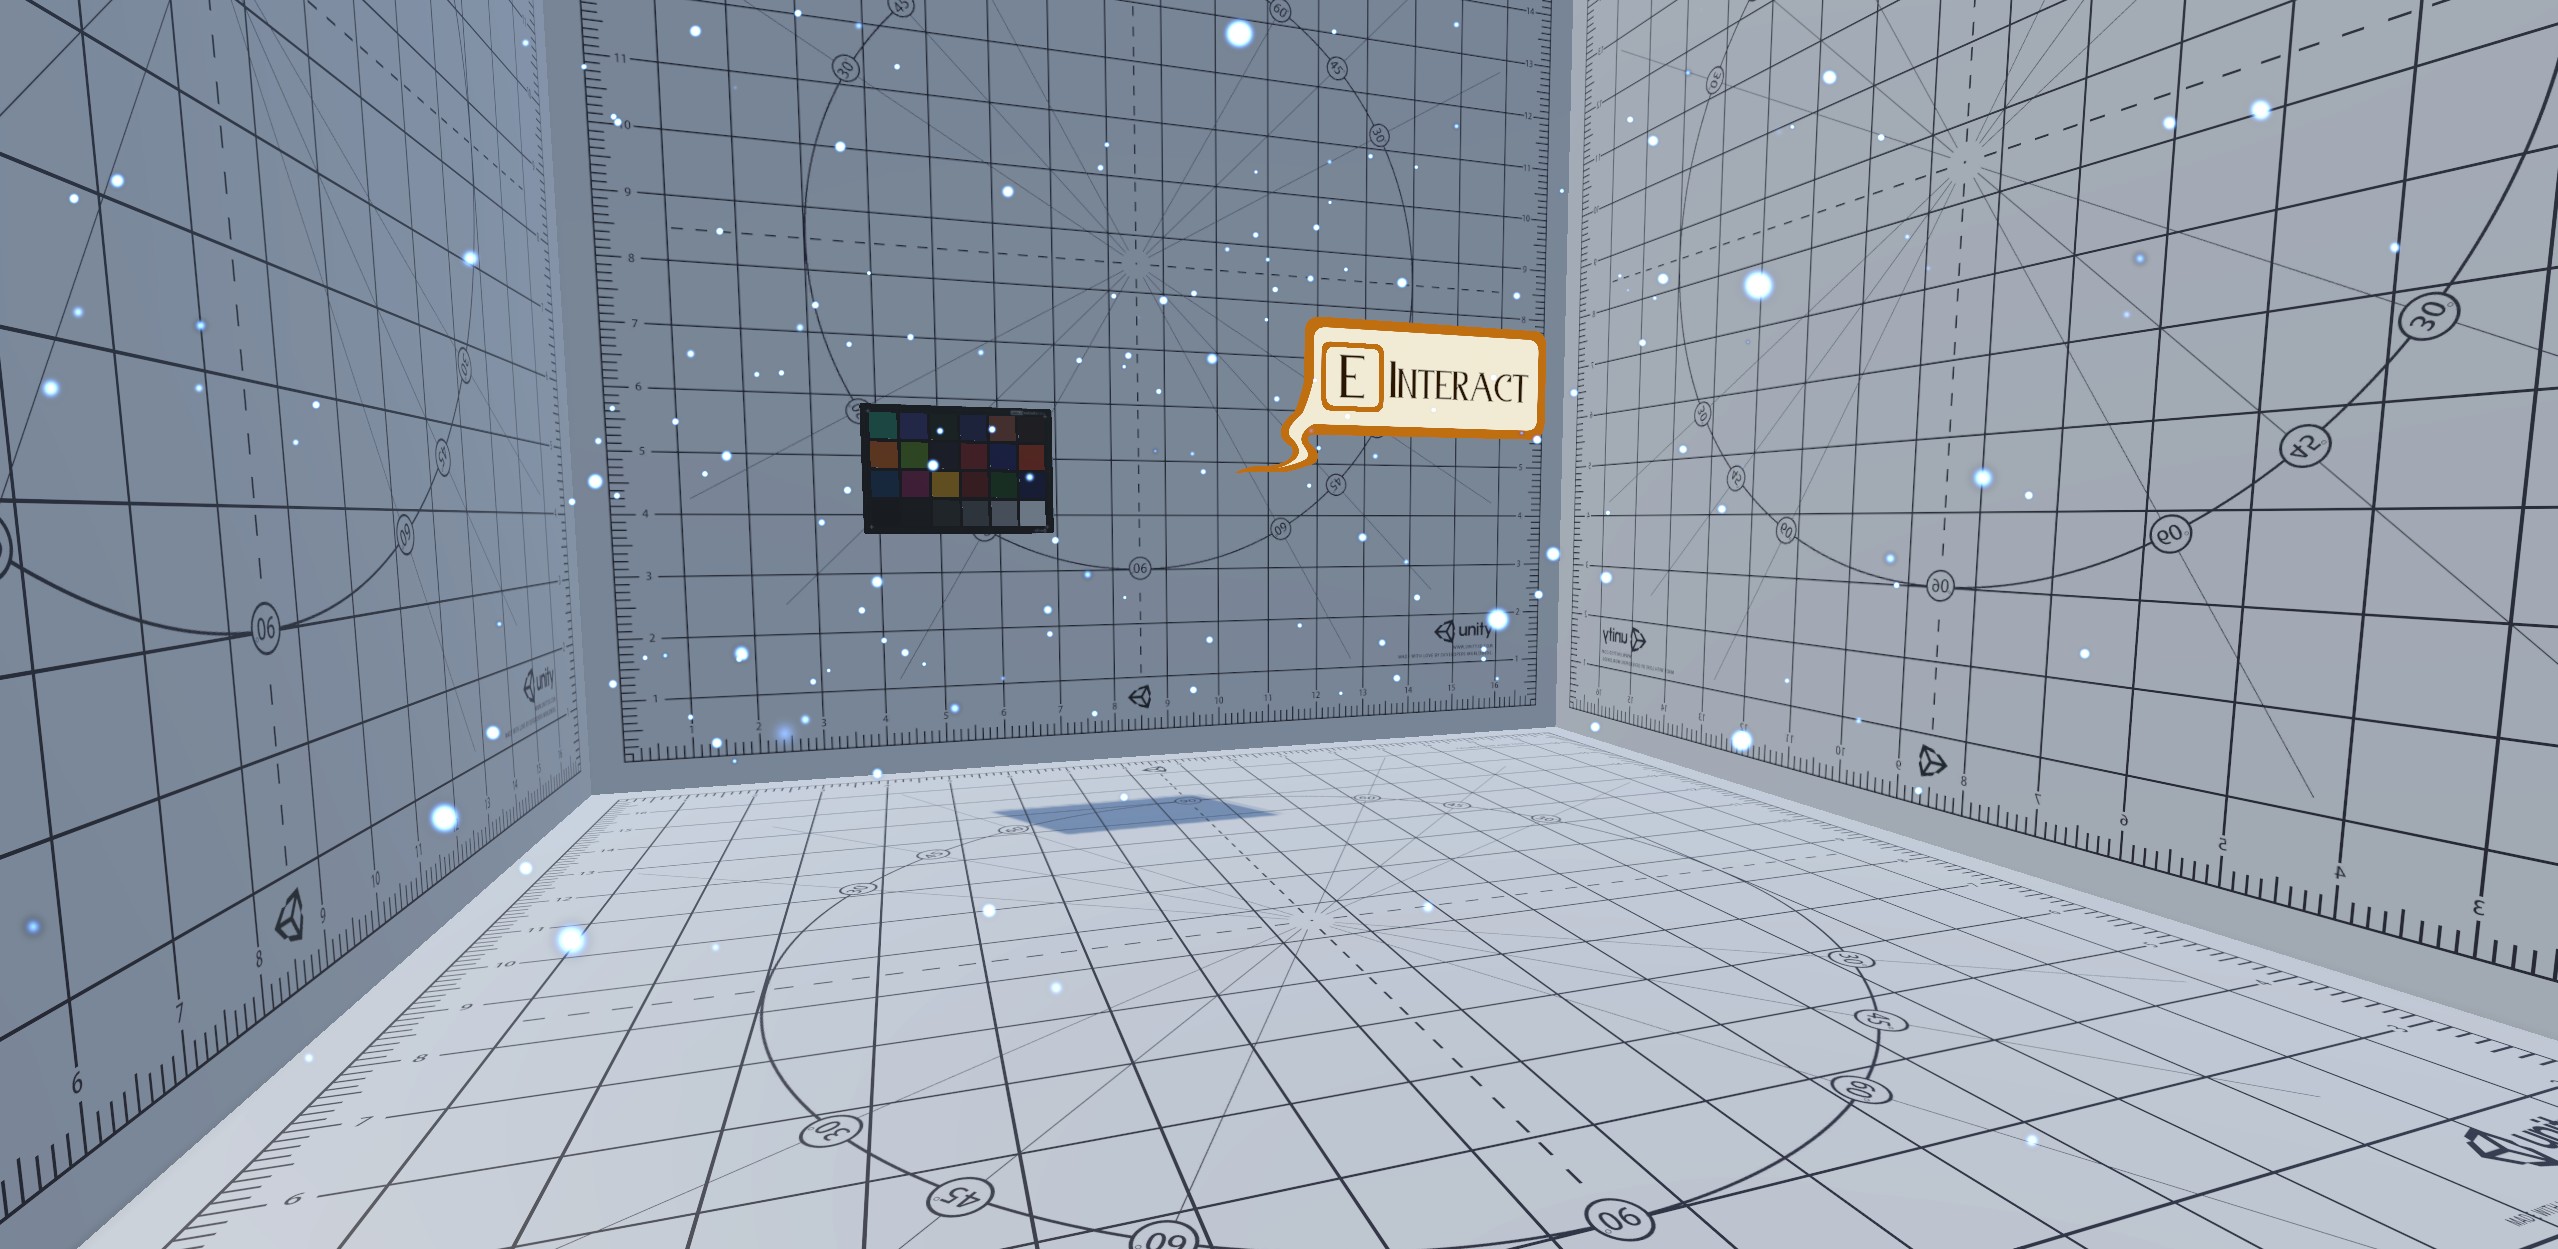
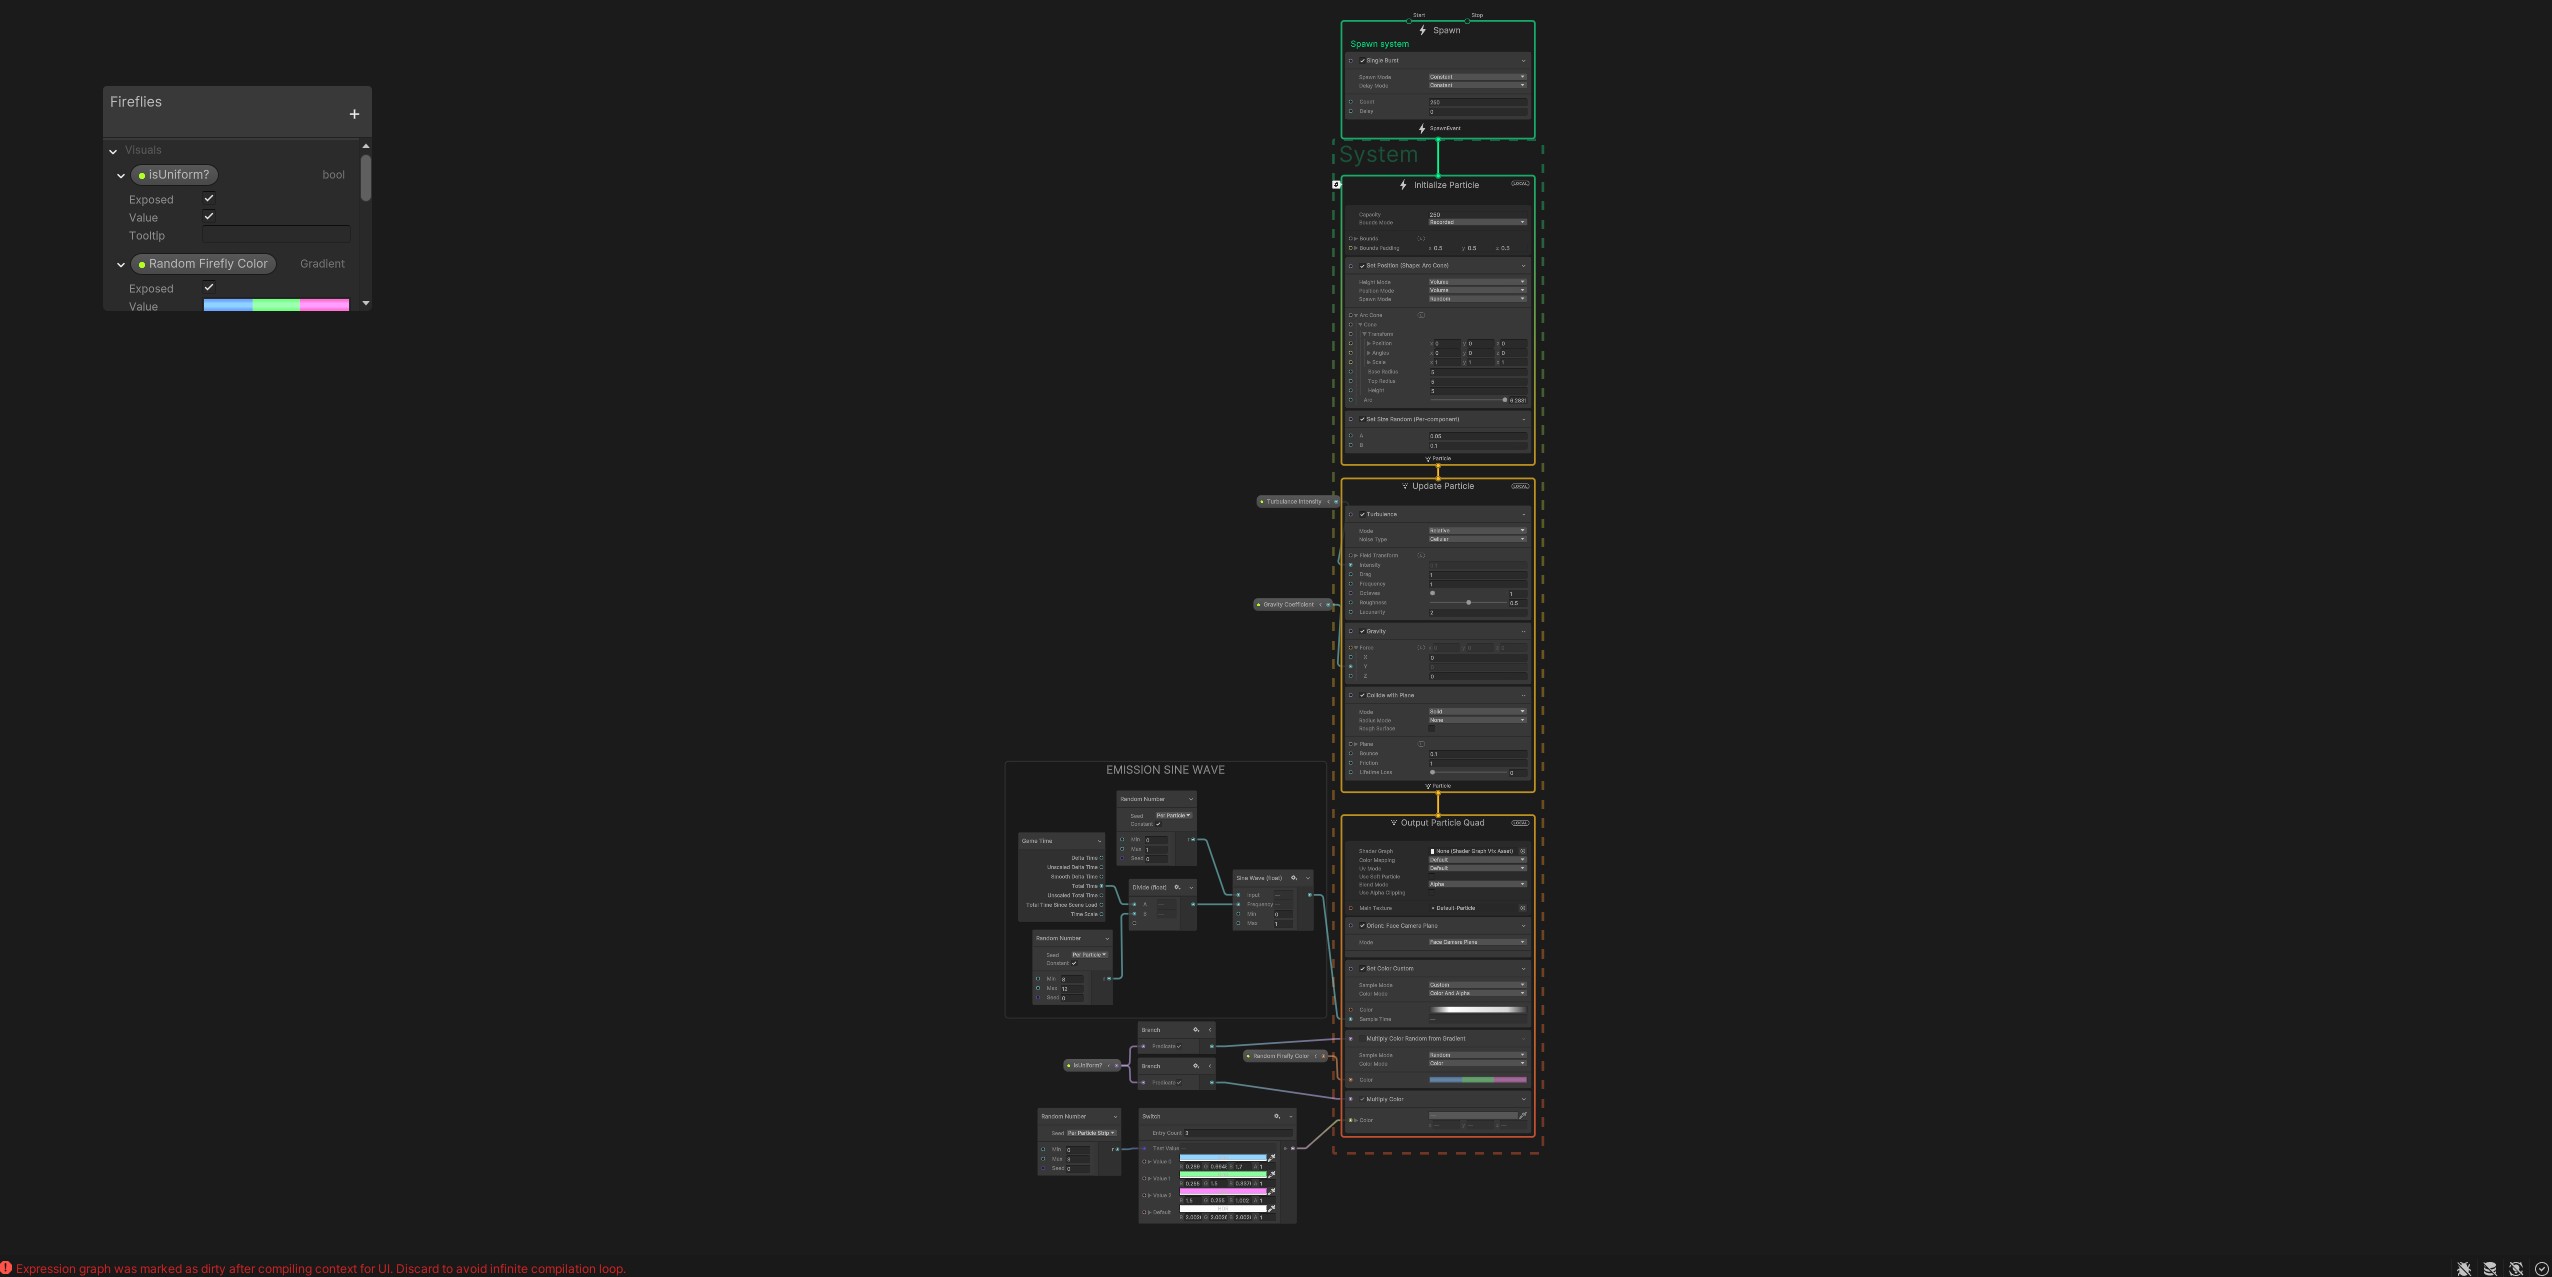
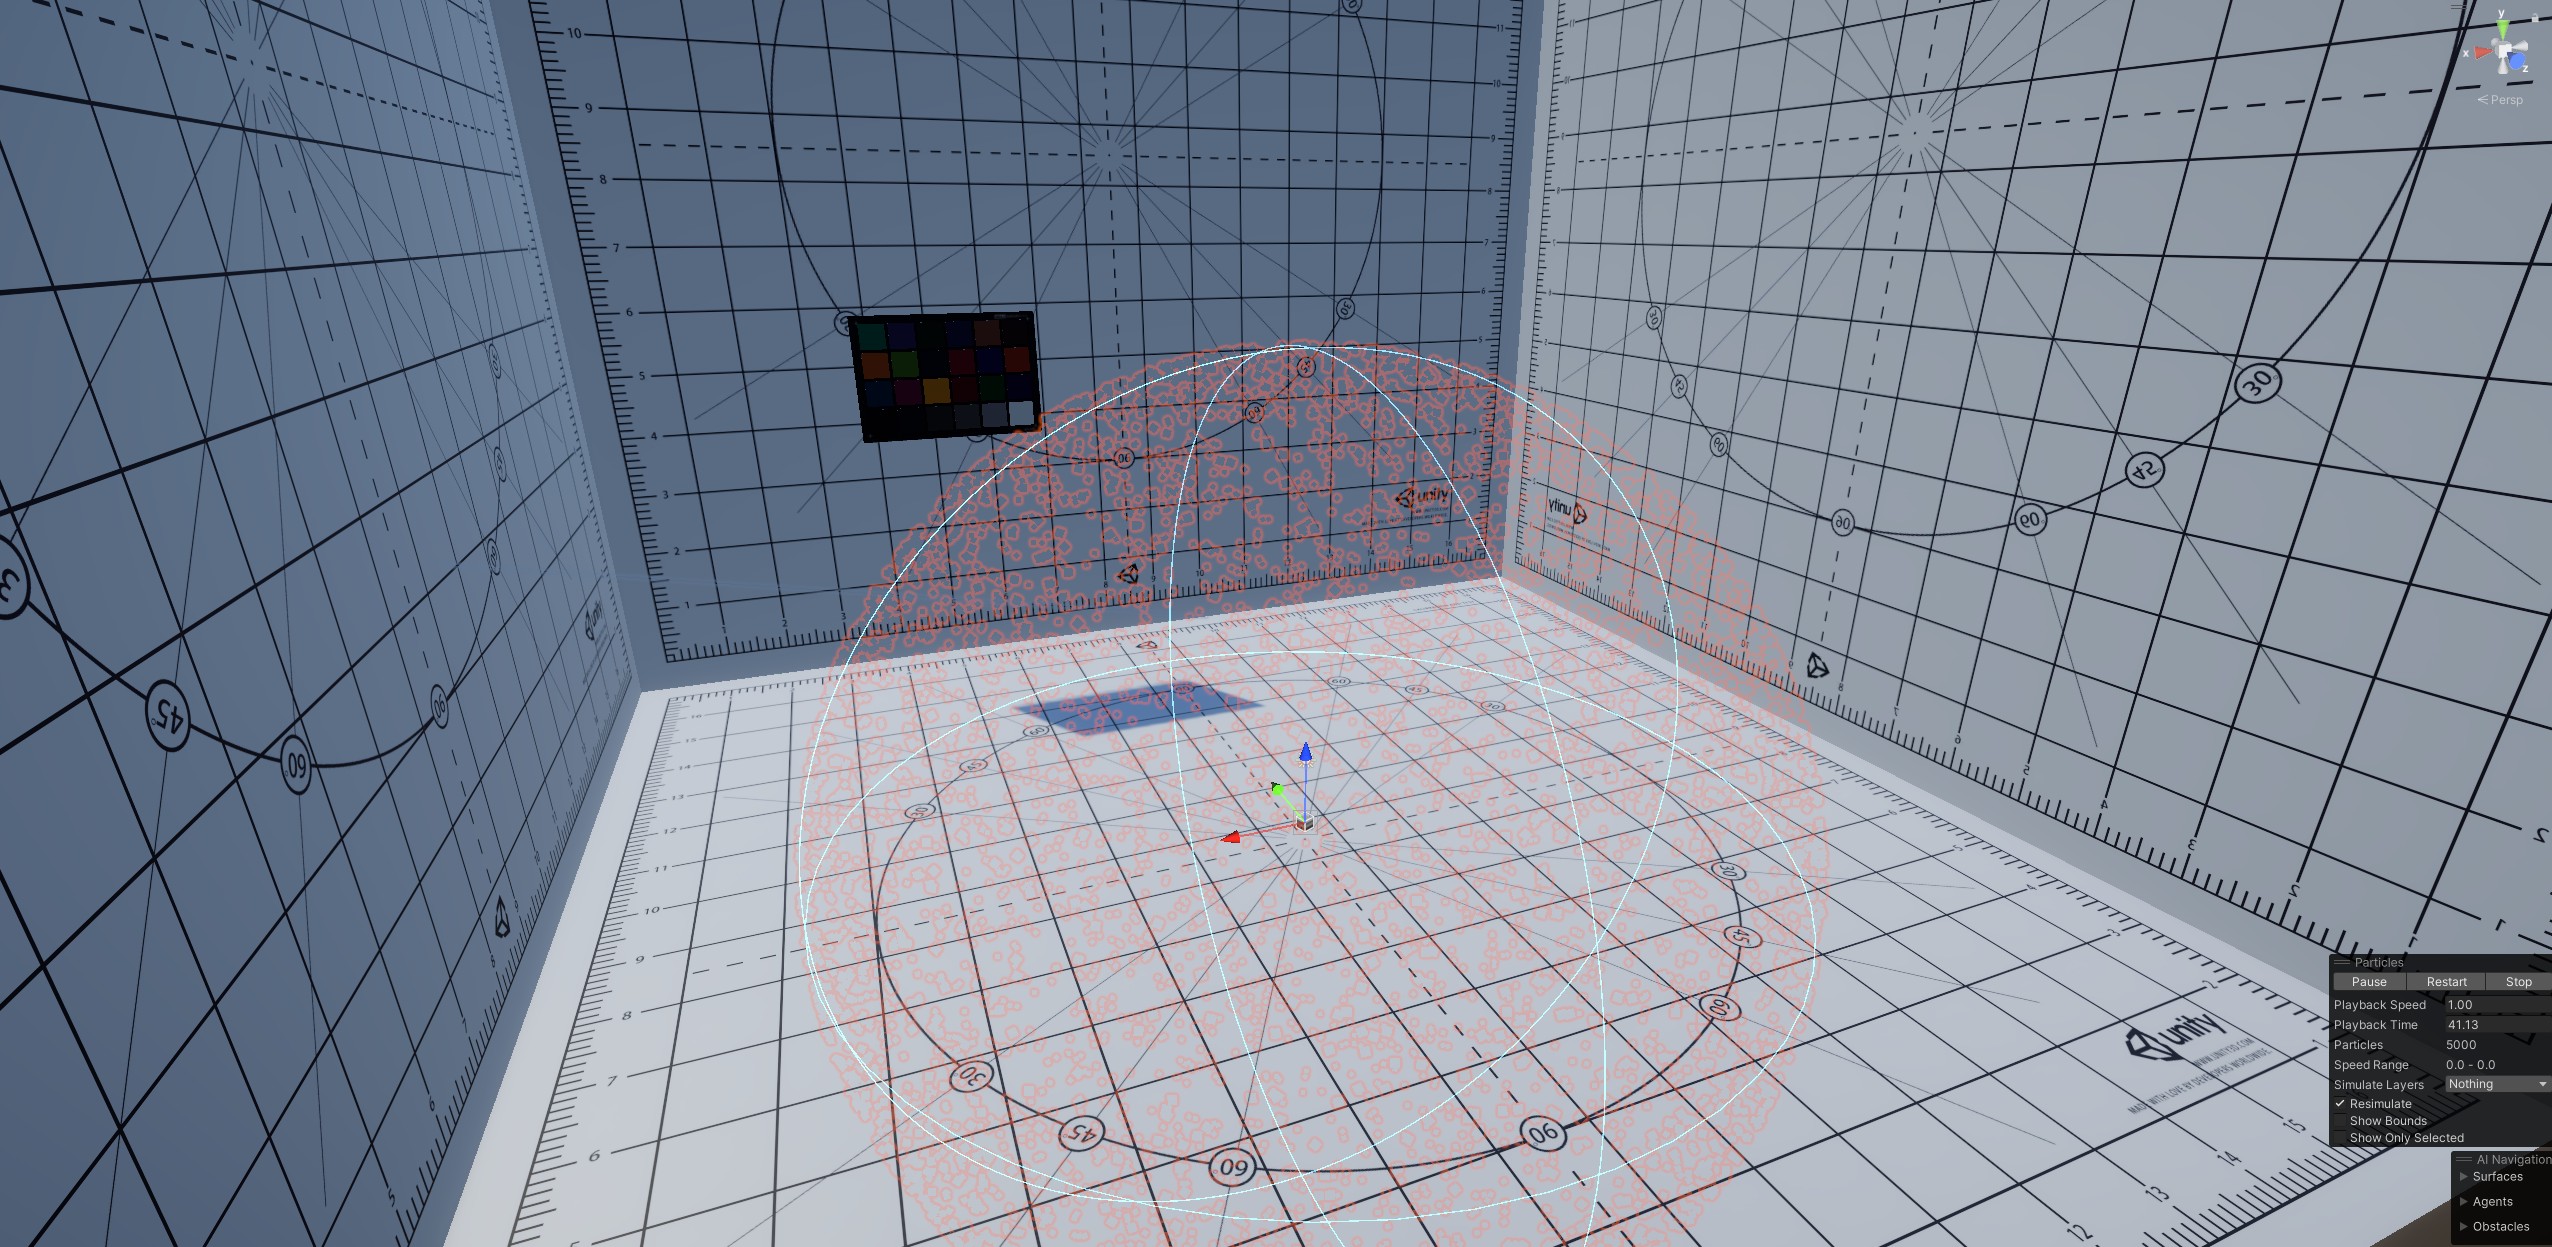
The first effect I made for Harmony in the Wild was a gentle snowfall effect using Visual Effects Graph. This effect was intended to represent ambient snow falling in the arctic section of the map. The graph, and effect, itself is rather simple. There is a single emitter which instantiates particles with slight turbulence and gravity applied, The texture used for the effect is a 4x4 sprite sheet of different snowflake textures, with the spawn logic set to choose a different texture index for each particle instantiated in order to give variety to the visuals of the snowflakes themselves.

Visual Effects Graph was chosen for this as the arctic portion of the map is quite large, and with VFX Graph we were able to cover the large area with a substantial number of spawned particles with minimal performance impact. On review, it would be better to implement a solution similar to how I handled the Starry Sky effect (more on this later), with a small shape placed around the fox and moving along with them to give the idea that the landscape is blanketed by snowfall while in reality only a small bubble around the player character is affected.
The first effect I made for Harmony in the Wild was a gentle snowfall effect using Visual Effects Graph. This effect was intended to represent ambient snow falling in the arctic section of the map. The graph, and effect, itself is rather simple. There is a single emitter which instantiates particles with slight turbulence and gravity applied, The texture used for the effect is a 4x4 sprite sheet of different snowflake textures, with the spawn logic set to choose a different texture index for each particle instantiated in order to give variety to the visuals of the snowflakes themselves.
Lorem ipsum dolor sit amet, consectetur adipiscing elit. Suspendisse varius enim in eros elementum tristique. Duis cursus, mi quis viverra ornare, eros dolor interdum nulla, ut commodo diam libero vitae erat. Aenean faucibus nibh et justo cursus id rutrum lorem imperdiet. Nunc ut sem vitae risus tristique posuere.
using System.Collections.Generic;
using System.Linq; // Required for filtering
using UnityEngine;
public class MultiTerrainParticleSpawner : MonoBehaviour
{
    [Header("Settings")]
    public GameObject container;
    public GameObject particleSystemPrefab;
    public Terrain[] terrains;
    public int targetTreeIndex = 0;
    public float yOffset = 5f;
    [Range(0f, 100f)] public float spawnChancePercentage = 100f;
    private void Awake()
    {
        if (terrains == null || terrains.Length == 0)
        {
            terrains = FindObjectsOfType<Terrain>()
                .Where(t => t.name.StartsWith("MainTerrain_"))
                .ToArray();
            if (terrains.Length == 0)
            {
                Debug.LogError("No terrains found with the specified naming pattern.");
            }
        }
    }
    private void Start()
    {
        if (particleSystemPrefab == null || container == null)
        {
            Debug.LogError("Please assign all references in the Inspector.");
            return;
        }
        SpawnParticlesOnTrees();
    }
    private void SpawnParticlesOnTrees()
    {
        System.Random random = new System.Random();
        foreach (Terrain terrain in terrains)
        {
            if (terrain == null) continue;

            TreeInstance[] treeInstances = terrain.terrainData.treeInstances;
            List<TreeInstance> matchingTrees = new List<TreeInstance>();

            foreach (TreeInstance tree in treeInstances)
            {
                if (tree.prototypeIndex == targetTreeIndex)
                {
                    matchingTrees.Add(tree);
                }
            }
            int totalMatchingTrees = matchingTrees.Count;
            int treesToSpawn = Mathf.RoundToInt((spawnChancePercentage / 100f) * totalMatchingTrees);
            ShuffleList(matchingTrees, random);
            for (int i = 0; i < treesToSpawn; i++)
            {
                TreeInstance selectedTree = matchingTrees[i];
                Vector3 treeWorldPosition = Vector3.Scale(selectedTree.position, terrain.terrainData.size) + terrain.transform.position;
                treeWorldPosition.y += yOffset;
                GameObject particleSystemInstance = Instantiate(particleSystemPrefab, treeWorldPosition, Quaternion.identity);
                particleSystemInstance.transform.SetParent(container.transform);
            }
        }
    }
    private void ShuffleList(List<TreeInstance> list, System.Random random)
    {
        int count = list.Count;
        for (int i = count - 1; i > 0; i--)
        {
            int randomIndex = random.Next(i + 1);
            TreeInstance temp = list[i];
            list[i] = list[randomIndex];
            list[randomIndex] = temp;
        }
    }
}
Lorem ipsum dolor sit amet, consectetur adipiscing elit. Suspendisse varius enim in eros elementum tristique. Duis cursus, mi quis viverra ornare, eros dolor interdum nulla, ut commodo diam libero vitae erat. Aenean faucibus nibh et justo cursus id rutrum lorem imperdiet. Nunc ut sem vitae risus tristique posuere.
Lorem ipsum dolor sit amet, consectetur adipiscing elit. Suspendisse varius enim in eros elementum tristique. Duis cursus, mi quis viverra ornare, eros dolor interdum nulla, ut commodo diam libero vitae erat. Aenean faucibus nibh et justo cursus id rutrum lorem imperdiet. Nunc ut sem vitae risus tristique posuere.
Lorem ipsum dolor sit amet, consectetur adipiscing elit. Suspendisse varius enim in eros elementum tristique. Duis cursus, mi quis viverra ornare, eros dolor interdum nulla, ut commodo diam libero vitae erat. Aenean faucibus nibh et justo cursus id rutrum lorem imperdiet. Nunc ut sem vitae risus tristique posuere.
Lorem ipsum dolor sit amet, consectetur adipiscing elit. Suspendisse varius enim in eros elementum tristique. Duis cursus, mi quis viverra ornare, eros dolor interdum nulla, ut commodo diam libero vitae erat. Aenean faucibus nibh et justo cursus id rutrum lorem imperdiet. Nunc ut sem vitae risus tristique posuere.
Lorem ipsum dolor sit amet, consectetur adipiscing elit. Suspendisse varius enim in eros elementum tristique. Duis cursus, mi quis viverra ornare, eros dolor interdum nulla, ut commodo diam libero vitae erat. Aenean faucibus nibh et justo cursus id rutrum lorem imperdiet. Nunc ut sem vitae risus tristique posuere.
Lorem ipsum dolor sit amet, consectetur adipiscing elit. Suspendisse varius enim in eros elementum tristique. Duis cursus, mi quis viverra ornare, eros dolor interdum nulla, ut commodo diam libero vitae erat. Aenean faucibus nibh et justo cursus id rutrum lorem imperdiet. Nunc ut sem vitae risus tristique posuere.
 HLSLINCLUDE

 // Comment this out if compiler indicates unknown pragma:
 #pragma never_use_dxc
 // --- Includes from URP.
 #include "Packages/com.unity.render-pipelines.universal/Shaders/Particles/ParticlesUnlitInput.hlsl"
 #include "Packages/com.unity.render-pipelines.universal/Shaders/Particles/ParticlesUnlitForwardPass.hlsl"
 #include "Packages/com.unity.render-pipelines.universal/Shaders/Particles/ParticlesDepthOnlyPass.hlsl"
 #include "Packages/com.unity.render-pipelines.universal/Shaders/Particles/ParticlesDepthNormalsPass.hlsl"
 #include "Packages/com.unity.render-pipelines.universal/Shaders/Particles/ParticlesEditorPass.hlsl"

 //---------------------------------------------------------------------
 // OVERRIDE VERTEX FUNCTIONS: push clipPos.z -> near 0 for reversed-Z, near 1 for standard-Z.
 //---------------------------------------------------------------------

 // ------------------------------------------------------------------
 //  Forward pass.
 VaryingsParticle Star_vertParticleUnlit(AttributesParticle input)
 {
     VaryingsParticle o = vertParticleUnlit(input);
     // Reversed-Z: push clipPos.z to near 0.
     o.clipPos.z = o.clipPos.w * 0.0001;
     return o;
 }
 // ------------------------------------------------------------------
 //  Depth Only pass.
 VaryingsDepthOnlyParticle Star_DepthOnlyVertex(AttributesDepthOnlyParticle input)
 {
     VaryingsDepthOnlyParticle o = DepthOnlyVertex(input);
     o.clipPos.z = o.clipPos.w * 0.0001;
     return o;
 }
 // ------------------------------------------------------------------
 //  Depth Normals pass
 VaryingsDepthNormalsParticle Star_DepthNormalsVertex(AttributesDepthNormalsParticle input)
 {
     VaryingsDepthNormalsParticle o = DepthNormalsVertex(input);
     o.clipPos.z = o.clipPos.w * 0.0001;
     return o;
 }
 // -------------------------------------
 // Scene Selection pass
 VaryingsParticle Star_vertParticleEditor(AttributesParticle input)
 {
     VaryingsParticle o = vertParticleEditor(input);
     o.clipPos.z = o.clipPos.w * 0.0001;
     return o;
 }
 // -------------------------------------
 // Scene Picking pass
 VaryingsParticle Star_vertParticleEditorPicking(AttributesParticle input)
 {
     VaryingsParticle o = vertParticleEditor(input);
     o.clipPos.z = o.clipPos.w * 0.0001;
     return o;
 }
 ENDHLSL
Lorem ipsum dolor sit amet, consectetur adipiscing elit. Suspendisse varius enim in eros elementum tristique. Duis cursus, mi quis viverra ornare, eros dolor interdum nulla, ut commodo diam libero vitae erat. Aenean faucibus nibh et justo cursus id rutrum lorem imperdiet. Nunc ut sem vitae risus tristique posuere.
Supplemental Effects
Lorem ipsum dolor sit amet, consectetur adipiscing elit. Suspendisse varius enim in eros elementum tristique. Duis cursus, mi quis viverra ornare, eros dolor interdum nulla, ut commodo diam libero vitae erat. Aenean faucibus nibh et justo cursus id rutrum lorem imperdiet. Nunc ut sem vitae risus tristique posuere.
Lorem ipsum dolor sit amet, consectetur adipiscing elit. Suspendisse varius enim in eros elementum tristique. Duis cursus, mi quis viverra ornare, eros dolor interdum nulla, ut commodo diam libero vitae erat. Aenean faucibus nibh et justo cursus id rutrum lorem imperdiet. Nunc ut sem vitae risus tristique posuere.
Lorem ipsum dolor sit amet, consectetur adipiscing elit. Suspendisse varius enim in eros elementum tristique. Duis cursus, mi quis viverra ornare, eros dolor interdum nulla, ut commodo diam libero vitae erat. Aenean faucibus nibh et justo cursus id rutrum lorem imperdiet. Nunc ut sem vitae risus tristique posuere.
Lorem ipsum dolor sit amet, consectetur adipiscing elit. Suspendisse varius enim in eros elementum tristique. Duis cursus, mi quis viverra ornare, eros dolor interdum nulla, ut commodo diam libero vitae erat. Aenean faucibus nibh et justo cursus id rutrum lorem imperdiet. Nunc ut sem vitae risus tristique posuere.
Lorem ipsum dolor sit amet, consectetur adipiscing elit. Suspendisse varius enim in eros elementum tristique. Duis cursus, mi quis viverra ornare, eros dolor interdum nulla, ut commodo diam libero vitae erat. Aenean faucibus nibh et justo cursus id rutrum lorem imperdiet. Nunc ut sem vitae risus tristique posuere.
Lorem ipsum dolor sit amet, consectetur adipiscing elit. Suspendisse varius enim in eros elementum tristique. Duis cursus, mi quis viverra ornare, eros dolor interdum nulla, ut commodo diam libero vitae erat. Aenean faucibus nibh et justo cursus id rutrum lorem imperdiet. Nunc ut sem vitae risus tristique posuere.

Lorem ipsum dolor sit amet, consectetur adipiscing elit. Suspendisse varius enim in eros elementum tristique. Duis cursus, mi quis viverra ornare, eros dolor interdum nulla, ut commodo diam libero vitae erat. Aenean faucibus nibh et justo cursus id rutrum lorem imperdiet. Nunc ut sem vitae risus tristique posuere.
Lorem ipsum dolor sit amet, consectetur adipiscing elit. Suspendisse varius enim in eros elementum tristique. Duis cursus, mi quis viverra ornare, eros dolor interdum nulla, ut commodo diam libero vitae erat. Aenean faucibus nibh et justo cursus id rutrum lorem imperdiet. Nunc ut sem vitae risus tristique posuere.

Lorem ipsum dolor sit amet, consectetur adipiscing elit. Suspendisse varius enim in eros elementum tristique. Duis cursus, mi quis viverra ornare, eros dolor interdum nulla, ut commodo diam libero vitae erat. Aenean faucibus nibh et justo cursus id rutrum lorem imperdiet. Nunc ut sem vitae risus tristique posuere.